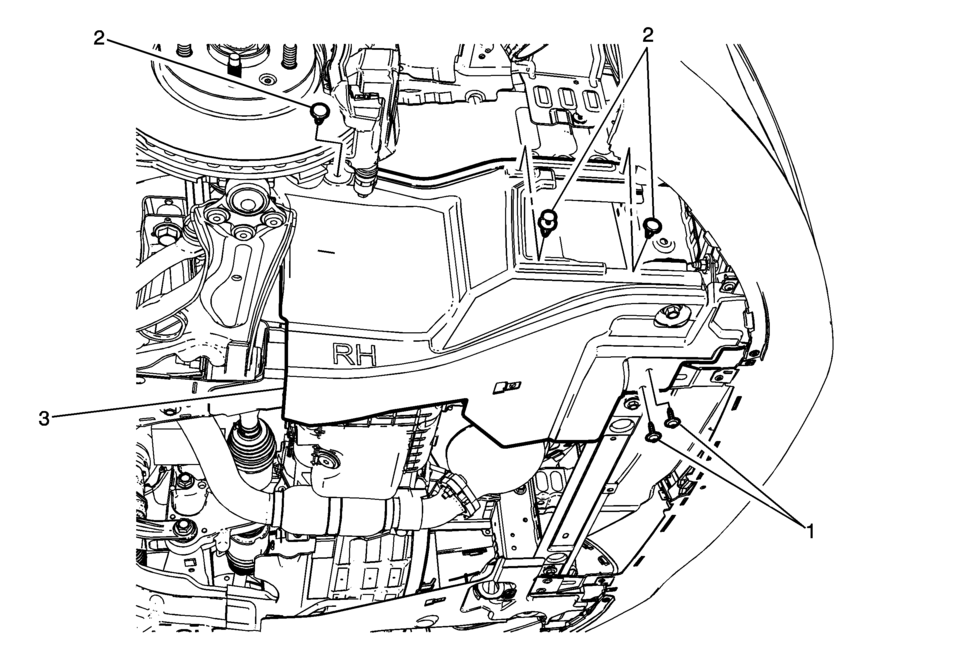
Chevrolet Sonic Repair Manual: Front Wheelhouse Liner Inner Front Extension Replacement (Right SIde, LWE, LUW)

|
Callout |
Component Name |
|---|---|
Preliminary Procedure
|
|
|
1 |
Front Wheelhouse Liner Inner Front Extension Screw (Qty:?€‰2) Caution: Refer to Fastener Caution.
3?€‰Y (27?€‰lb?€‰in) |
|
2 |
Front Wheelhouse Liner Inner Front Extension Push-In Retainer (Qty:?€‰3) |
|
3 |
Front Wheelhouse Liner Inner Front Extension |
 Front Wheelhouse Liner Inner Front Extension Replacement (Left SIde)
Front Wheelhouse Liner Inner Front Extension Replacement
Callout
Component Name
Preliminary Procedure
Remove the tire and wheel ...
 Front Wheelhouse Liner Inner Front Extension Replacement (Right Side, LUV)
Front Wheelhouse Liner Inner Front Extension Replacement
Callout
Component Name
Preliminary Procedure
Remove the tire and wheel ass ...
Other materials:
Rear Brake Hose Replacement (Body to Axle - Disc Brake)
Removal Procedure
Warning: Refer to Brake Dust Warning.
Warning: Refer to Brake Fluid Irritant Warning.
Raise and support the vehicle. Refer to Lifting and Jacking the Vehicle.
Remove the tire and wheel assembly. Refer to Tire and Wheel Removal
and Install ...
Engine Coolant Temperature Sensor Replacement (Radiator)
Engine Coolant Temperature Sensor Replacement - Radiator
Callout
Component Name
Preliminary Procedures
Drain the cooling system. Refer to Cooling System
Draining and Filling.
1
Retaining ...
Automatic Transmission Shift Lock Control Function Check
Warning: When you are doing this inspection, the vehicle could move
suddenly. If the vehicle moves, you or others could be injured.
Before starting this check, be sure there is enough room
around the vehicle. It should be parked on a level surface.
Apply the parking brake. Be read ...
0.0064
