Chevrolet Sonic Repair Manual: Fuel Injection Fuel Rail Assembly Replacement
- Removal Procedure
-
- Disconnect battery negative cable. Refer to Battery Negative Cable Disconnection and Connection.
- Remove engine cover. Refer to Engine Cover Replacement.
- Remove the fuel feed pipe from fuel injection fuel rail. Refer to Fuel Feed Pipe Replacement.
- Remove the positive crankcase ventilation pipe from the intake manifold. Refer to Positive Crankcase Ventilation Pipe Removal.
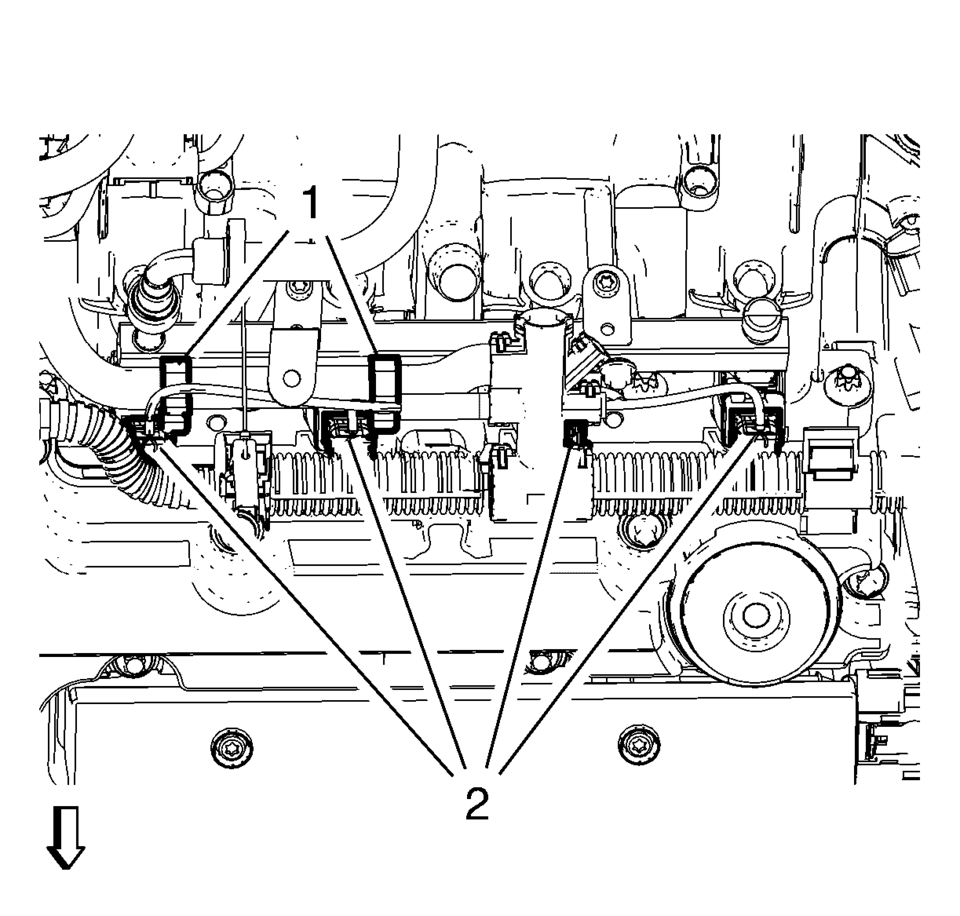
- Disconnect the 4 fuel injector wiring harness plugs (2).
- Unclip the ECM wiring harness from retainer clips (1) and the camshaft cover.
- Remove the ground cable nut (2) and the ground cable.
- Remove the 2 fuel injection fuel rail bolts (1).
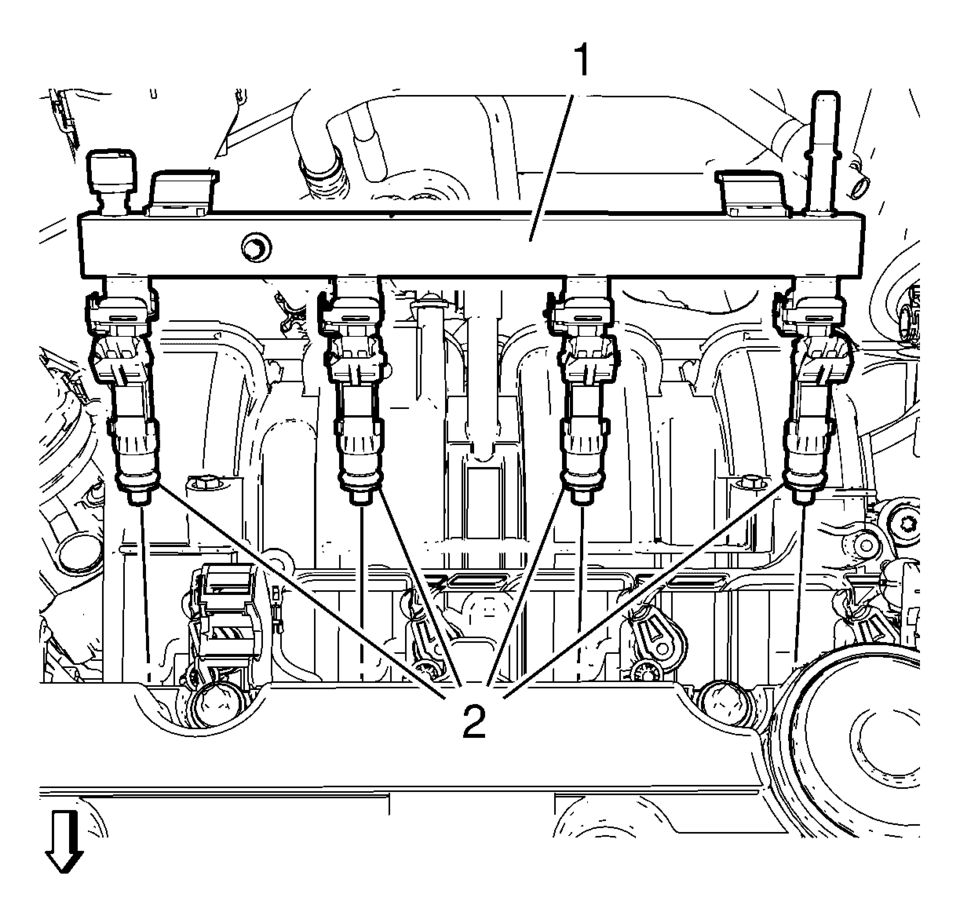
- Remove the fuel injection fuel rail assembly (1) and the 4 fuel injector seal rings (2).
............., hi

- Installation Procedure
-
- Install the fuel injection fuel rail assembly (1) to the intake manifold. Use NEW fuel injector seal rings (2).
- Install the 2 fuel injection fuel rail bolts (1) and tighten to
7 Y (62 lb in)
.
- Install the ground cable and the ground cable nut (2) and tighten.
- Connect the 4 fuel injector wiring harness plugs (2).
- Clip the ECM wiring harness to the retainer clip (1) and the camshaft cover.
- Remove the positive crankcase ventilation pipe from the intake manifold. Refer to Positive Crankcase Ventilation Pipe Removal.
- Install the fuel feed pipe to the fuel injection fuel rail. Refer to Fuel Feed Pipe Replacement.
- Install the engine sight shield. Refer to Engine Cover Replacement.
- Connect battery negative cable. Refer to Battery Negative Cable Disconnection and Connection.
Note:
Lubricate the 4 fuel injector seal rings (2) with clean engine oil.
Caution:
Refer to Fastener Caution.
............., hi
 Fuel Tank Fuel Pump Module Replacement (Steel Tank)
Special Tools
EN-48279 Fuel Sender Lock Ring Wrench
For equivalent regional tools, refer to Special Tools.
Removal Procedure
Relieve the fuel system pressure. Refer to Fuel Pressure ...
 Fuel Tank Draining
Warning: Refer to Gasoline/Gasoline Vapors Warning.
Note: The fuel tank must be drained with a suitable, commercially-available
fuel removal unit and suction hose - follow safety ...
Other materials:
Parking Brake Cable Replacement (Disc Brake)
Removal Procedure
Remove the front floor console. Refer to Front Floor Console Replacement.
Ensure that the parking brake lever is in the fully released position.
Using ONLY HAND TOOLS, remove the adjusting nut (1) from the end of
the front park brake c ...
Intake Manifold Replacement (LUW)
Removal Procedure
Disconnect the negative battery cable. Refer to Battery Negative Cable
Disconnection and Connection.
Remove the throttle body assembly. Refer to Throttle Body Assembly Replacement.
Disconnect wiring harness plug.
Disconnect the pipes from ...
Sun visors
To reduce glare from the front, pull down the main Nissan Armada sun visor
1.
To block sunlight from the side, detach the sun visor from the center mount
and rotate it sideways 2.
Extend or retract the Nissan Armada sun visor extension 3 as needed for
additional coverage.
CAUT ...

0.0064