Chevrolet Sonic Repair Manual: Fuel Tank Fuel Pump Module Replacement (Steel Tank)
Special Tools
EN-48279 Fuel Sender Lock Ring Wrench
For equivalent regional tools, refer to Special Tools.
- Removal Procedure
-
- Relieve the fuel system pressure. Refer to Fuel Pressure Relief.
- Remove the fuel tank. Refer to Fuel Tank Replacement.
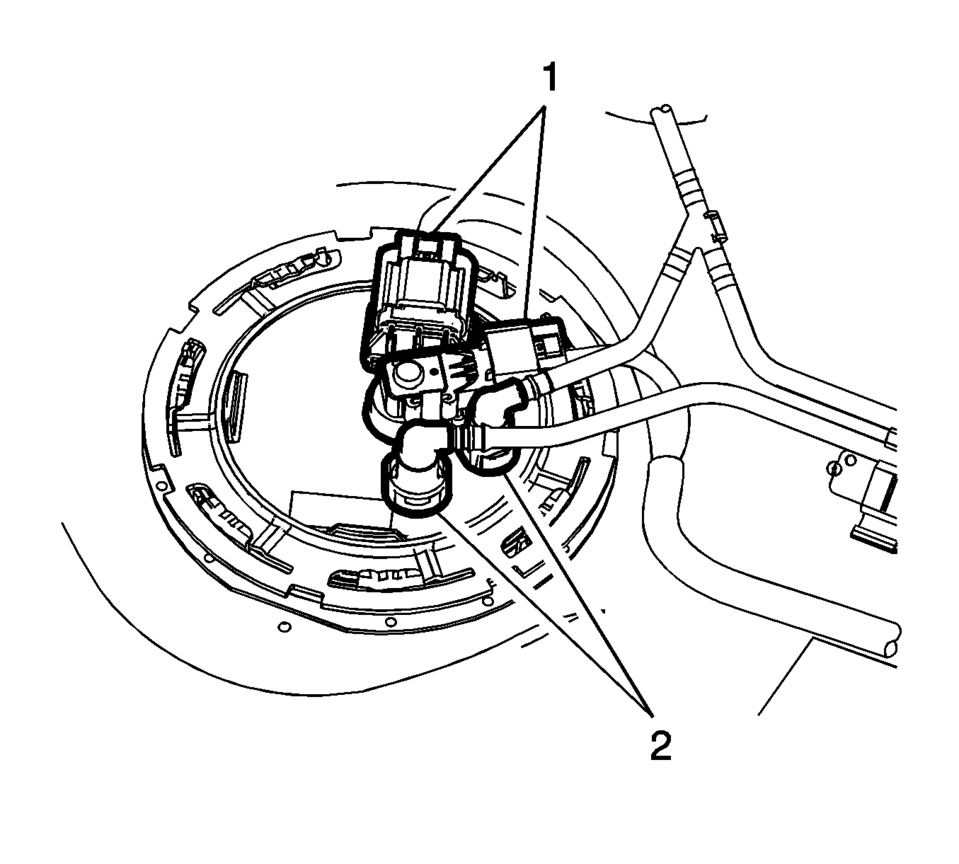
- Disconnect the electrical connectors (1).
- Disconnect the evaporative emission and fuel lines (2). Refer to Plastic Collar Quick Connect Fitting Service.
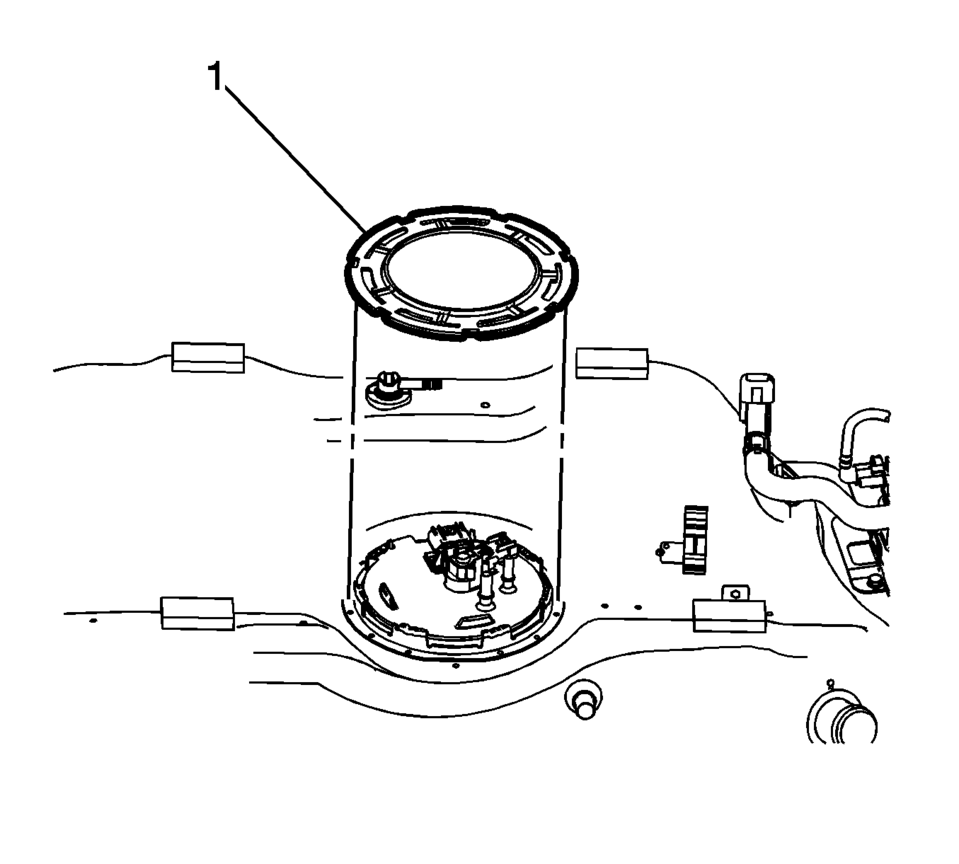
- Using the EN-48279 fuel sender lock ring wrench , remove the lock ring (1) by turning counter-clockwise.
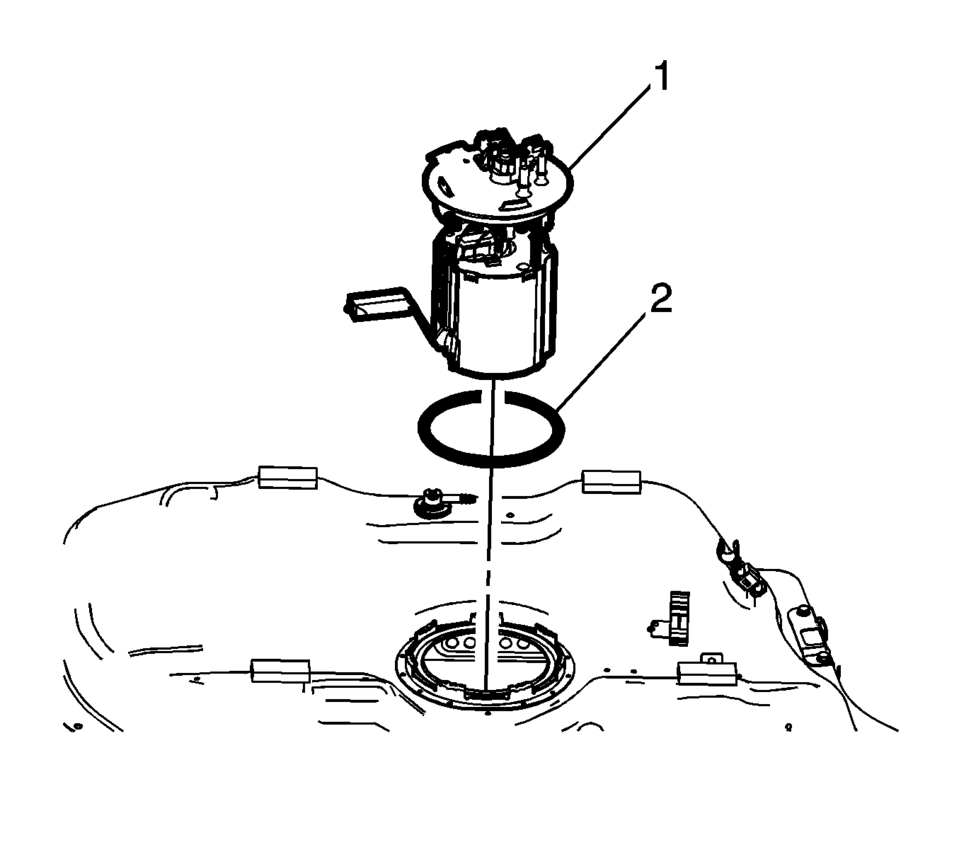
- Remove the fuel pump module (1) and O-ring (2). Discard the seal.
- Installation Procedure
-
- Install a NEW O-ring (2) and the fuel pump module (1).
- Using the EN 48279 wrench, install the lock ring (1) by turning clockwise.
- Connect the electrical connectors (1).
- Connect the evaporative emission and fuel lines (2). Refer to Plastic Collar Quick Connect Fitting Service.
- Install the fuel tank. Refer to Fuel Tank Replacement.
 Fuel Tank Fuel Pump Module Replacement
Special Tools
EN-48279 Fuel Sender Lock Ring Tool
For equivalent regional tools, refer Special Tools.
Removal Procedure
Relieve the fuel system pressure. Refer to Fuel Press ...
 Fuel Injection Fuel Rail Assembly Replacement
Removal Procedure
Disconnect battery negative cable. Refer to Battery Negative Cable Disconnection
and Connection.
Remove engine cover. Refer to Engine Cover Replacement.
Remo ...
Other materials:
Automatic Transmission
P (Park): This position locks the front wheels. It is the best position to use
when you start the engine because the vehicle cannot move easily.
Warning
It is dangerous to get out of the vehicle if the shift lever is not fully
in P (Park) with the parking brake firmly set. The vehicle can ro ...
When to Add Engine Oil
1.8L Shown, 1.4L Similar
If the oil is below the minimum mark on the dipstick, add 1 L (1 qt) of the recommended
oil and then recheck the level. See “Selecting the Right Engine Oil” in this section
for an explanation of what kind of oil to use. For engine oil crankcase capacity,
see Cap ...
OnStar Additional Information
Transferring Service
Press to request account transfer
eligibility information. The Advisor can assist in canceling or removing account
information. If OnStar receives information that vehicle ownership has changed,
OnStar may send a voice message to the vehicle, requesting updated account i ...

0.0043