Chevrolet Sonic Repair Manual: Fuel Tank Replacement
- Removal Procedure
-
- Disconnect the battery negative cable. Refer to Battery Negative Cable Disconnection and Connection.
- Relieve the fuel pressure. Refer to Fuel Pressure Relief.
- Drain the fuel Tank. Refer to Fuel Tank Draining.
- Lift and support the vehicle. Refer to Lifting and Jacking the Vehicle.
- Remove the harness cover fastener (1) and harness cover (2).
- Disconnect the fuel pump harness electrical connector (3).
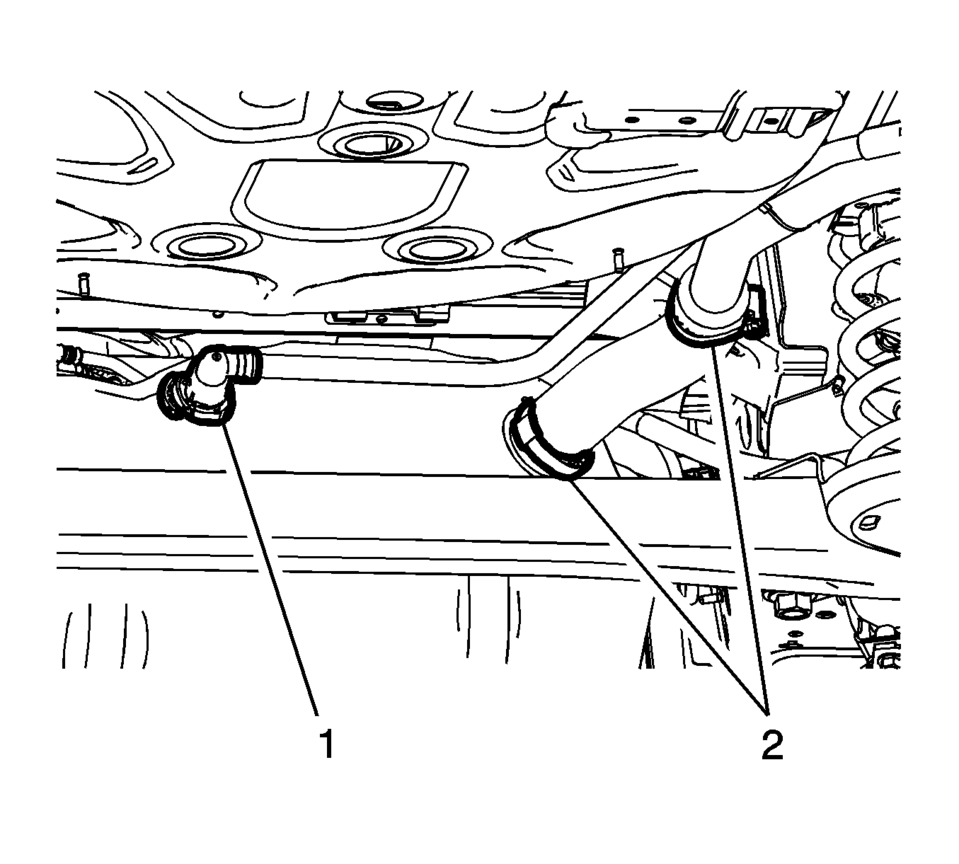
- Disconnect the vent hose (1)
- Loosen the hose clamps (2) and slide the filler hose off the fuel tank.
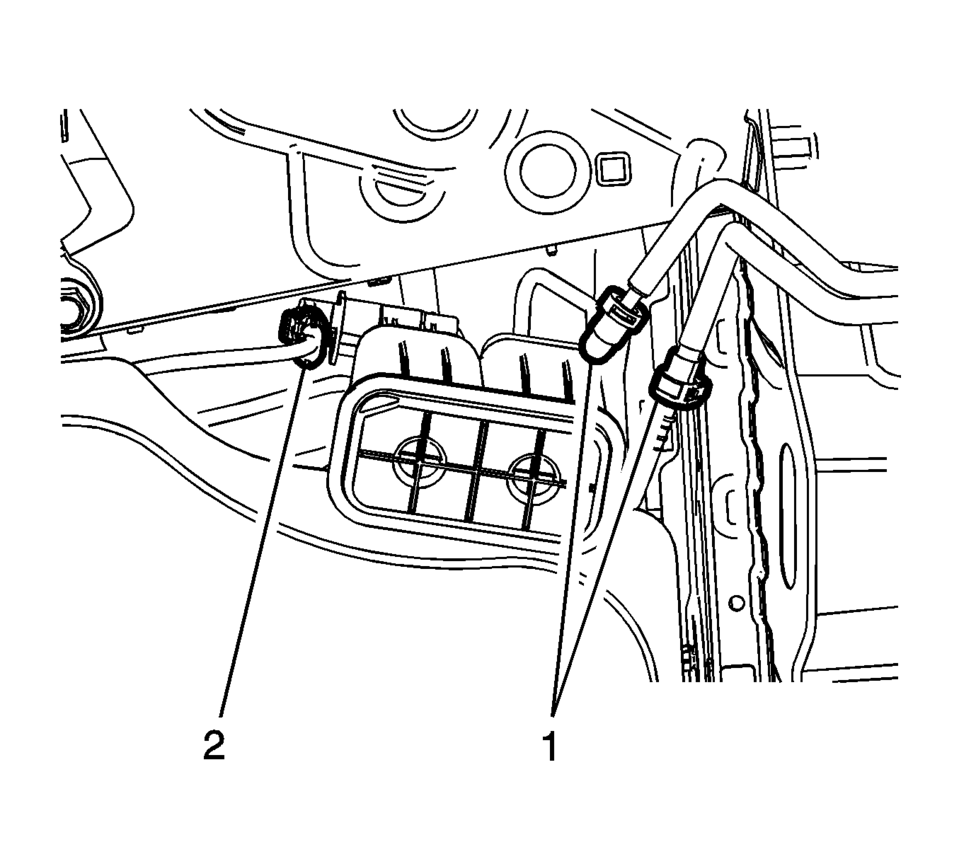
- Disconnect the fuel and evaporative emission connectors (1). Refer to Plastic Collar Quick Connect Fitting Service.
- Support the fuel tank with a suitable stand.
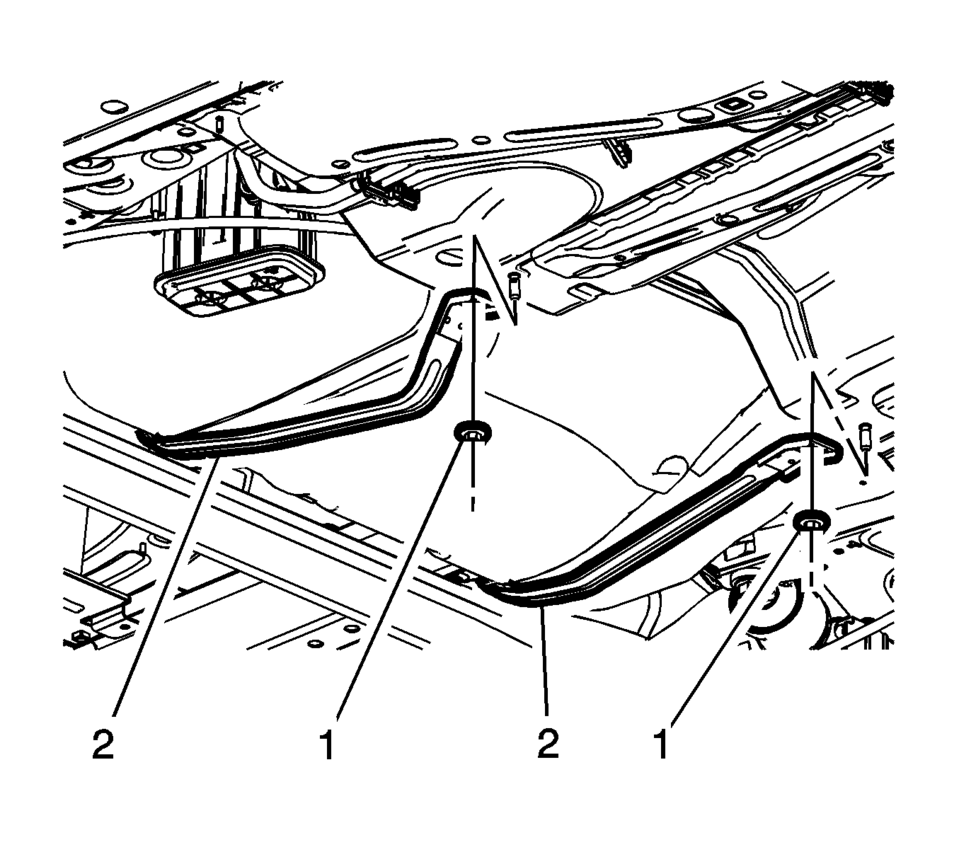
- Remove the fuel tank strap fasteners (1).
- Reposition the fuel tank straps (2) toward the back of the vehicle.
- Lower the fuel tank (1).


- Installation Procedure
-
- If replacing the tank, remove the fuel pump module and the evaporative emission canister. Refer to Fuel Tank Fuel Pump Module Replacement and Evaporative Emission Canister Replacement.
- Transfer parts as necessary.
- Raise the fuel tank (1).
- Support the fuel tank with a suitable stand.
- Position the fuel tank straps (2) onto the fuel tank.
- Install the fuel tank strap fasteners (1) and tighten to 22 Y(16 lb ft)
.
- Connect the fuel and evaporative emission connectors (1). Refer to Plastic Collar Quick Connect Fitting Service.
- Connect the vent hose (1) .
- Tighten the hose clamps (2) to 4.5 Y(40 lb in).
and slide the filler hose off the fuel tank.
- Connect the fuel pump harness electrical connector (3).
- Install the harness cover (2) and tighten the cover fasteners (1).
- Connect the battery negative cable. Refer to Battery Negative Cable Disconnection and Connection.
Caution:
Refer to Fastener Caution.
 Fuel Tank Heat Shield Replacement
Removal Procedure
Support the fuel tank with a suitable jack.
Remove the fuel tank strap fasteners (1) and lower the fuel tank straps (2).
Remove the ...
 Ignition System
...
Other materials:
Vehicle Alarm System
This vehicle has an anti-theft alarm system.
The indicator light on the instrument panel near the windshield indicates the
status of the system.
Off: Vehicle is disarmed.
On Solid: Vehicle is secured during the delay to arm the system.
Fast Flash: Vehicle is unsecured. A door, the hood, or t ...
Sunroof Window Height and Opening Fit Adjustment
Note: Correct adjustment cannot be achieved if the sunroof window
is closed from vent position.
Cycle the sunroof window from full open to closed position.
.,
Note: Do Not remove or lower headliner to access sunroof window
screws.
Loosen the adjusting screws on ...
Air Conditioning System Seal Replacement
Removal Procedure
Disassemble the A/C refrigerant components. Refer to the appropriate
repair procedure.
Note: Cap or tape the open A/C refrigerant components immediately
to prevent system contamination.
Cap or tape the A/C refrigerant components.
...

0.0064