Chevrolet Sonic Repair Manual: Fuel Tank Replacement
- Removal Procedure
-
- Disconnect the battery negative cable. Refer to Battery Negative Cable Disconnection and Connection.
- Relieve the fuel pressure. Refer to Fuel Pressure Relief.
- Drain the fuel Tank. Refer to Fuel Tank Draining.
- Lift and support the vehicle. Refer to Lifting and Jacking the Vehicle.
- Remove the harness cover fastener (1) and harness cover (2).
- Disconnect the fuel pump harness electrical connector (3).
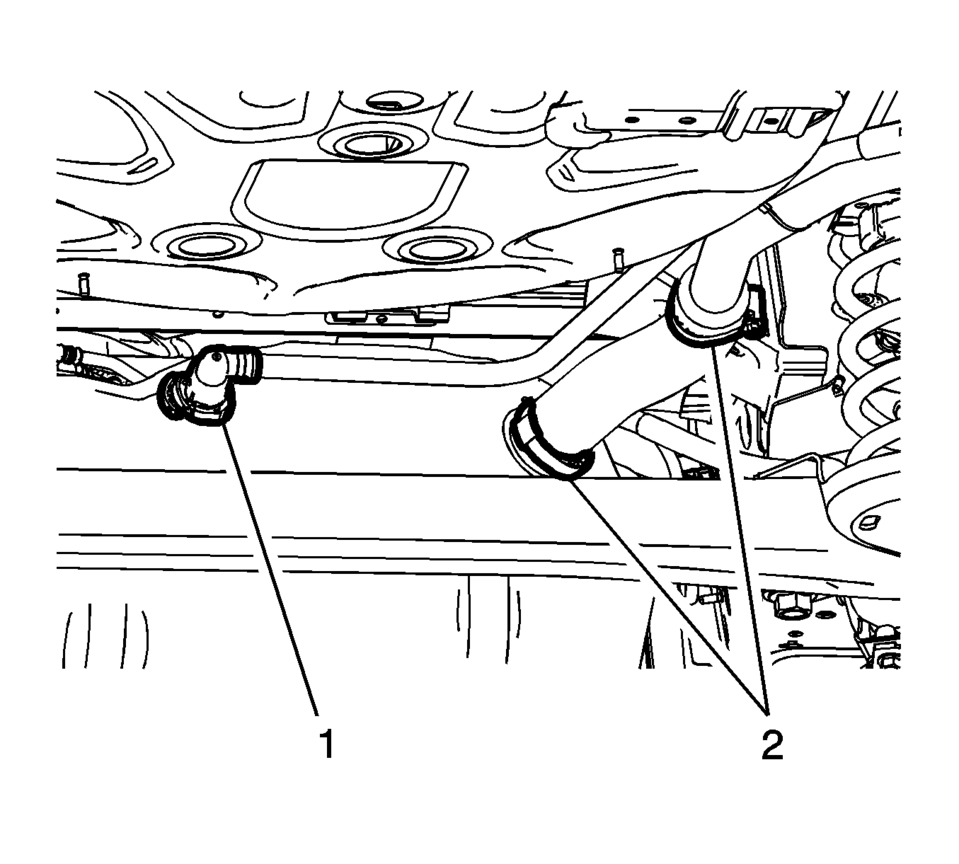
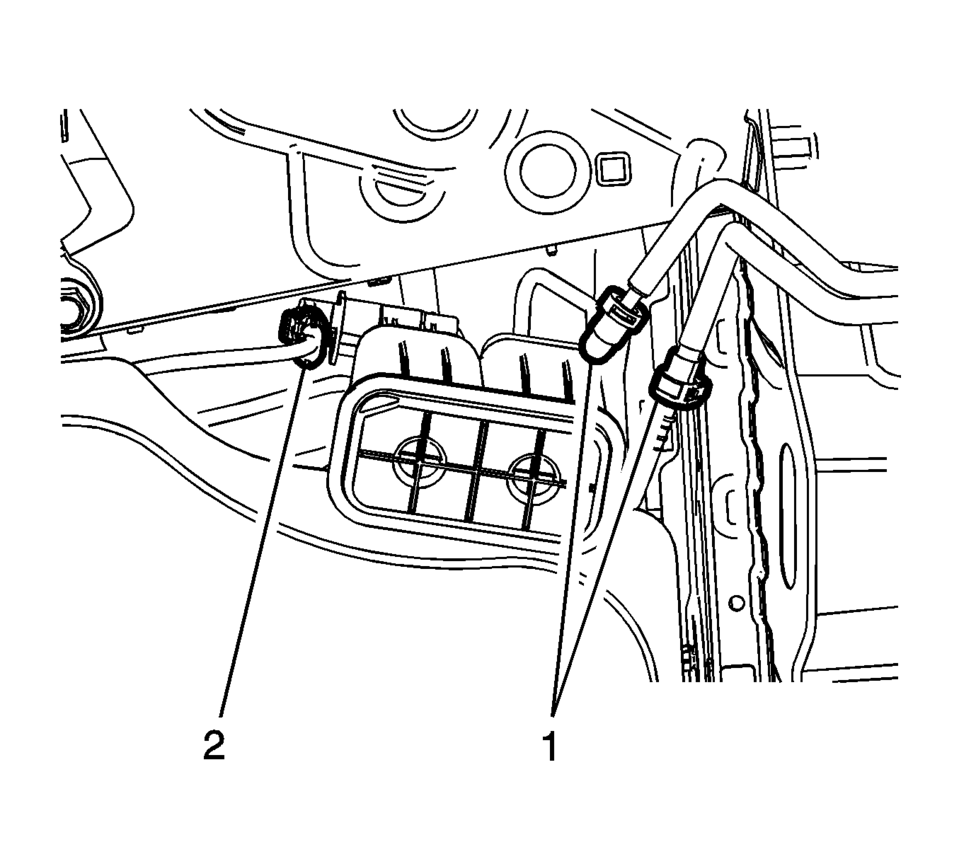
- Disconnect the vent hose (1)
- Loosen the hose clamps (2) and slide the filler hose off the fuel tank.
- Disconnect the fuel and evaporative emission connectors (1). Refer to Plastic Collar Quick Connect Fitting Service.
- Support the fuel tank with a suitable stand.
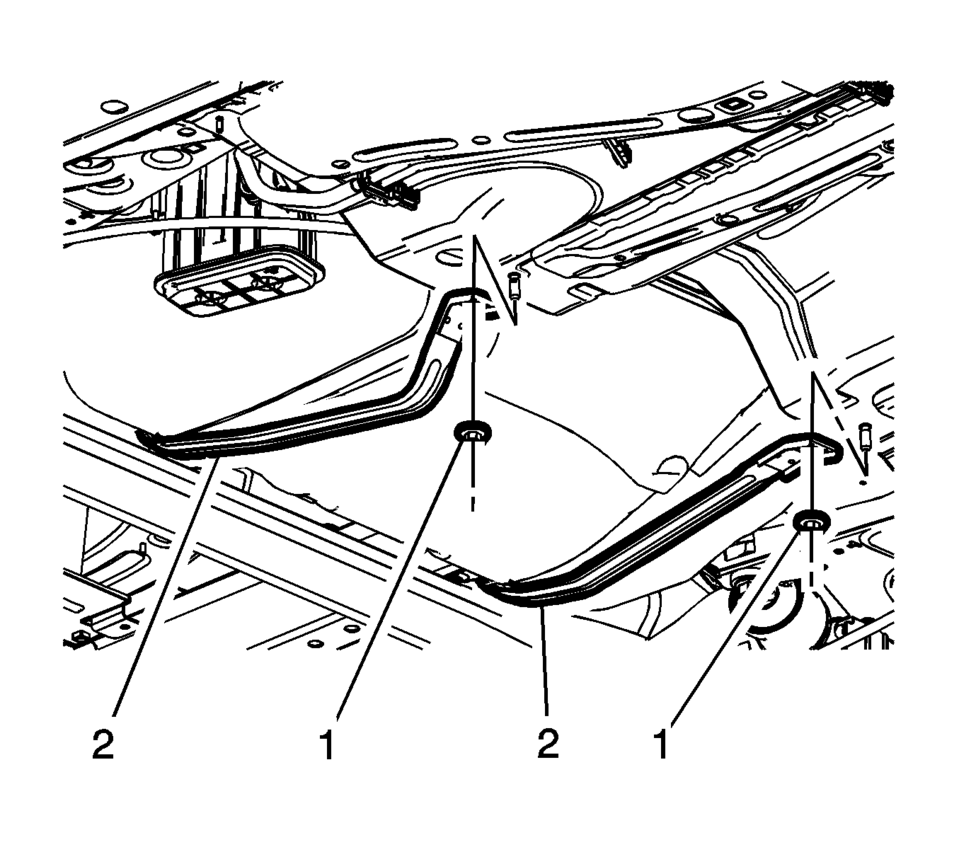
- Remove the fuel tank strap fasteners (1).
- Reposition the fuel tank straps (2) toward the back of the vehicle.
- Lower the fuel tank (1).


- Installation Procedure
-
- If replacing the tank, remove the fuel pump module and the evaporative emission canister. Refer to Fuel Tank Fuel Pump Module Replacement and Evaporative Emission Canister Replacement.
- Transfer parts as necessary.
- Raise the fuel tank (1).
- Support the fuel tank with a suitable stand.
- Position the fuel tank straps (2) onto the fuel tank.
- Install the fuel tank strap fasteners (1) and tighten
to 22 Y(16 lb ft)
.
- Connect the fuel and evaporative emission connectors (1). Refer to Plastic Collar Quick Connect Fitting Service.
- Connect the vent hose (1) .
- Tighten the hose clamps (2) to 4.5 Y(40 lb in).
and slide the filler hose off the fuel tank.
- Connect the fuel pump harness electrical connector (3).
- Install the harness cover (2) and tighten the cover fasteners (1).
- Connect the battery negative cable. Refer to Battery Negative Cable Disconnection and Connection.
Caution:
Refer to Fastener Caution.
 Fuel Tank Fuel Pump Module Replacement (Steel Tank)
Special Tools
EN-48279 Fuel Sender Lock Ring Wrench
For equivalent regional tools, refer to Special Tools.
Removal Procedure
Relieve the fuel system pressure. Refer to
Fuel Pres ...
 Ignition Coil Replacement
Special Tools
EN-6009 Remover and Installer Ignition Coil
For equivalent regional tools, refer to Special Tools.
Removal Procedure
Remove the engine wiring harness guide ...
Other materials:
Cleaning High Gloss Surfaces and Vehicle Information and Radio Displays
For vehicles with high gloss surfaces or vehicle displays, use a microfiber cloth
to wipe surfaces. Before wiping the surface with the microfiber cloth, use a soft
bristle brush to remove dirt that could scratch the surface. Then use the microfiber
cloth by gently rubbing to clean. Never use w ...
Front Seat Armrest Replacement
Front Seat Armrest Replacement
Callout
Component Name
1
Front Seat Armrest Cover Zipper
Procedure
Open the zipper to access the front seat armrest mounting bolt and to
remove the armrest cover
...
Piston and Connecting Rod Disassemble
Remove the piston with connection rod. Refer to Piston, Connecting Rod,
and Bearing Removal.
Note: Note installation position of the piston in respect of the
connection rod.
Detach the piston from the connection rod.
Note: Do not damage the bore.
Remove ...

0.005