
Chevrolet Sonic Repair Manual: Gears Cleaning and Inspection (Gen 2)
- Gears
-
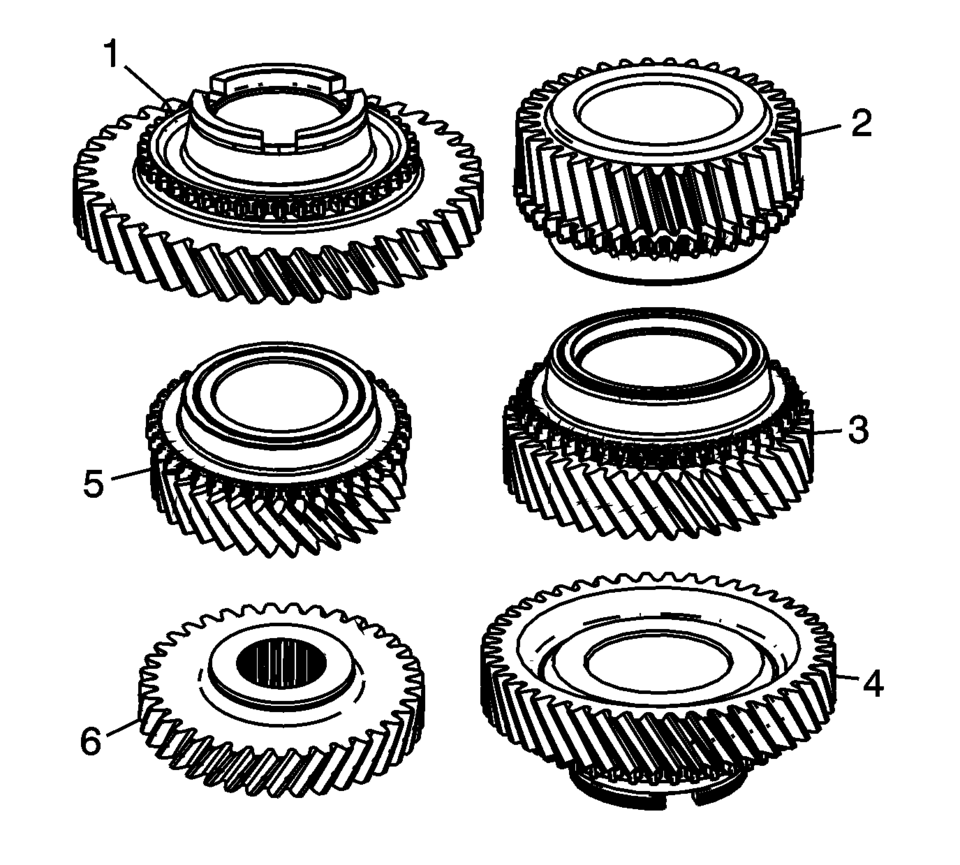
- Clean the following gears in a suitable solvent and air dry all the parts.
Warning:
Wear safety glasses to avoid injury when using compressed air or any cleaning solvent. Bodily injury may occur if fumes are inhaled or if skin is exposed to chemicals.
- 1st Gear (1)
- 2nd Gear Assembly (4)
- 3rd Gear Assembly (3)
- 4th Gear Assembly (2)
- 5th Gear Assembly - Driven (5)
- 5th Gear - Driving (6)
- Inspect the gear tooth surfaces on all the gears for the following conditions:
- Cracks
- Pitting
- Nicks
- Chipped gear teeth
- High spots ?small shiny spots on the gear teeth mating surfaces
- Input Shaft
-
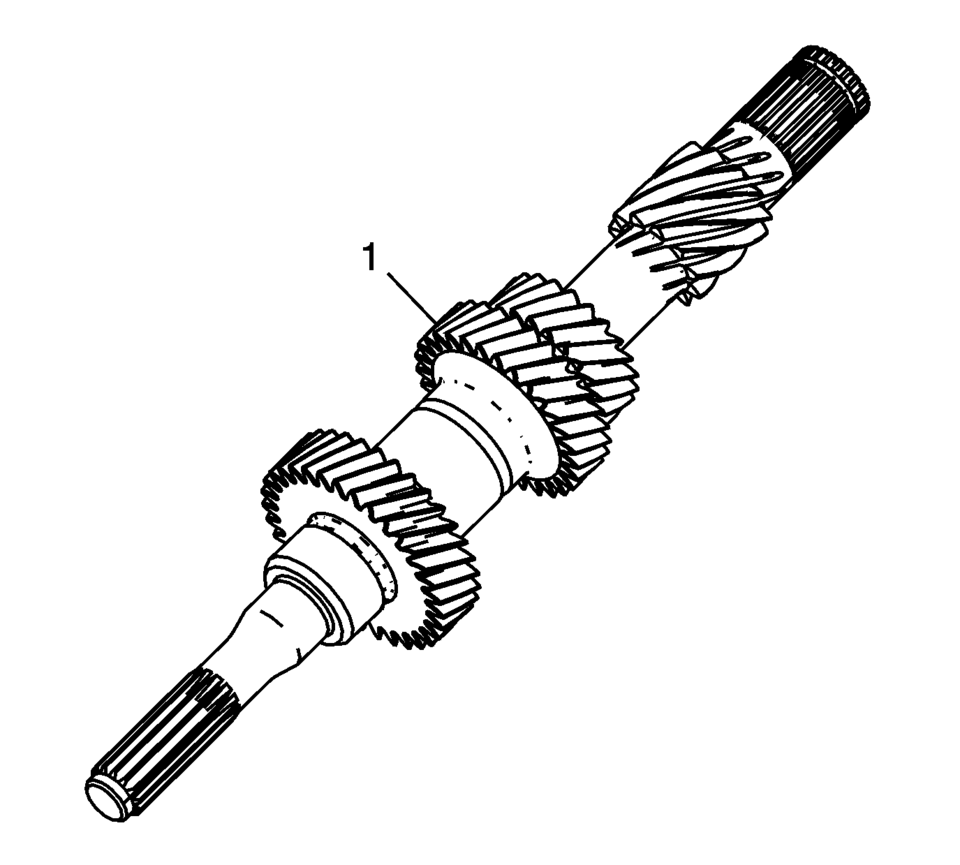
- Clean the input shaft (1) in a suitable solvent.
- Clean and air dry the oil gallery.
- Inspect the input shaft bearing surfaces for the following conditions:
- Wear
- Lack of lubricant
- Debris embedded in the oil grooves
- Brinelling
- Inspect the input shaft splines for wear or damage.
- Replace the input shaft if any of the above conditions are found.
- Main Shaft
-
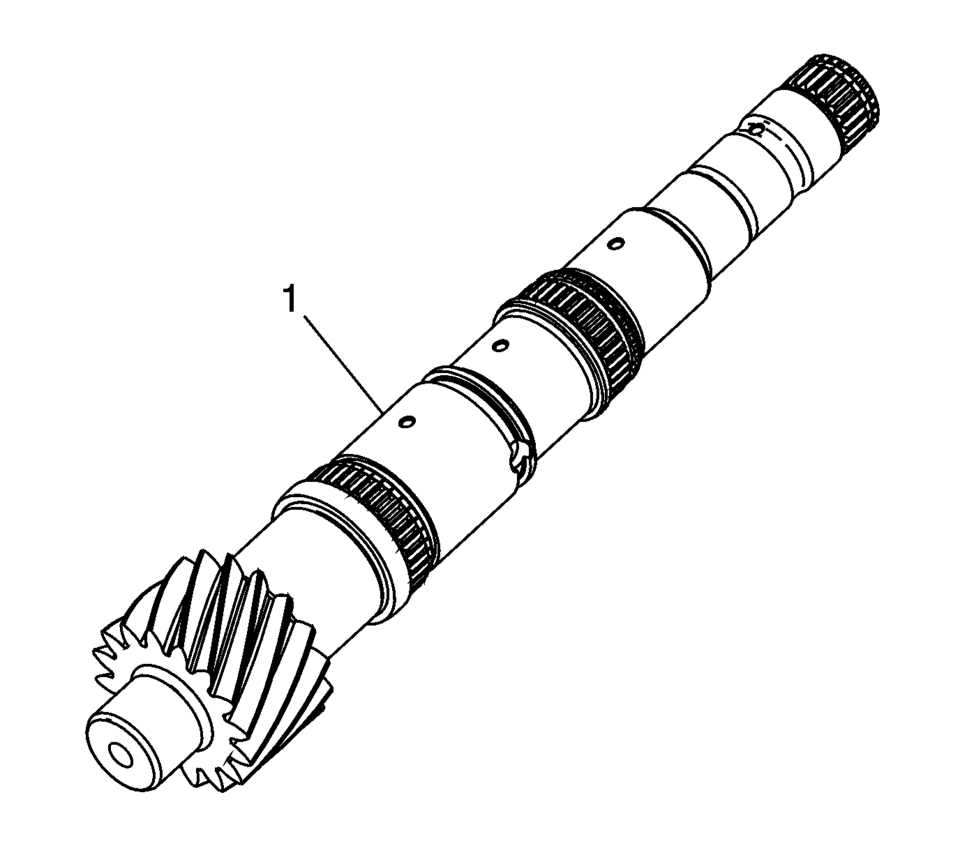
- Clean the main shaft (1) in a suitable solvent.
- Clean and air dry the oil gallery.
- Inspect the main shaft bearing surfaces for the following conditions:
- Wear
- Lack of lubricant
- Debris embedded in the oil grooves
- Brinelling
- Inspect the main shaft splines for wear or damage.
- Replace the main shaft if any of the above conditions are found.
- Reverse Gears and Shaft
-
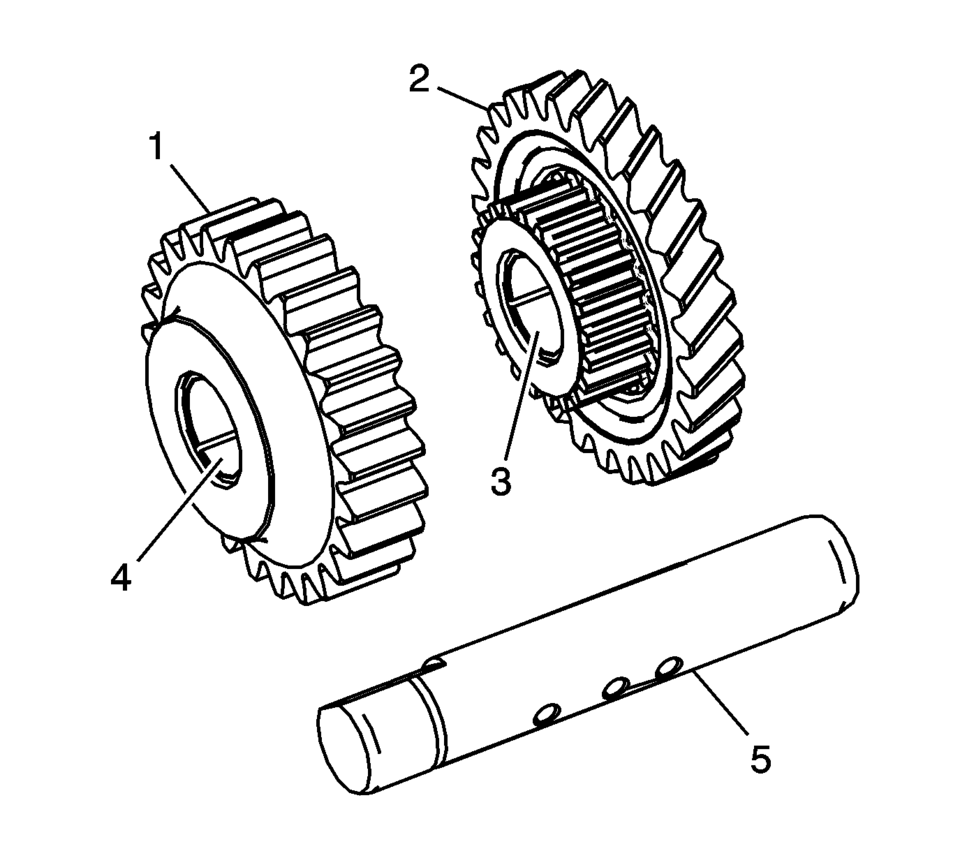
- Clean the reverse spur gear (1), reverse helical gear (2), and shaft (5) in a suitable solvent and air dry all the parts.
- Inspect the reverse spur gear bushings (4) and reverse helical gear bushings (3) for the following conditions:
- Excessive wear
- Scoring
- Pitting
- Replace the reverse gears if the bushings are faulty.
- Inspect the reverse gear shaft for the following conditions:
- Excessive wear
- Scoring
- Pitting
- Replace the reverse gear shaft if it is faulty.
 Gears Cleaning and Inspection (Gen 1)
Gears
Warning: Wear safety glasses to avoid injury when using compressed
air or any cleaning solvent. Bodily injury may occur if fumes are inhaled
or if skin is exp ...
 Input Shaft Assemble
Special Tools
J-840733 Driver
For equivalent regional tools, refer to Special Tools.
Note: Ensure the input shaft rear bearing retaining ring (2) is
placed on the input s ...
Other materials:
Audio Settings
The audio settings can be set for each radio band and each audio player source.
To quickly reset an audio setting value to 0:
1. Press the TONE button.
2. Select the audio setting.
3. Press and hold the Push/MENU/ TUNE button until the value changes to 0.
Press the BACK button to go back
to ...
Quarter Inner Trim Finish Panel Replacement (Hatchback)
Quarter Inner Trim Finish Panel Replacement
Callout
Component Name
Preliminary Procedures
Remove the rear side door opening floor carpet retainer. Refer to
Rear Side Door Opening Floor Carpet Retainer Replacement.
Remove ...
SIR Seatbelt Pretensioner Handling Warning
Warning: When carrying an undeployed inflatable restraint seat belt
retractor pretensioner:
Do not carry the seat belt pretensioner by the seat belt webbing or
pigtail connector, if equipped.
Carry the seat belt pretensioner by the housing, keeping hands and fingers
away fro ...

0.0132