Chevrolet Sonic Repair Manual: Generator Replacement (LUV)
- Removal Procedure
-
- Disconnect the negative battery cable. Refer to Battery Negative Cable Disconnection and Connection.
- Raise and support the vehicle. Refer to Lifting and Jacking the Vehicle.
- Remove the drive belt. Refer to Drive Belt Replacement.
- Remove the drive belt tensioner. Refer to Drive Belt Tensioner Replacement.
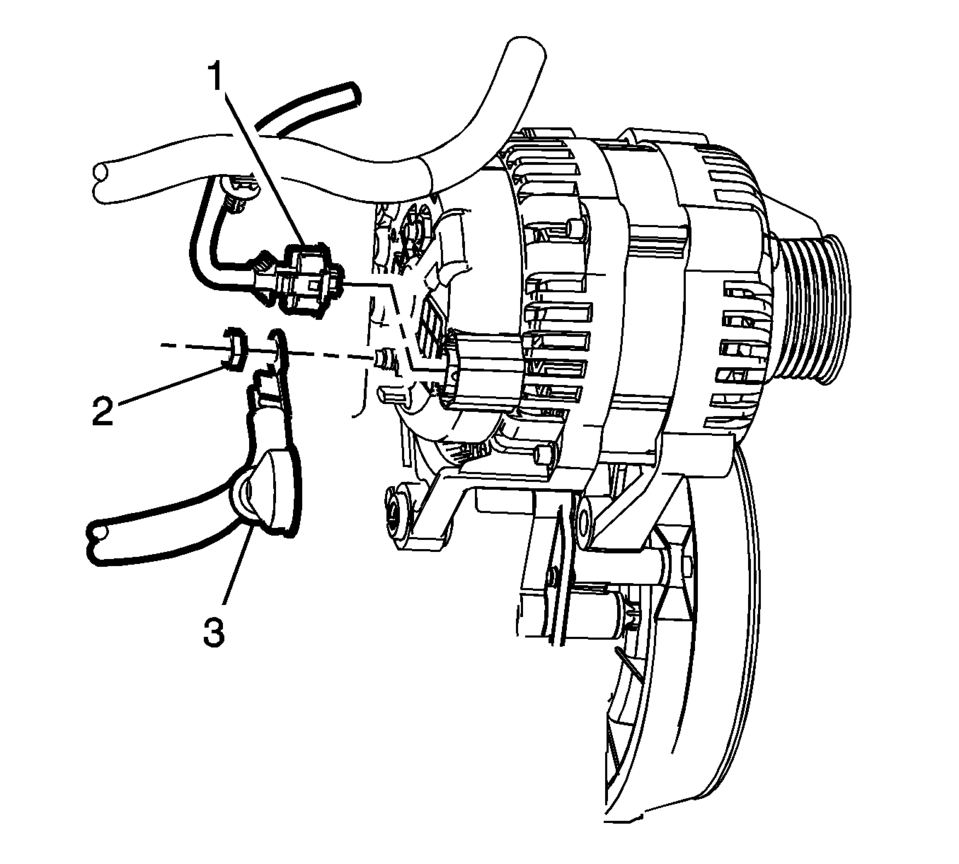
- Remove the engine harness connector (1) and the battery positive cable generator fastener (2).
- Remove the battery positive cable (3) from the back of the generator.
- Remove the generator mounting fasteners (1) and remove the generator (2) from the engine.

- Installation Procedure
-
- Install the generator (2) with the mounting fasteners (1) and tighten
to 35 Y (26 lb ft)
.
- Install the battery positive cable (3) and the engine harness connector (1)
to the back of the generator. Tighten fastener (2) to 9 Y (80 lb in)
.
- Install the drive belt tensioner. Refer to Drive Belt Tensioner Replacement.
- Install the drive belt. Refer to Drive Belt Replacement.
- Connect the negative battery cable. Refer to Battery Negative Cable Disconnection and Connection.
Caution:
Refer to Fastener Caution.
- Install the generator (2) with the mounting fasteners (1) and tighten
to 35 Y (26 lb ft)
 Generator Removal
Remove the 2 generator bolts (2).
Remove the generator (1).
...
 Generator Replacement (LUW)
Removal Procedure
Disconnect the negative battery cable. Refer to Battery Negative Cable
Disconnection and Connection.
Raise and support the vehicle. Refer to Lifting and Jacking ...
Other materials:
Rear Wheel Speed Sensor Replacement
Removal Procedure
Warning: Refer to Brake Dust Warning.
Raise and support the vehicle. Refer to Lifting and Jacking the Vehicle.
Remove the tire and wheel assembly. Refer to Tire and Wheel Removal
and Installation.
Remove the rear wheel speed sensor ...
Special Tools
Illustration
Tool Number/Description
207649
Rod Hairpins
547324
Flange Screws
EN-232
KM-232
J-21867-L40
Oil Pressure Check Adapter
...
Engine Coolant Thermostat Replacement (LUV)
Removal Procedure
Drain the cooling system. Refer to Cooling System Draining and Filling.
Remove the air cleaner outlet duct. Refer to Air Cleaner Outlet Duct
Replacement.
Remove the engine coolant temperature sensor connector (1).
Disconnect the radi ...

0.0106