
Chevrolet Sonic Repair Manual: Generator Replacement (LUW)
- Removal Procedure
-
- Disconnect the negative battery cable. Refer to Battery Negative Cable Disconnection and Connection.
- Raise and support the vehicle. Refer to Lifting and Jacking the Vehicle.
- Remove the drive belt. Refer to Drive Belt Replacement.
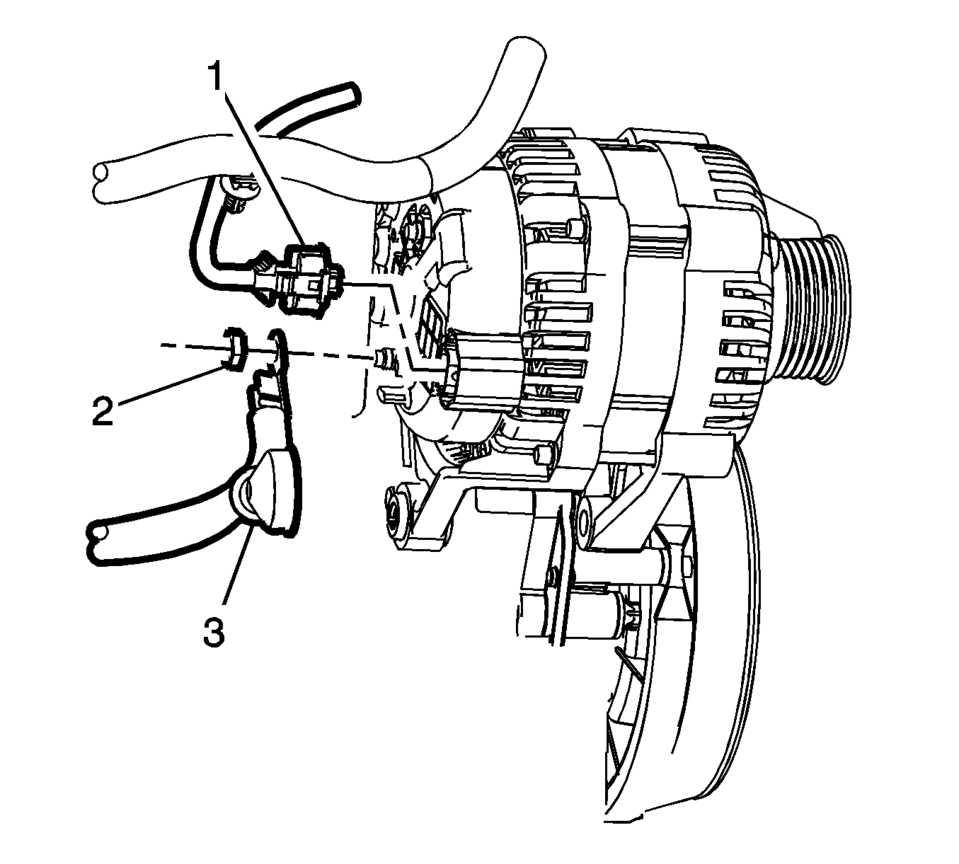
- Remove the engine harness connector (1) and the battery positive cable generator fastener (2).
- Remove the battery positive cable (3) from the back of the generator.
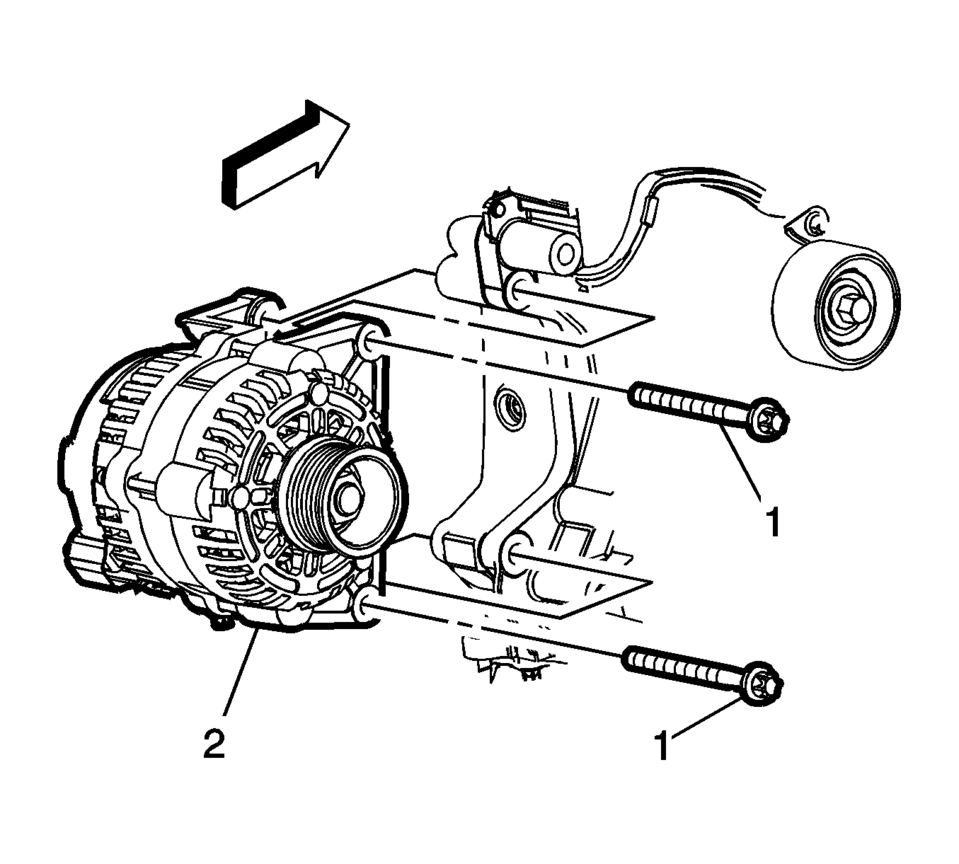
- Remove the generator mounting fasteners (1) and remove the generator (2) from the engine.
- Installation Procedure
-
- Install the generator (2) with the mounting fasteners (1) and tighten
to 35 Y (26 lb ft)
.
- Install the battery positive cable (3) and the engine harness connector (1)
to the back of the generator. Tighten fastener (2) to 9 Y (80 lb in)
.
- Install the drive belt. Refer to Drive Belt Replacement.
- Connect the negative battery cable. Refer to Battery Negative Cable Disconnection and Connection.
Caution:
Refer to Fastener Caution.
- Install the generator (2) with the mounting fasteners (1) and tighten
to 35 Y (26 lb ft)
 Generator Replacement (LUV)
Removal Procedure
Disconnect the negative battery cable. Refer to Battery Negative Cable
Disconnection and Connection.
Raise and support the vehicle. Refer to Lifting and Jacking ...

Other materials:
Driver or Passenger Seat Head Restraint Guide Replacement
Driver or Passenger Seat Head Restraint Guide Replacement
Callout
Component Name
Preliminary Procedure
Remove the seat head restraint. Refer to Driver or Passenger Seat Head
Restraint Replacement.
1
...
Differential Case Disassemble
Special Tools
6-9607346 Sensor Ring Gear Puller
J-810704 Steering Column Center Bar Puller
J-810721 Axle Shaft Seal Remover Support Base
R-0006749 Support Base
R-0407011 Bearing Race Remover
R-0007761 Universal Handle for Pullers and Installers
S-9407195 Pinion Gear Case Bearing ...
Locking with power door lock switch
Driver's armrest
Front passenger's armrest
Basic information
The Nissan Armada power door lock system allows centralized locking and unlocking
of all doors using switches located on both the driver’s and front passenger’s doors.
To lock all doors, press the switch to the lo ...

0.0058