
Chevrolet Sonic Repair Manual: Generator Replacement (LUW)
- Removal Procedure
-
- Disconnect the negative battery cable. Refer to Battery Negative Cable Disconnection and Connection.
- Raise and support the vehicle. Refer to Lifting and Jacking the Vehicle.
- Remove the drive belt. Refer to Drive Belt Replacement.
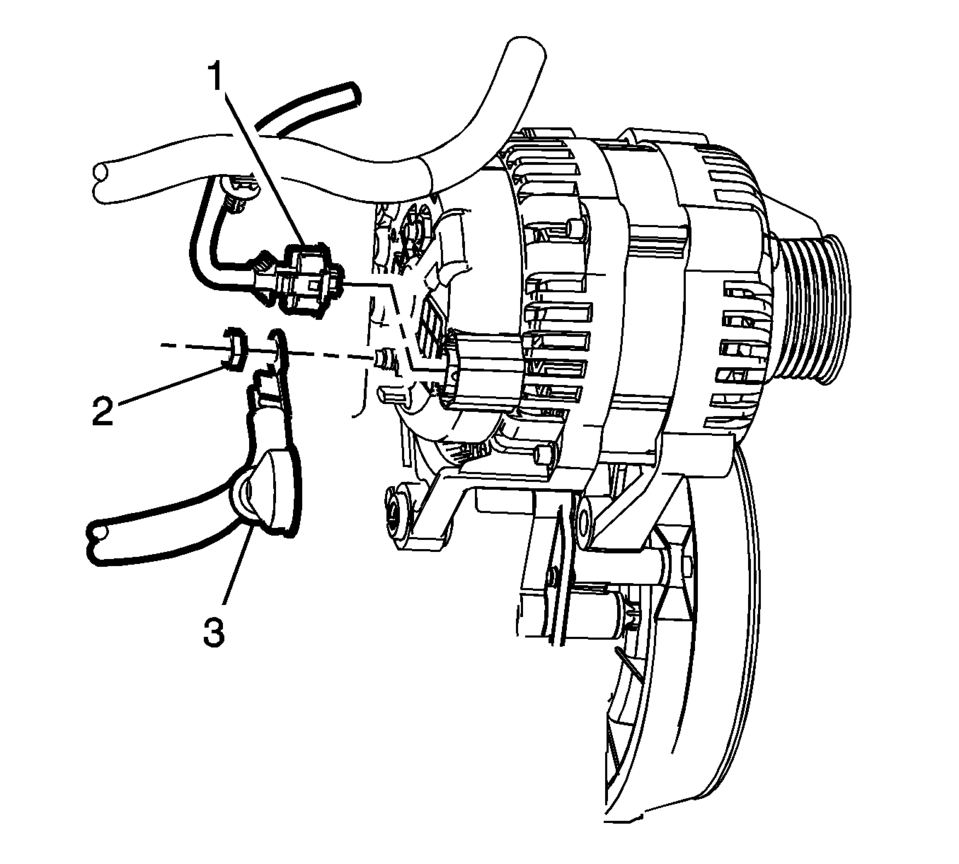
- Remove the engine harness connector (1) and the battery positive cable generator fastener (2).
- Remove the battery positive cable (3) from the back of the generator.
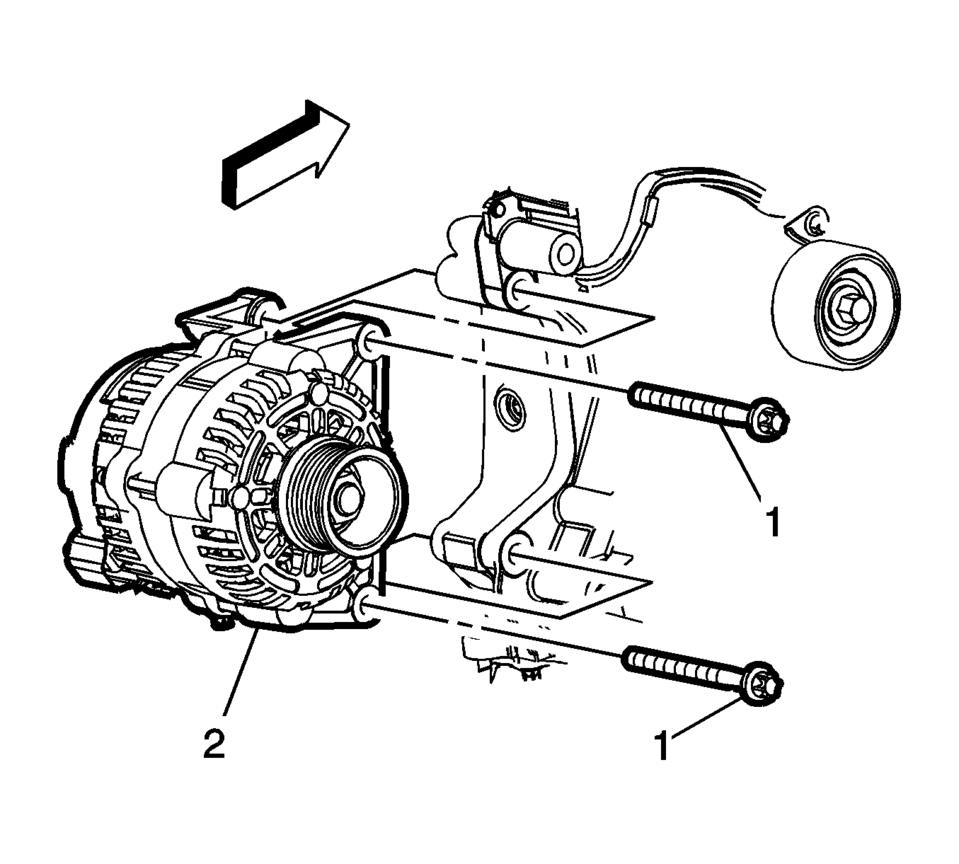
- Remove the generator mounting fasteners (1) and remove the generator (2) from the engine.
- Installation Procedure
-
- Install the generator (2) with the mounting fasteners (1) and tighten
to 35 Y (26 lb ft)
.
- Install the battery positive cable (3) and the engine harness connector (1)
to the back of the generator. Tighten fastener (2) to 9 Y (80 lb in)
.
- Install the drive belt. Refer to Drive Belt Replacement.
- Connect the negative battery cable. Refer to Battery Negative Cable Disconnection and Connection.
Caution:
Refer to Fastener Caution.
- Install the generator (2) with the mounting fasteners (1) and tighten
to 35 Y (26 lb ft)
 Generator Replacement (LUV)
Removal Procedure
Disconnect the negative battery cable. Refer to Battery Negative Cable
Disconnection and Connection.
Raise and support the vehicle. Refer to Lifting and Jacking ...
 Lubrication Description
Oil is applied under pressure to the crankshaft (8), connecting rods (5), camshaft
adjuster (1), camshaft bearing surfaces (3) and valve tappets (4). All other movi ...
Other materials:
Front Compartment Front Insulator Cover Replacement
Front Compartment Front Insulator Cover Replacement
Callout
Component Name
1
Front Compartment Front Insulator Cover Screw (Qty:?€‰2)
Caution: Refer to Fastener Caution.
Tighten
2.5?€‰Y (22?₠...
Radiator Grille Emblem/Nameplate Replacement
Radiator Grille Emblem/Nameplate Replacement
Callout
Component Name
Preliminary Procedure
Remove the front bumper fascia. Refer to Front Bumper Fascia Replacement.
Remove the front bumper energy absorber. Refer to Front Bu ...
Rear Window Wiper Motor Grommet Replacement
Rear Window Wiper Motor Grommet Replacement
Callout
Component Name
Preliminary Procedure
Remove the rear window wiper motor. Refer to Rear Window Wiper Motor
Replacement.
1
Rear Window Wiper Mot ...

0.0055