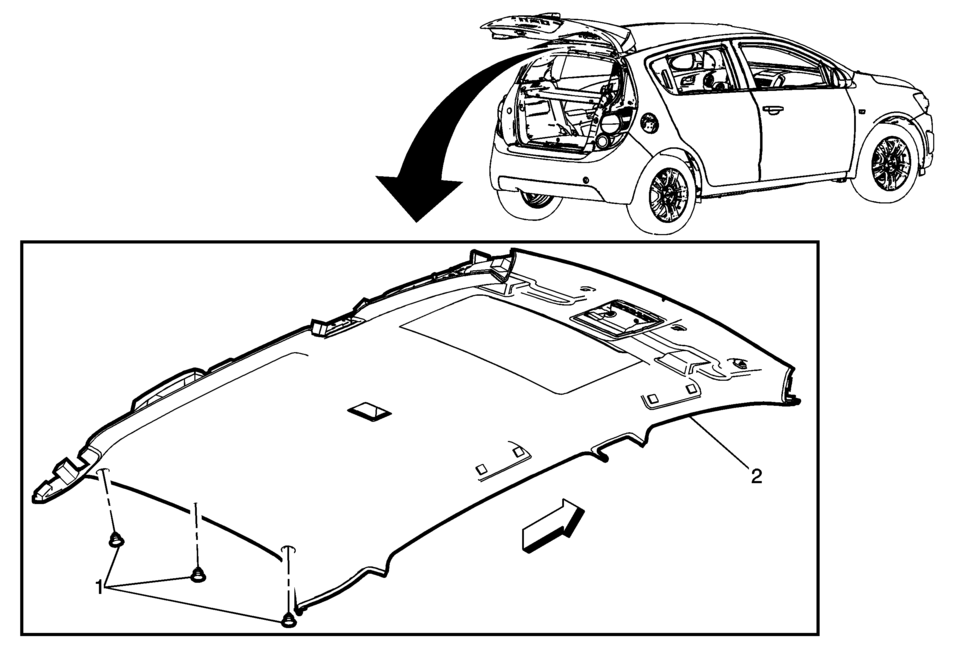
Chevrolet Sonic Repair Manual: Headlining Trim Panel Replacement (Hatchback with Sunroof)
|
Callout |
Component Name |
|---|---|
|
Warning: Do not attempt to repair or alter the head impact energy-absorbing material glued to the headliner or to the garnish trims. If the material is damaged, replace the headliner and/or the garnish trim. Failure to do so could result in personal injury. Caution: If a vehicle is equipped with a head curtain inflator module ensure that the inflator module and tether are undamaged. If tether or curtain airbag are damaged in any way, they must be replaced. Caution: Use care when working around the head curtain inflator module. Sharp tools may puncture the curtain airbag. If the head curtain inflator module is damaged in any way, it must be replaced.
|
|
|
1 |
Headliner Trim Panel Retainer (Qty:?€‰3) |
|
2 |
Headliner Trim Panel Assembly Procedure
Disconnect the electrical connectors. Note: When installing a new headliner, tape any unused connector to the headliner with a high adhesive tape. |
 Front Side Door Window Switch Bezel Replacement (Right Side)
Front Side Door Window Switch Bezel Replacement
Callout
Component Name
Preliminary Procedure
Remove the front side door trim. R ...
 Headlining Trim Panel Replacement (Hatchback without Sunroof)
Headlining Trim Panel Replacement
Callout
Component Name
Warning: Do not attempt to repair or alter the head impact
energ ...
Other materials:
Rear Wheelhouse Liner Replacement (Sedan - Right)
Rear Wheelhouse Liner Replacement
Callout
Component Name
Preliminary Procedure
Remove the tire and wheel assembly. Refer to Tire and Wheel Removal and
Installation.
1
Rear Wheelhouse Panel Liner ...
Engine Coolant Temperature Sensor Replacement (Water Outlet)
Engine Coolant Temperature Sensor Replacement
Callout
Component Name
Preliminary Procedure
Disconnect the negative battery cable. Refer to
Battery Negative Cable Disconnection and Connection.
Drain the cooling system. ...
Maximum load limits
Maximum trailer loads
Never exceed the maximum allowable trailer load specified in the "Towing load/specification"
section. The total trailer load includes both the trailer itself and any cargo it
carries.
When towing loads of 3,500 lbs (1,587 kg) or more with your Nissan
Armad ...

0.0073