
Chevrolet Sonic Repair Manual: Headlining Trim Panel Replacement (Sedan without Sunroof)
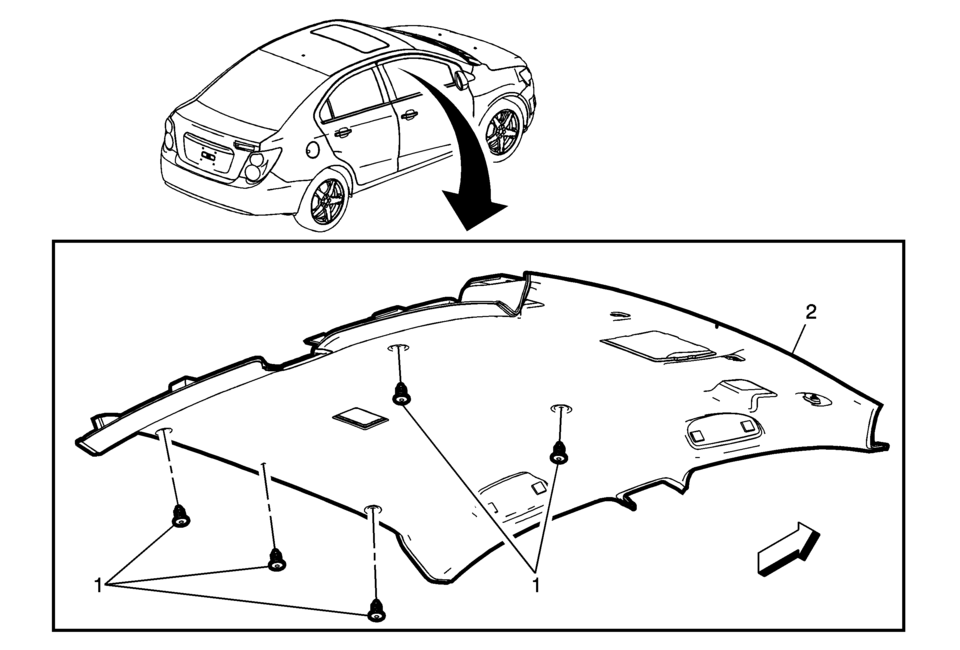
|
Callout |
Component Name |
|---|---|
|
Warning: Do not attempt to repair or alter the head impact energy-absorbing material glued to the headliner or to the garnish trims. If the material is damaged, replace the headliner and/or the garnish trim. Failure to do so could result in personal injury. Caution: If a vehicle is equipped with a head curtain inflator module ensure that the inflator module and tether are undamaged. If tether or curtain airbag are damaged in any way, they must be replaced. Caution: Use care when working around the head curtain inflator module. Sharp tools may puncture the curtain airbag. If the head curtain inflator module is damaged in any way, it must be replaced.
|
|
|
1 |
Headliner Trim Panel Retainer?€‰(Qty:?€‰5) |
|
2 |
Headliner Trim Panel Assembly Procedure
Disconnect the electrical connectors. Note: When installing a new headliner, tape any unused connector to the headliner with a high adhesive tape. |
 Headlining Trim Panel Replacement (Sedan with Sunroof)
Headlining Trim Panel Replacement
Callout
Component Name
Warning: Do not attempt to repair or alter the head impact
energ ...
 Sunroof Actuator Motor Replacement
Sunroof Actuator Motor Replacement
Callout
Component Name
Preliminary Procedure
Remove the dome lamp bezel. Refer to Dome Lamp ...
Other materials:
Smartphone Link (Overview)
Before Using Smartphone Link
If equipped, the vehicle can connect to Pandora®, Stitcher SmartRadio™, or other
available applications through the infotainment system. The applications must be
downloaded to the device first, then the device can be connected to the infotainment
system.
Pan ...
Front Compartment Front Insulator Cover Replacement
Front Compartment Front Insulator Cover Replacement
Callout
Component Name
1
Front Compartment Front Insulator Cover Screw (Qty:?€‰2)
Caution: Refer to Fastener Caution.
Tighten
2.5?€‰Y (22?₠...
Warning/indicator lights (red)
Brake warning light
or
In the Nissan Armada, the brake warning light is a critical safety indicator
that helps monitor the condition of the braking system. When the ignition switch
is turned to the ON position, this light should illuminate briefly for a few seconds
and then turn off, ...

0.0075