Chevrolet Sonic Repair Manual: Home Page (Radio with Touchscreen)
- Touchscreen Buttons
-
Touchscreen buttons show on the screen when available. When a function is unavailable, the button may gray out. When a function is selected, the button may highlight.
- Home Page Features
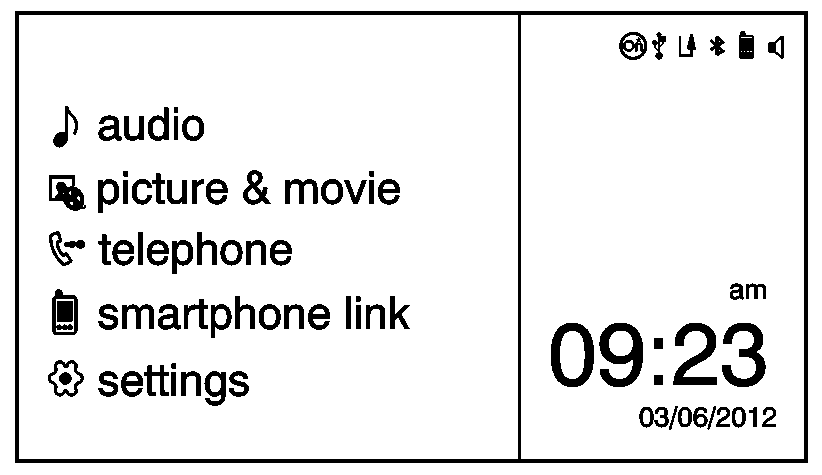
audio picture movie telephone el smartphone link settings 03/06/2012
Press F to go to the Home Page.
- e audio
-
Press to select AM, FM, SiriusXM (if equipped), USB/iPod/Bluetooth Audio, or AUX.
- G picture & movie
-
Press to view a picture, movie, or auxiliary video.
- 7 telephone
-
Press to activate the phone features (if equipped). See Bluetooth.
- ^ smartphone link
-
Press to listen to Pandora® (if equipped), Stitcher™, or available application. See Smartphone Link.
- 8 settings
-
Press to access the Personalization menu. See Vehicle Personalization.
 Audio Disc Player and USB Receptacle Replacement
Audio Disc Player and USB Receptacle Replacement
Callout
Component Name
1
Audio Disc Player and USB Receptacle
Proced ...
 Overview (AM-FM Radio)
45tune<=backtoneseekl>klseekpushmenu101112131415
FAV 1-2-3 (Favorites)
Radio: Opens the favorites list.
O /VOL (Power/Volume)
Turns the system on or off and adjusts the volum ...
Other materials:
Spare Tire Kit Installation
Installation Instructions Part Number
95280943
Procedure
...
Torque Steer Description
A vehicle pulls or leads in one direction during hard acceleration. A vehicle
pulls or leads in the other direction during deceleration.
The following factors may cause torque steer to be more apparent on a particular
vehicle:
A slightly smaller diameter tire on the right front increa ...
How to enable/disable the I-DA system
Vehicle information display
Steering-wheel-mounted control (right side)
To enable or disable the Intelligent Driver Alertness system in the Nissan Armada,
follow these steps:
1. Press the
button until "Settings" appears in the vehicle information display, then confirm
...

0.0084