
Chevrolet Sonic Repair Manual: Ignition Coil Replacement
Special Tools
EN-6009 Remover and Installer Ignition Coil
For equivalent regional tools, refer to Special Tools.
- Removal Procedure
-
- Remove the engine wiring harness guide (1) from the cylinder head.
- Disconnect the ignition coil electrical connector (2).
- Remove the cover of the ignition coil in the direction of the arrow.
- Remove the ignition coil bolts.
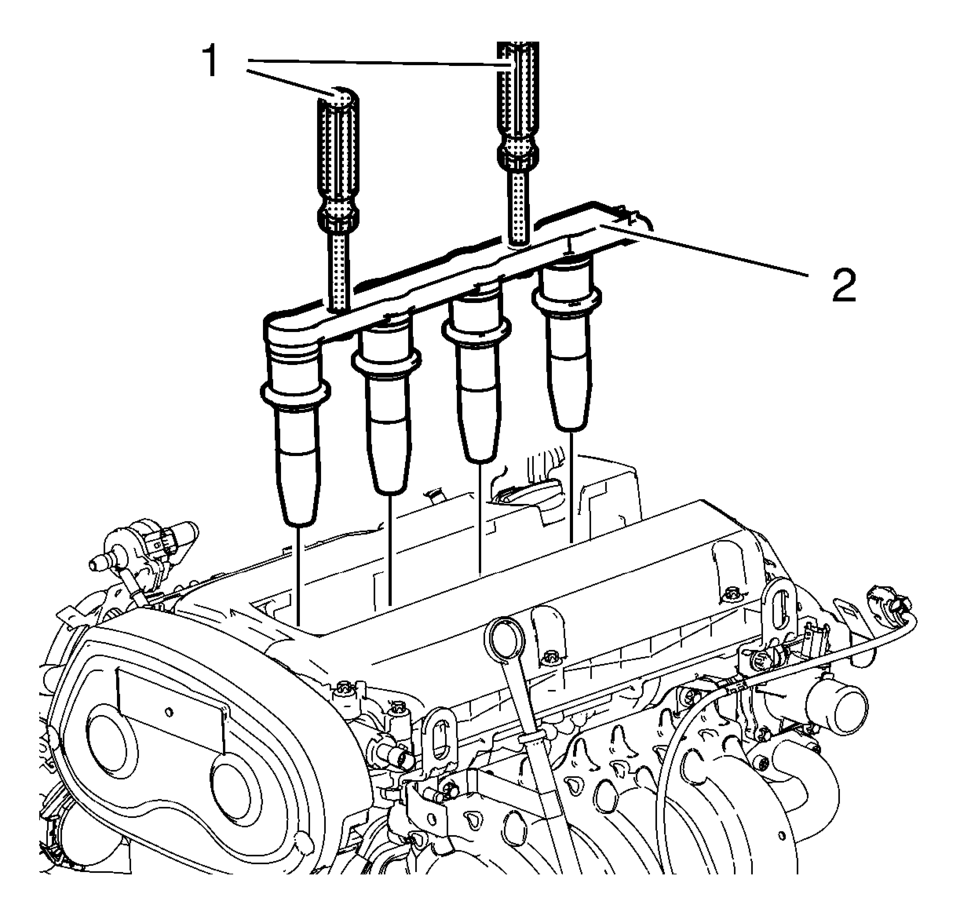
- Install the EN-6009 remover/installer (1).
- Remove the ignition coil (2).
- Remove the EN-6009 remover/installer (1).
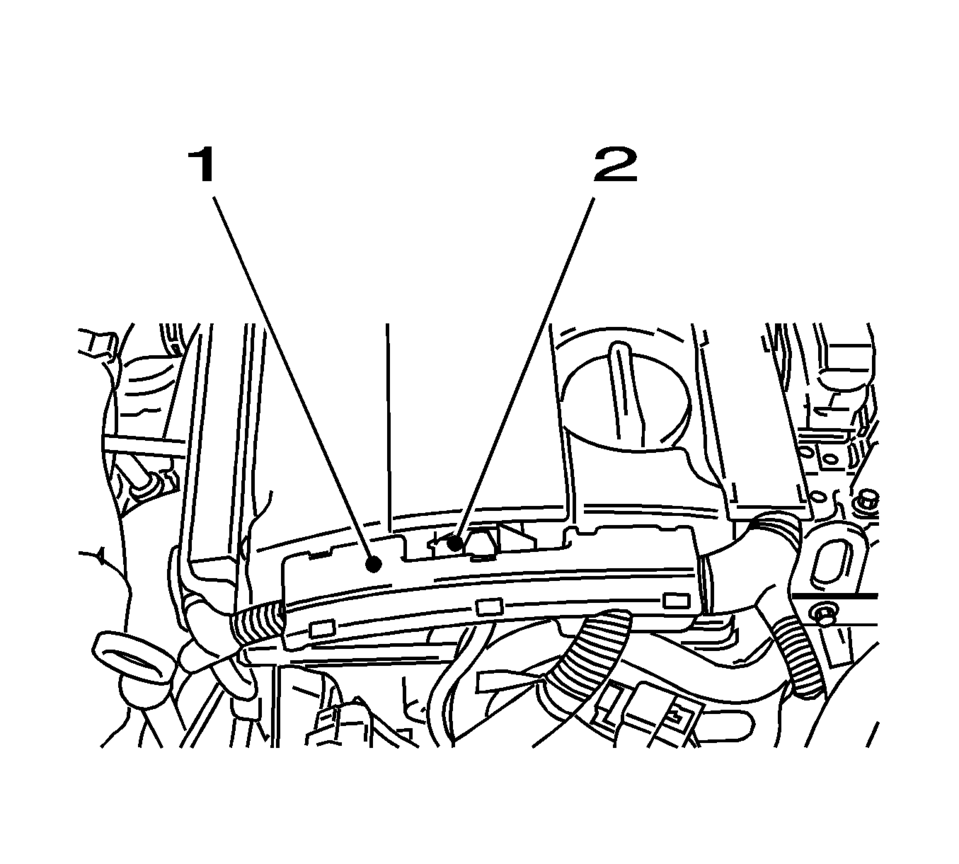
Note:
Note the arrow on the cover.
- Installation Procedure
-
- Install the EN-6009 remover/installer (1).
- Install the ignition coil (2).
- Remove the EN-6009 remover/installer (1).
- Install the ignition coil fasteners and tighten to
8 Y (71 lb in)
.
- Install the ignition coil cover in the opposite direction of the arrow.
- Connect the ignition coil electrical connector (2).
- Install the engine wiring harness guide (1) at the cylinder head.
Note:
Note the arrow on the cover.
 Fuel Tank Replacement
Removal Procedure
Disconnect the battery negative cable. Refer to
Battery Negative Cable Disconnection and Connection.
Relieve the fuel pressure. Refer to
Fuel Pressure Relie ...
 Inspection/Maintenance (I/M) System DTC Table
Inspection/Maintenance (I/M) System DTC Table
System
DTCs Required to Set System Status to YES
If an inspection/maintenance system stat ...
Other materials:
Replacing Brake System Parts
The braking system on a vehicle is complex. Its many parts have to be of top
quality and work well together if the vehicle is to have really good braking. The
vehicle was designed and tested with top-quality brake parts. When parts of the
braking system are replaced, be sure to get new, approv ...
Rear-facing child restraint installation using LATCH
Before installing a child restraint in the Nissan Armada, carefully review all
warnings and precautions provided in the "Child safety" and "Child restraints" sections
of this manual.
Do not use the LATCH lower anchors if the combined weight of the child and the
child restr ...
Basic information
WARNING
Failure to properly follow the instructions and safety guidelines for the
Nissan Armada LDW and I-LI systems may result in serious injury or even fatal consequences.
The Nissan Armada LDW and I-LI systems are driver-assist technologies
and will not take full control of steering or ...

0.0057