Chevrolet Sonic Repair Manual: Inside Rearview Mirror Replacement
|
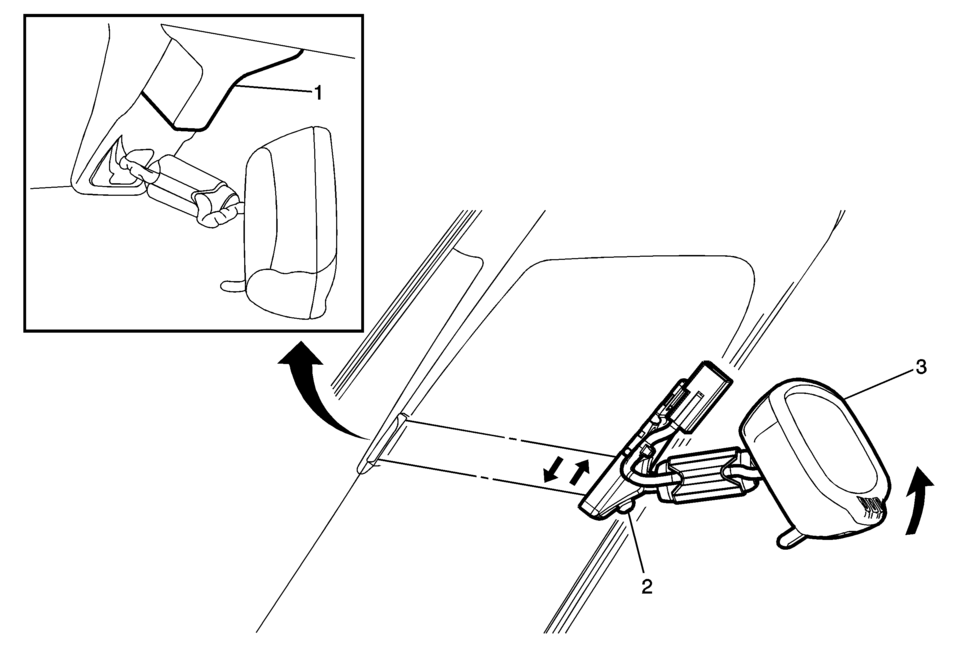
Callout |
Component Name |
|---|---|
|
1 |
Inside Rearview Mirror Cover Procedure
|
|
2 |
Inside Rearview Mirror Screw Caution: Refer to Fastener Caution.
2?€‰Y?€‰(18?€‰lb?€‰in) |
|
3 |
Inside Rearview Mirror |
 Outside Mirror Description and Operation
Power Mirror System Components
The power mirror system consists of the following components:
Outside rearview mirror switch
Mirror selector switch
Driver outside rearview mirror
...
 Outside Rearview Mirror Glass Replacement
Removal Procedure
Warning: Approved safety glasses and gloves should be worn
when performing this procedure to reduce the chance of personal injury.
Place masking ta ...
Other materials:
Instrument Panel Fuse Block Access Hole Cover Replacement (With AAL)
Instrument Panel Fuse Block Access Hole Cover Replacement
Callout
Component Name
1
Instrument Panel Fuse Block Access Hole Cover
Procedure
Grasp the lower edge of the fuse block cover and pull outward disengaging ...
Instrument Panel Outer Air Outlet Duct Replacement
Instrument Panel Outer Air Outlet Duct Replacement
Callout
Component Name
Preliminary Procedures
Remove the instrument panel assembly. Refer to Instrument Panel
Assembly Replacement.
Reposition any wiring or hoses to gain ...
Basic information
WARNING
Failure to strictly follow all safety warnings and operating instructions
related to the Intelligent Driver Alertness system in the Nissan Armada may result
in serious injury or fatal accidents.
The Nissan Armada I-DA system is designed –∏—Å–∫–ª—é—á–∏—Ç–µ–ª—å–Ω–æ as a driver assista ...

0.0059