Chevrolet Sonic Repair Manual: Instrument Panel Assembly Replacement
|
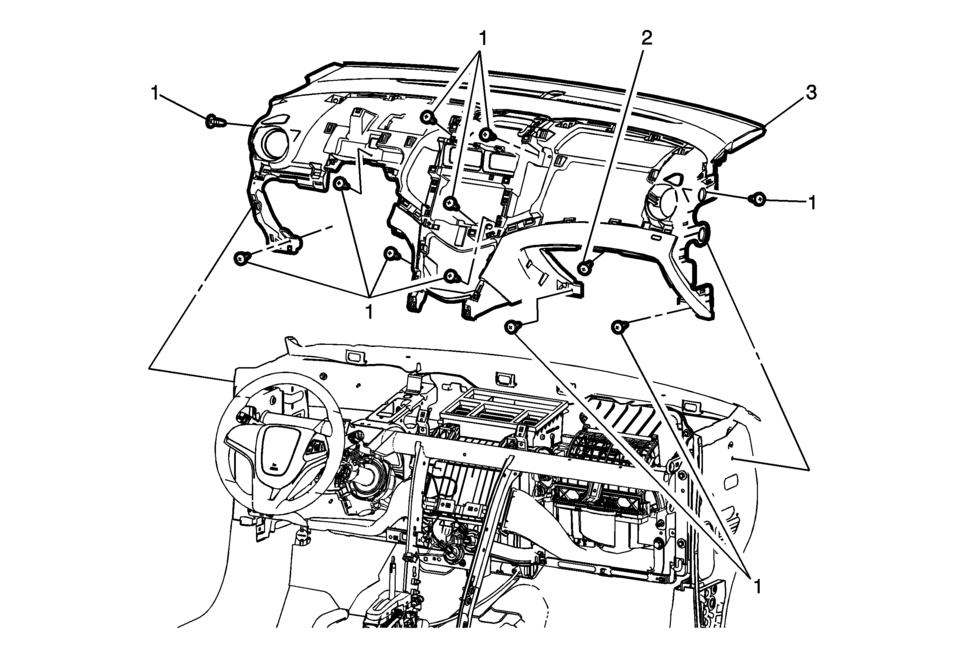
Callout |
Component Name |
|---|---|
Preliminary Procedure
|
|
|
1 |
Instrument Panel Fastener (Qty:?€‰11) Caution: Refer to Fastener Caution. |
|
2 |
Instrument Panel Compartment Door Latch Striker bolt Tighten
9?€‰Y (80?€‰lb?€‰in) |
|
3 |
Instrument Panel Assembly Procedures
|
 Instrument Panel Airbag Arming Status Display Replacement
Instrument Panel Airbag Arming Status Display Replacement
Callout
Component Name
Preliminary Procedure
Remove the heater and ai ...
 Instrument Panel Center Air Outlet Replacement
Instrument Panel Center Air Outlet Replacement
Callout
Component Name
Preliminary Procedure
Remove the instrument panel center ...
Other materials:
Turn Signal Multifunction Switch Replacement
..
Turn Signal Multifunction Switch Replacement
Callout
Component Name
Preliminary Procedure
Remove the upper trim cover and the lower trim cover from the steering
column. Refer to Steering Column Lower Trim Cover Replacemen ...
Mode Control Cable Replacement (LHD)
Mode Control Cable Replacement
Callout
Component Name
Preliminary Procedures
Remove the heater and air conditioning control.Refer to Heater and
Air Conditioning Control Replacement
Remove the instrument panel lower trim p ...
Camshaft Replacement
Special Tools
EN-422 Installer
For equivalent regional tools, refer to Special Tools.
Removal Procedure
Note: Take extreme care to prevent any scratches, nicks or
damage to the camshafts and caps bearing surfaces.
Remove the timing belt rear cover ( ...

0.0059