Chevrolet Sonic Repair Manual: Instrument Panel Upper Trim Panel Replacement - Right Side
|
Callout |
Component Name |
|---|---|
Preliminary Procedure
|
|
|
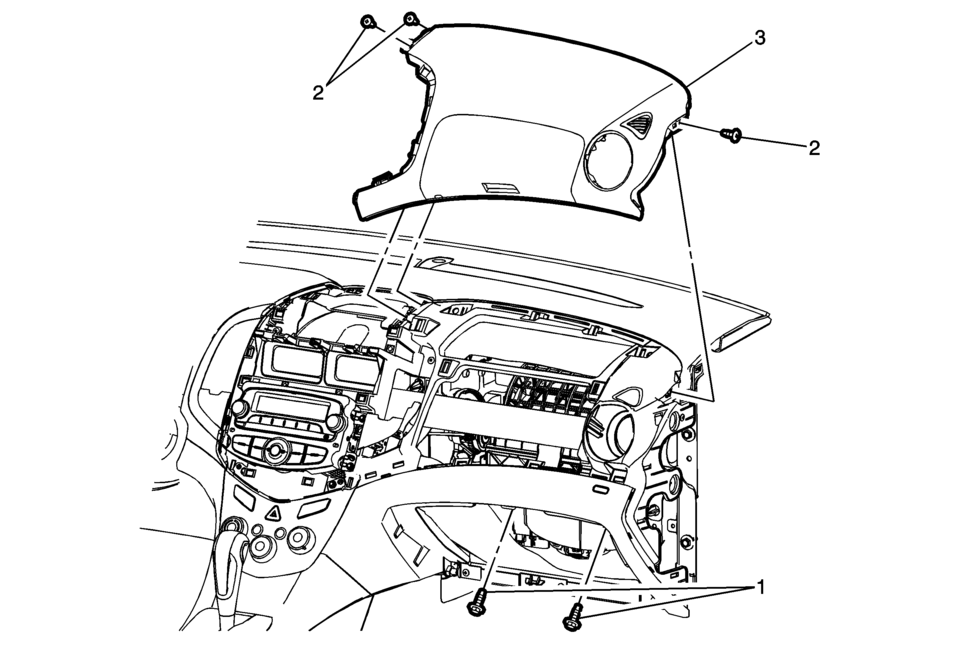
1 |
Instrument Panel Inflatable Restraint Module Fasteners (Qty:?€‰2) Caution: Refer to Fastener Caution.
10Y 89?€‰lb?€‰in |
|
2 |
Instrument Panel Upper Trim Panel Fastener (Qty:?€‰3) |
|
3 |
Instrument Panel Upper Trim Panel Procedures
|
 Instrument Panel Upper Trim Panel Replacement - Left Side
Instrument Panel Upper Trim Panel Replacement - Left Side
Callout
Component Name
Preliminary Procedure
Remove the instrument cluste ...
 Cup Holders
...
Other materials:
Rear Side Door Window Regulator Motor Replacement
Rear Side Door Window Regulator Motor Replacement
Callout
Component Name
Warning: Refer to Glass and Sheet Metal Handling Warning.
Preliminary Procedure
Remove the rear side door window regulator. Refer to Rear ...
Front Floor Console Cover Replacement (Automatic Transmission)
Front Floor Console Cover Replacement
Callout
Component Name
1
Front Floor Console Cover Assembly
Procedures
Apply the parking brake.
Move the shifter from ?€?Park?€? to the ?€?Neutral?€? position.
...
Fuel Tank Fuel Pump Module Replacement (Steel Tank)
Special Tools
EN-48279 Fuel Sender Lock Ring Wrench
For equivalent regional tools, refer to Special Tools.
Removal Procedure
Relieve the fuel system pressure. Refer to Fuel Pressure Relief.
Remove the fuel tank. Refer to Fuel Tank Replacement.
Disconnect the ...

0.005