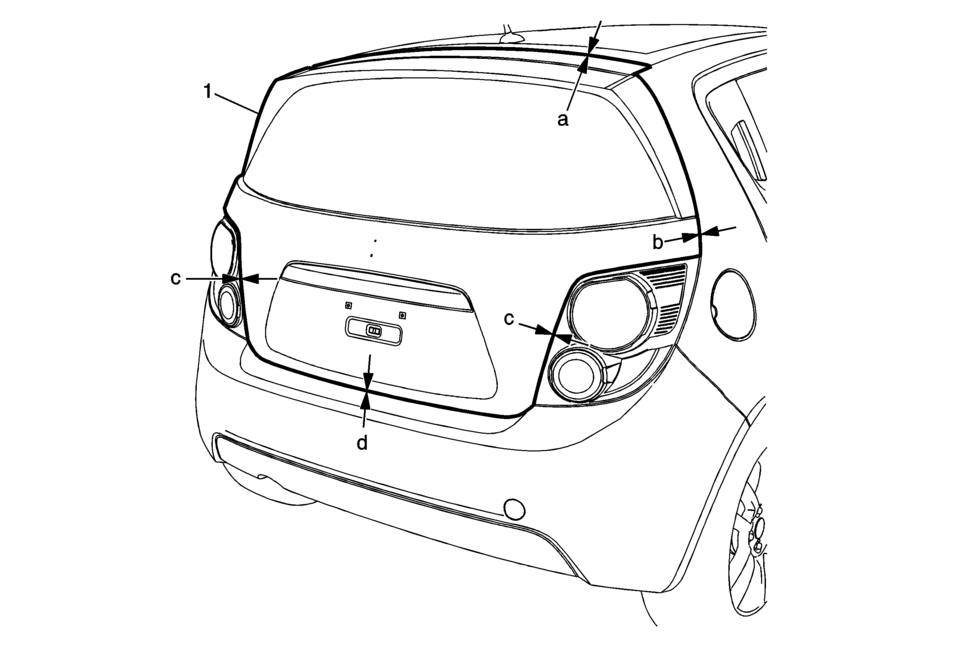
Chevrolet Sonic Repair Manual: Liftgate Adjustment
|
Callout |
Component Name |
|---|---|
|
1 |
Liftgate Caution: Refer to Fastener Caution.
22?€‰Y (16?€‰lb?€‰ft) |
 Adhesive Installation of Liftgate Windows
Warning: Refer to Glass and Sheet Metal Handling Warning.
Use a urethane adhesive systems which meet GM Specification GM?€‰3651G.
Remove all mounds or loose pieces of urethane ad ...
 Liftgate Assist Rod Caution
Caution: Apply pressure only at the end of the liftgate/hood assist
rod that you are removing or attaching. Do NOT apply pressure to the middle
of the rod because damage or bending will resul ...
Other materials:
Brake System Warning Light
The vehicle brake system consists of two hydraulic circuits. If one circuit is
not working, the remaining circuit can still work to stop the vehicle. For normal
braking performance, both circuits need to be working
If the warning light comes on, there is a brake problem. Have the brake system
...
Intake Manifold Assemble (1.8L LUW and LWE)
Install the 4 NEW multiport fuel injector seals (4).
Install the multiport fuel injection fuel rail (2) and the fuel injectors (3)
to the intake manifold (5).
Caution: Refer to Fastener Caution.
Install the 2 multiport fuel in ...
2-6 Clutch Piston Removal
2-6 Clutch Piston Removal
Callout
Component Name
1
2? Clutch Spring Retainer
Special Tool
DT-28585 Snap Ring Remover or equivalent
For equivalent regional tools, refer to Special
Tools.
2 ...

0.0045