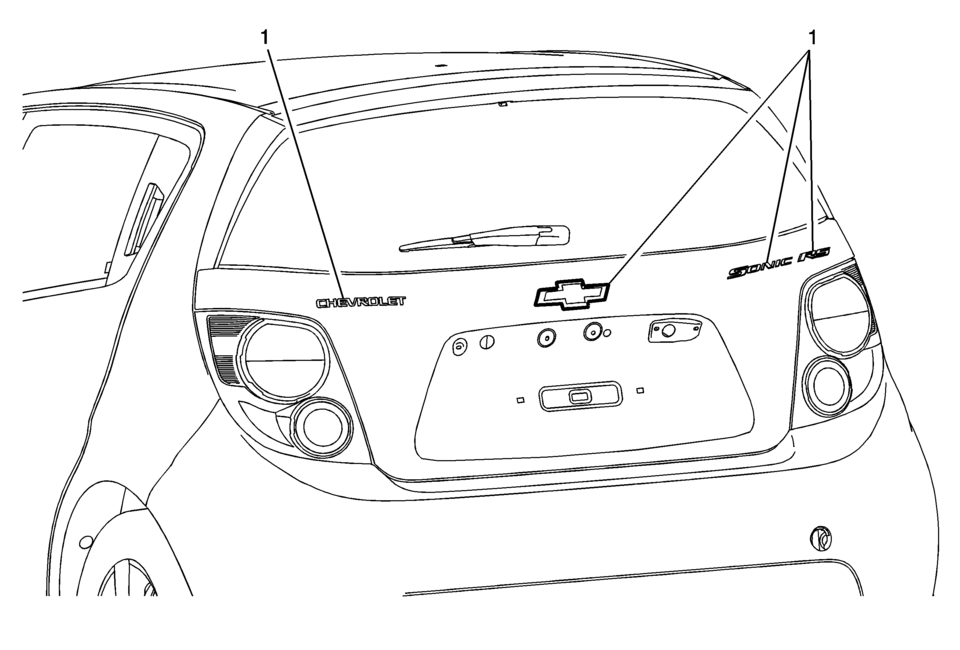
Chevrolet Sonic Repair Manual: Liftgate Emblem/Nameplate Replacement (Hatchback)
|
Callout |
Component Name |
|---|---|
|
1 |
Liftgate Emblem/Nameplate Assembly Caution: Refer to Exterior Trim Emblem Removal Caution.
|
 Liftgate Assist Rod Caution
Caution: Apply pressure only at the end of the liftgate/hood assist
rod that you are removing or attaching. Do NOT apply pressure to the middle
of the rod because damage or bending will resul ...
 Liftgate Replacement
Liftgate Replacement
Callout
Component Name
Preliminary Procedures
Disconnect the electrical connectors.
Disconnect the liftgat ...
Other materials:
Front Side Door Window Switch Bezel Replacement (Right Side)
Front Side Door Window Switch Bezel Replacement
Callout
Component Name
Preliminary Procedure
Remove the front side door trim. Refer to Front Side Door Trim Replacement.
1
Front Side Door Window S ...
Front Side Door Window Regulator Handle Replacement
Front Side Door Window Regulator Handle Replacement
Callout
Component Name
1
Front Side Door Window Regulator Handle Clip
Procedure
Use the appropriate tool, remove the clip from handle.
2
...
Engine Coolant Temperature Sensor Replacement - Radiator
Engine Coolant Temperature Sensor Replacement - Radiator
Callout
Component Name
Preliminary Procedure
Drain the cooling system. Refer to
Cooling System Draining and Filling.
Remove the right front wheelhouse liner. Ref ...

0.0053