Chevrolet Sonic Repair Manual: Liftgate Side Applique Replacement (Hatchback)
|
Callout |
Component Name |
|---|---|
Preliminary Procedure
|
|
|
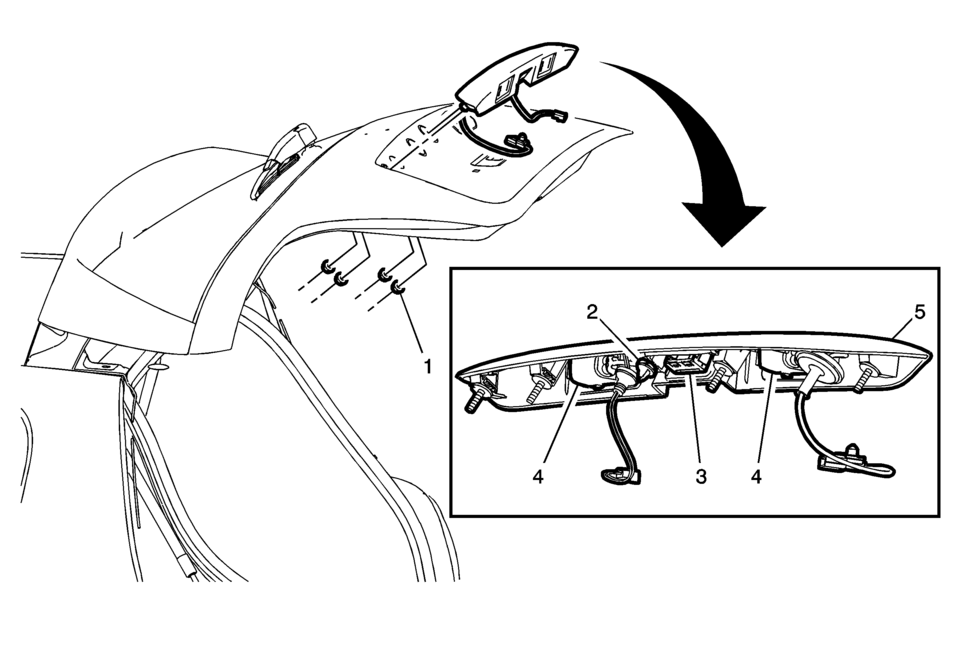
1 |
Liftgate Side Applique Nut (Qty:?€‰4) Caution: Refer to Fastener Caution.
5?€‰Y (44?€‰lb?€‰in) |
|
2 |
Liftgate Side Applique Retainer |
|
3 |
Liftgate Release Switch Procedure
Remove the liftgate release switch. Refer to Liftgate Release Switch Replacement |
|
4 |
Rear License Plate Lamp (Qty:?€‰2) Procedure
Remove the rear license plate lamps. Refer to Rear License Plate Lamp Replacement. |
|
5 |
Liftgate Side Applique |
 Front Compartment Front Insulator Cover Replacement
Front Compartment Front Insulator Cover Replacement
Callout
Component Name
1
Front Compartment Front Insulator Cover Scr ...
 Rear Compartment Lid Applique Replacement
Rear Compartment Lid Applique Replacement
Callout
Component Name
Preliminary Procedure
Open and support the rear compartment lid.
...
Other materials:
Replacing Brake System Parts
The braking system on a vehicle is complex. Its many parts have to be of top
quality and work well together if the vehicle is to have really good braking. The
vehicle was designed and tested with top-quality brake parts. When parts of the
braking system are replaced, be sure to get new, approv ...
Throttle Actuator Control (TAC) System Description
acceleratorpedalassemblyi/pappsensor1appsensor2ignitionvoltage(ifequipped)cruisecontrolswitch(ifequipped)(ifequipped)throttlebodybcmtpsensor1tpsensorreducedenginepowerlampthrottleactuatormotor
The engine control module (ECM) is the control center for the throttle actuator
control (TAC) system. ...
Engine Replacement (Manual Transmission)
Special Tools
J-45859 Wheel Drive Shaft Remover .
CH-807 Closure Plugs .
For equivalent regional tools, refer to Special Tools.
Removal Procedure
Remove the battery and battery tray. Refer to
Battery Tray Replacement.
Relieve the fuel system pressure. Refer to
...

0.0059