Chevrolet Sonic Repair Manual: Liftgate Window Replacement
Special Tools
- BO-24402-A Glass Sealant Remover (Cold Knife)
- BO-39032 Stationary Glass Removal Tool
- Use an adhesive that is approved by GM
For equivalent regional tools, refer to Special Tools
- Removal Procedure
-
- Open the liftgate.
- Remove the liftgate trim. Refer to Liftgate Trim Finish Panel Replacement.
- Disconnect the electrical connectors from the liftgate window defogger bus bar.
- Remove the rear window wiper arm. Refer to Rear Window Wiper Arm Replacement.
- Remove the rear spoiler. Refer to Rear End Spoiler Replacement.
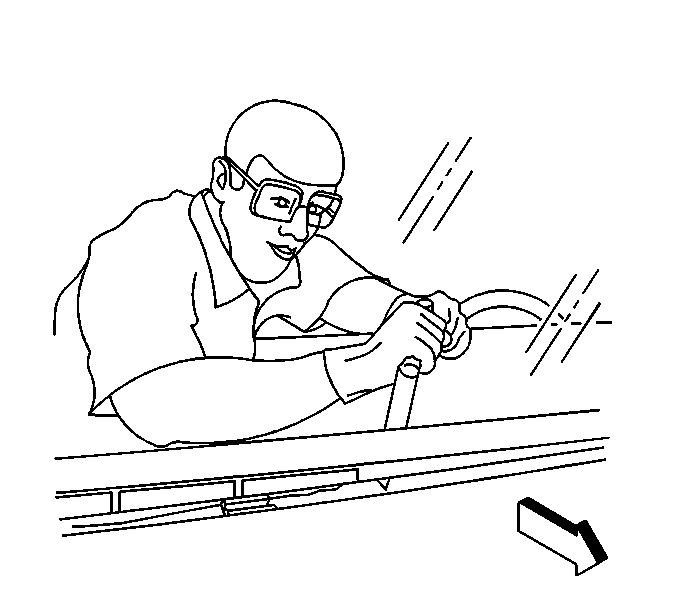
- Cover the following parts to protect from broken glass:
Warning:
Refer to Cracked Window Warning.
Note:
Before cutting out a stationary window, apply a double layer of masking tape around the perimeter of the painted surfaces and the interior trim.
Warning:
Refer to Defroster Outlet Warning.
- Upper dash pad
- Defroster outlets and A/C outlets
- Seats and carpeting
Note:
Keep the cutting edge of the appropriate tool against the window. There are window locating pins, one in each upper corner of the window. Use care Not to remove or cut them off when removing the window. If the window locator pins are cut, it will be necessary to tape the window in place.
- This will allow the auto-adhesive to be separated from the window.
- Leave a base of auto-adhesive on the pinchweld flange.
- The only suitable lubrication is clean water.
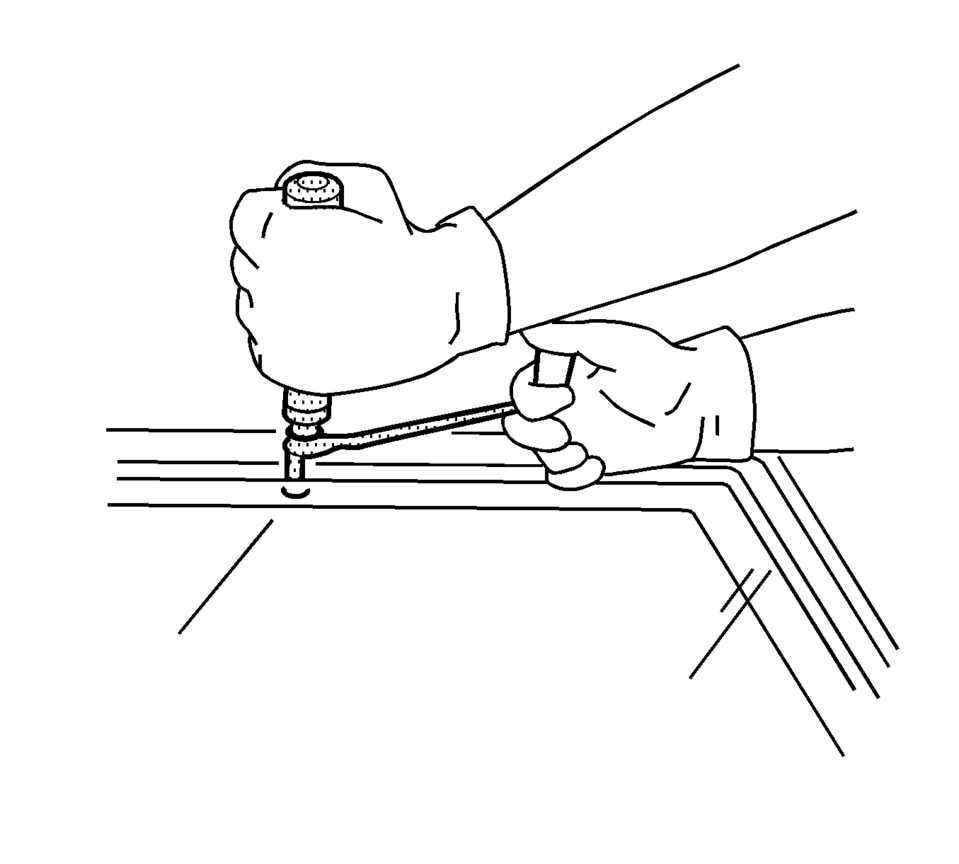
- Use BO-24402-A Glass Sealant Remover (Cold Knife).
- BO-39032 Stationary Glass Removal Tool, or equivalent in order to remove the window.
Note:
Keep the cutting edge of appropriate tool the against the window. Do this from inside the vehicle.
- Use the appropraite tool to remove the bottom of the window from the auto-adhesive. Keep the cutting edge of the tool against the window. Do this from inside the vehicle.
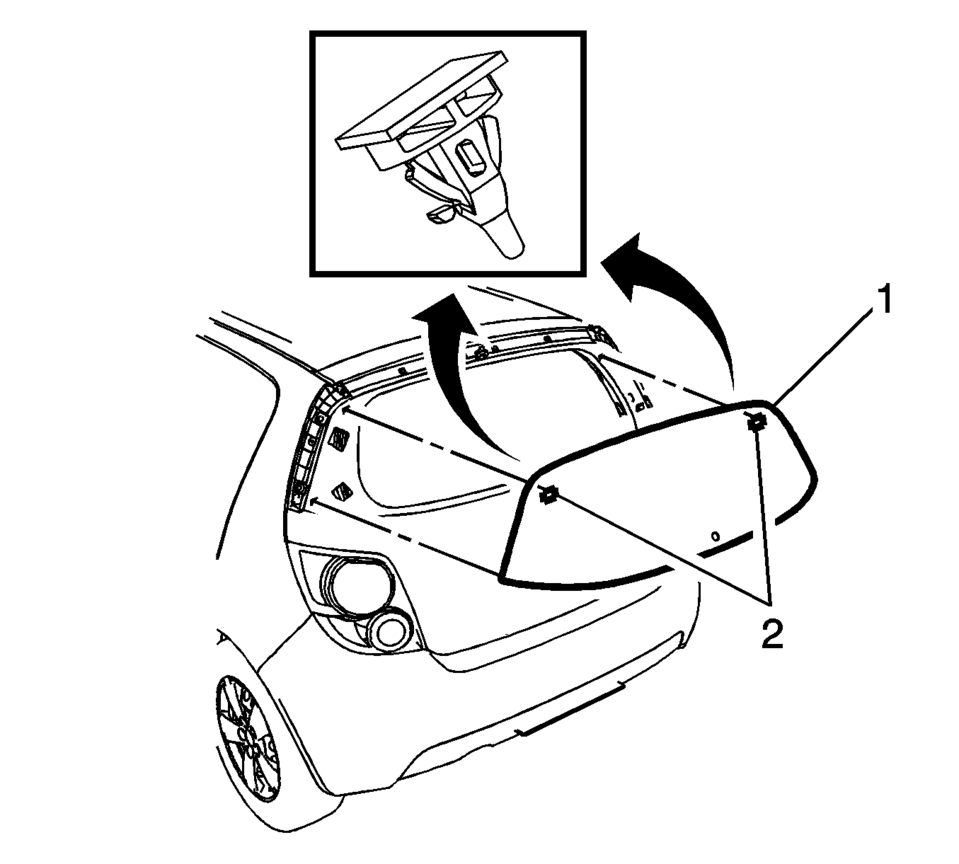
- With an assistant, remove the window?€‰(1) from the vehicle.
- Installation Procedure
-
- Install the liftgate window into the opening. Refer to Adhesive Installation of Liftgate Windows.
- Install the rear spoiler. Refer to Rear End Spoiler Replacement.
- Install the rear window wiper arm. Refer to Rear Window Wiper Arm Replacement.
- Connect the liftgate window defogger electrical connectors to the bus bar.
- Install the liftgate trim. Refer to Liftgate Trim Finish Panel Replacement.
- Remove the double layer of masking tape around the perimeter of the painted surfaces and the interior trim.
- Close the liftgate.
 Full-Cut Method Description
Note:
If corrosion of the pinch-weld flange is present, or if sheet metal
repairs or replacements are required, refinish the pinch-weld flange in
order to present a clean, primer-onl ...
 Rear Side Door Stationary Window Replacement
Rear Side Door Stationary Window Replacement
Callout
Component Name
Warning: Refer to Glass and Sheet Metal Handling Warning.
...
Other materials:
Headlamp Housing Bracket Replacement
Headlamp Housing Bracket Replacement
Callout
Component Name
Preliminary Procedure
Remove the front bumper fascia. Refer to Front Bumper Fascia Replacement.
1
Headlamp Housing Bracket Screw (Qty:? ...
Windshield Washer Solvent Container Replacement
Windshield Washer Solvent Container Replacement
Callout
Component Name
Preliminary Procedures
Remove the windshield washer solvent container filler tube. Refer
to Windshield Washer Solvent Container Filler Tube Replacement.
...
Overview
The Nissan Armada ProPILOT Assist system is an advanced driver assistance technology
designed specifically for controlled-access highways. It is not intended for urban
streets or rural roads. This system supports the driver by helping maintain lane
centering and keeping a preset following dist ...

0.0062