Chevrolet Sonic Repair Manual: Manual Shift Shaft and Seal Replacement
Special Tools
- DT-45201 Cooler Line Seal Remover
- DT-49101 Seal Installer
For equivalent regional tools, refer to Special Tools.
- Removal Procedure
-
- Remove the battery tray. Refer to Battery Tray Replacement.
- Remove the manual shaft and position switch assembly. Refer to Manual Shift Detent Lever with Shaft Position Switch Assembly Replacement.
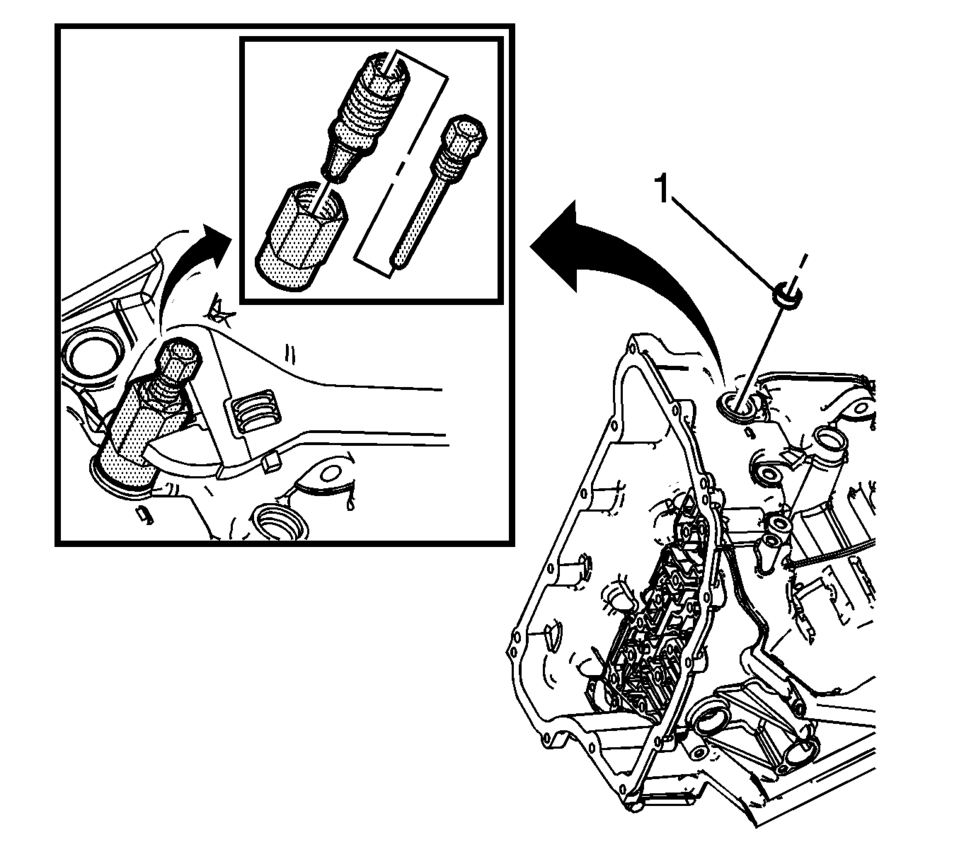
- Remove the manual shaft seal (1) using DT-45201 remover .
- Installation Procedure
-
- Install the manual shaft and position switch assembly. Refer to Manual Shift Detent Lever with Shaft Position Switch Assembly Replacement.
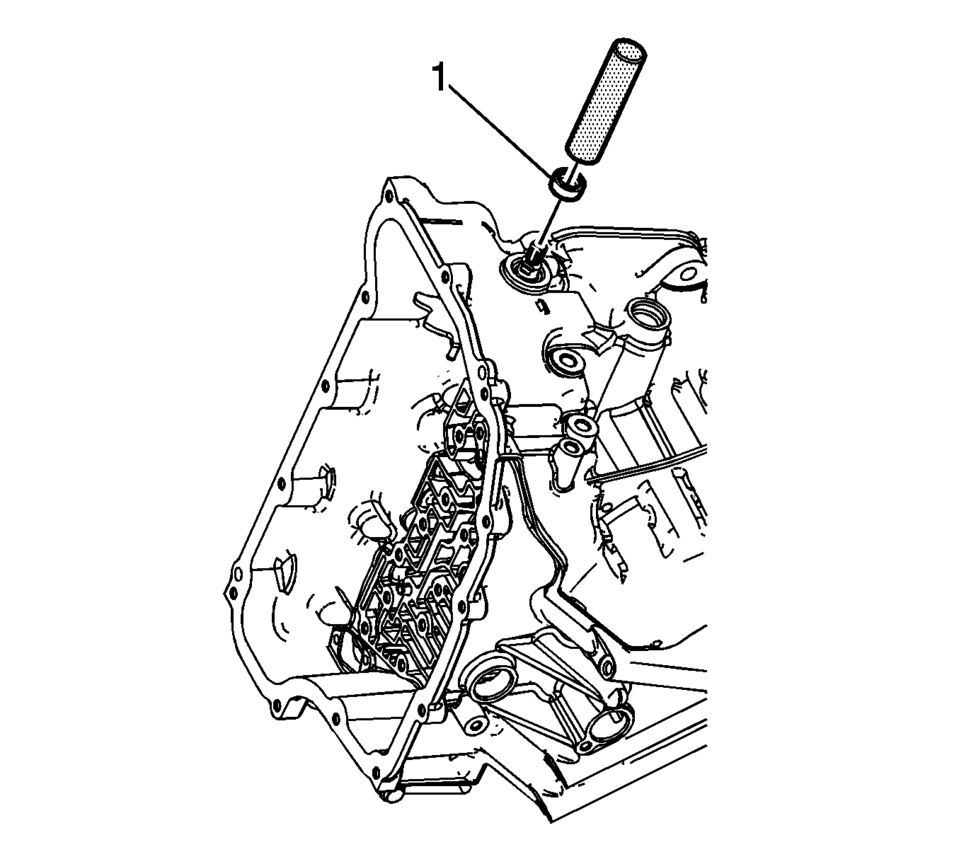
- Install the manual shaft seal (1) using DT-49101 seal installer .
- Install the battery tray. Refer to Battery Tray Replacement.
 Manual Shift Shaft Seal Removal
Manual Shift Shaft Seal Removal
Callout
Component Name
1
Manual Shift Shaft Seal
Note: Use the DT-45201 seal rem ...
 Neutral - Engine Running (Gen 1)
When the gear selector is moved to the Neutral (N) position, the hydraulic and
electrical system operation is identical to Park (P) range. However, if Neutral
is selected after the vehicle was ope ...
Other materials:
Wiper/Washer System Description and Operation
Wiper/Washer System Components
The wiper/washer system consists of the following electrical components:
Windshield Wiper Relay
Windshield Wiper Speed Control Relay
Windshield Washer Pump Relay
Windshield Washer Pump
Windshield Wiper Motor
Windshield Wiper/Washer Switch
...
Gear Position Sensor Replacement
Gear Position Sensor Replacement
Callout
Component Name
Preliminary Procedure
Unclip the engine control module (ECM) and bracket from the battery tray.
1
Gear Position Sensor Magnet Bolt
...
Basic information
WARNING
Failure to properly follow the safety guidelines and operating instructions
for the Nissan Armada Intelligent Blind Spot Intervention (I-BSI) system may result
in serious injury or even fatal accidents.
The Nissan Armada I-BSI system is designed as a driver assistance feature
and ...

0.0063