Chevrolet Sonic Repair Manual: Manual Transmission Shift Lever and Selector Lever Cable Replacement
- Removal Procedure
-
- Remove the battery tray. Refer to Battery Tray Replacement.
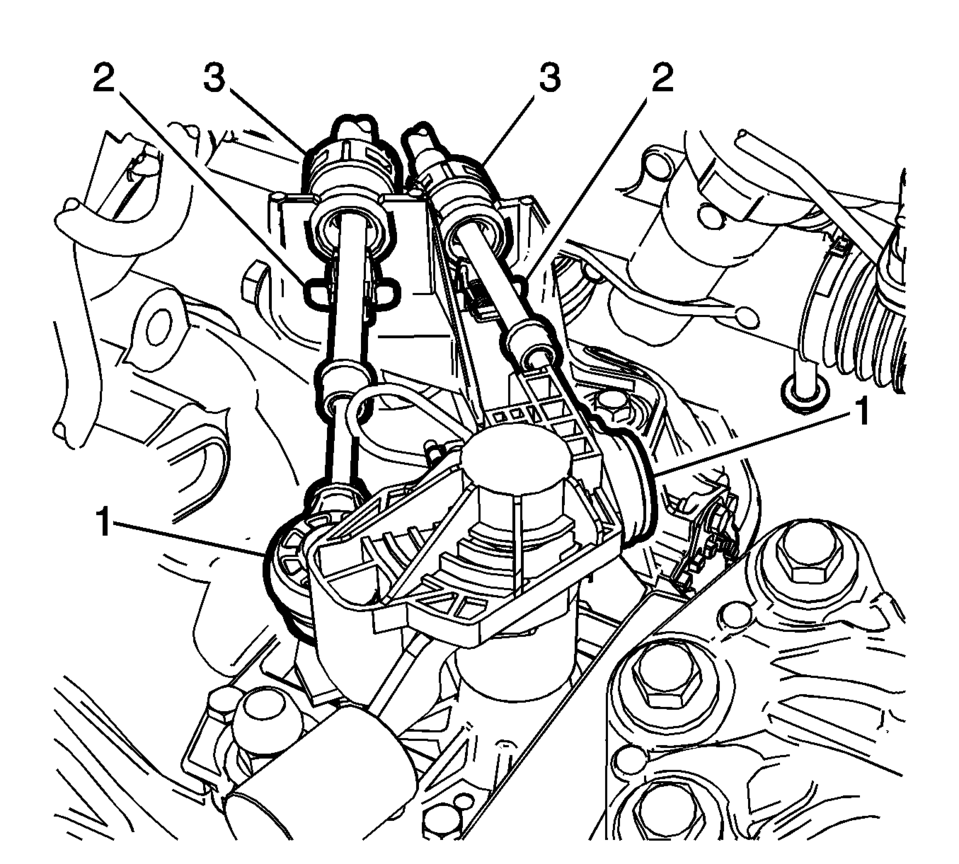
- Disconnect the shift lever and selector cable ends (1) from the transmission shift lever and selector levers.
- Pull the cable retainers (2) to release the shift lever and selector cable from the shift lever and selector cable bracket.
- Disconnect the shift lever and selector cables (3) from the shift lever and selector cable bracket.
- Remove the floor console. Refer to Front Floor Console Replacement.
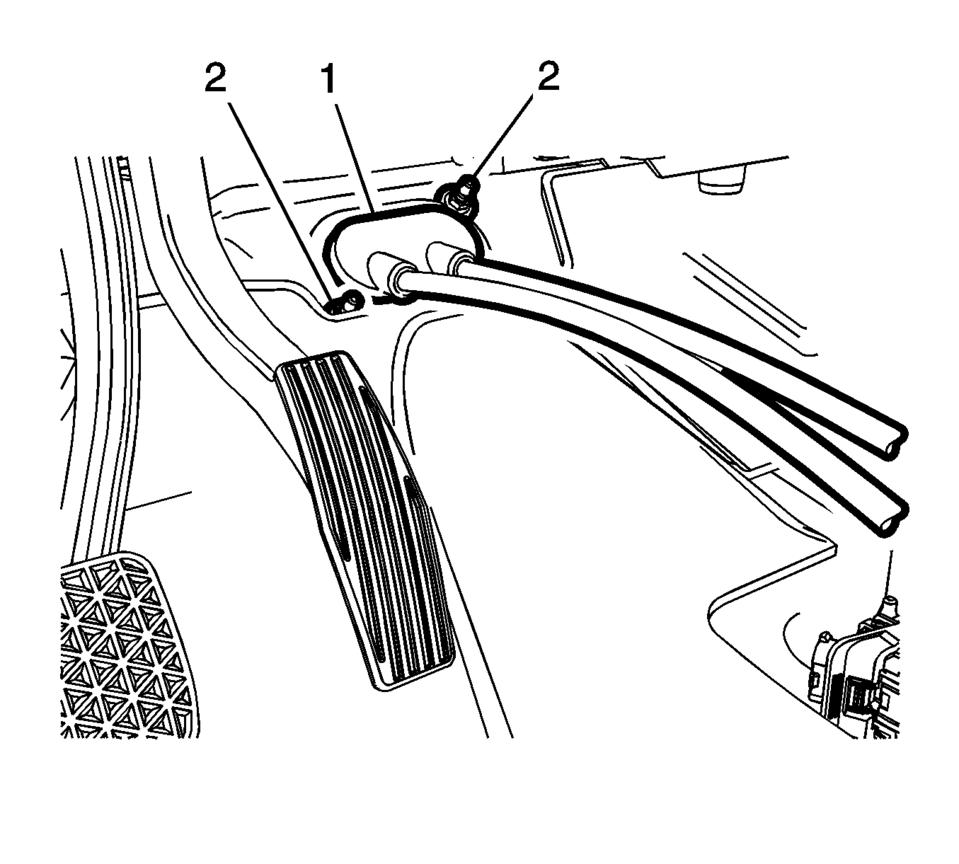
- Move the floor carpet in order to get access to the gear shift lever and selector cable grommet (1).
- Remove the grommet nuts (2).
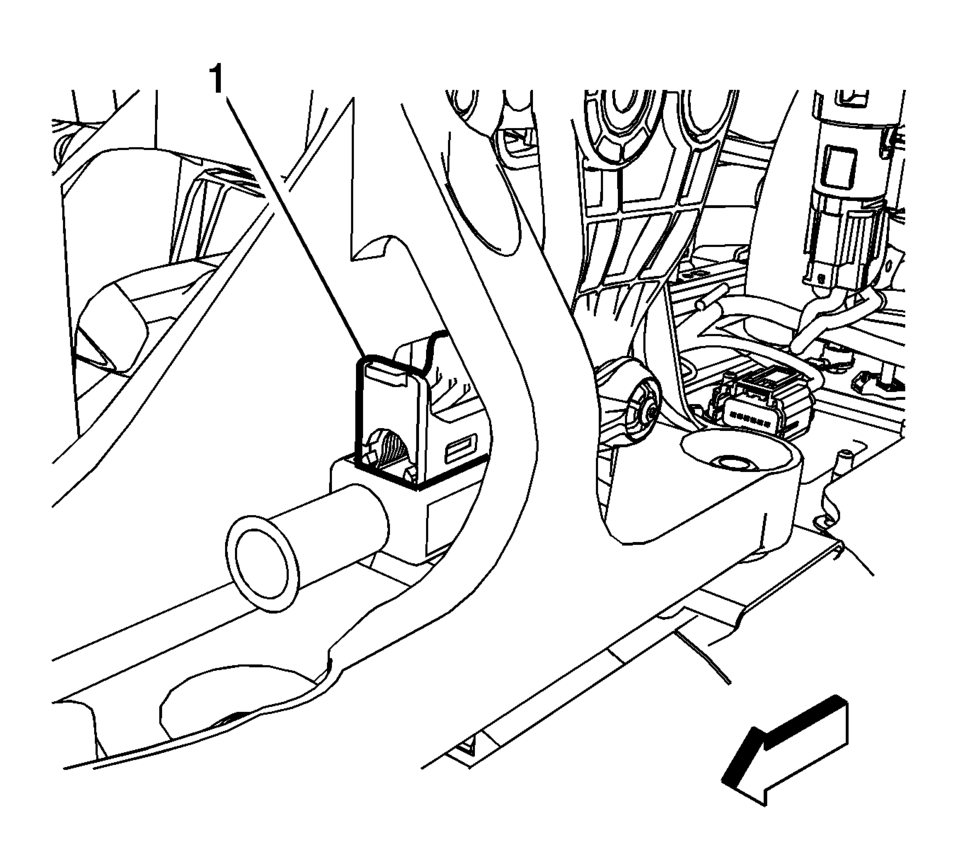
- Lift both cable adjustment retainers (1), one for each cable, to release the shift lever and selector cable.
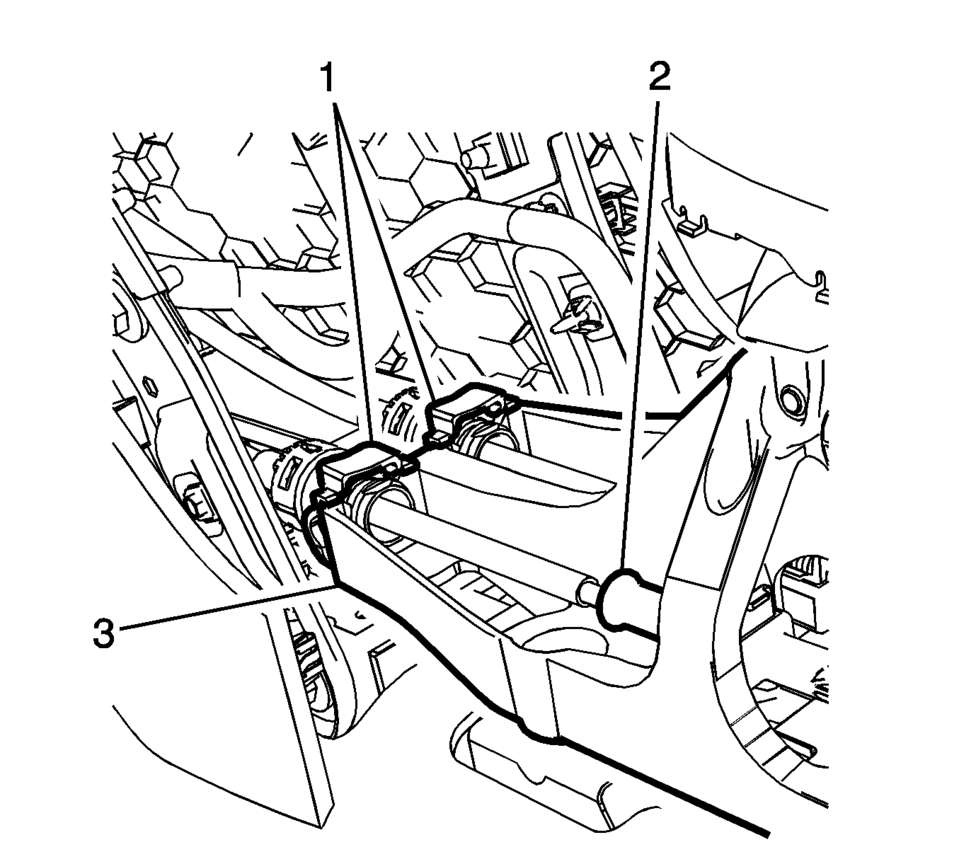
- Pull the shift lever and selector cable retainers (1) from the transmission control assembly (3)
- Remove the shift lever and selector cable from the shift lever and selector control.
- Pull the shift lever and selector cable assembly through the cowl into the passenger compartment.
- Remove the shift lever and selector cable assembly from the vehicle.

\i


.1
- Installation Procedure
-
- Position the shift lever and selector cable assembly in the vehicle.
- Gently pull the shift lever and selector cable assembly through the cowl into the engine compartment.
- Connect the shift lever and selector cable ends (1) to the transmission shift lever and selector lever.
- Install the shift lever and the selector lever cable (3) to the shift lever and selector lever cable bracket.
- Move the floor carpet in order to get access to the shaft lever and selector lever cable grommet (1).
- Install the grommet nuts and tighten to 9 Y
(80 lb in)
- Connect the shift lever and selector lever cables to the shaft and selector control adjusters (2).
- Install the shift lever and selector lever cable retainers (1) to the transmission control (3).
- Press down and Lock both cable adjustment retainers (1) one for each cable, to adjust the shift lever and selector lever cable.
- Adjust the shift lever and selector lever cables. Refer to Manual Transmission Shift Lever Cable Adjustment.
- Install the floor console. Refer to Front Floor Console Replacement.
- Install the battery tray. Refer to Battery Tray Replacement.
- Verify correct operation of the transmission control assembly.

\i

Caution:
Refer to Component Fastener Tightening Caution.

.1

 Manual Transmission Shift Lever and Selector Lever Cable Adjustment
Remove the floor console. Refer to
Front Floor Console Replacement.
Lift upward and disengage (do not remove) both cable lock
adjusters (1) to release the internal cable asse ...
 Range Selector Lever Cable Adjustment
Note: Adjust the automatic transmission range selector cable while
the transmission and the gear selector are in the Park position only. Failure
to do so may cause mis-adjustment.
...
Other materials:
Brake Fluid
The brake/clutch master cylinder reservoir is filled with DOT 3 brake fluid as
indicated on the reservoir cap. See Engine Compartment Overview for
the location of the reservoir.
There are only two reasons why the fluid level in the reservoir might go down:
The fluid level goes down ...
Seat Belt Latch Stop Installation
Seat Belt Latch Stop Installation
Callout
Component Name
Preliminary Procedure
Locate the hole in the seat belt webbing where the original seat
belt stop button was located.
If the original hole in the seat belt webbing i ...
Input, Reaction, and Output Carrier Disassemble
Input, Reaction, and Output Carrier Disassemble
Callout
Component Name
1
Output Carrier Assembly
Note:
The 6T30 and 6T40 have 4 pinions.
The 6T45 and 6T50 have 5 pinions.
...
0.0073
