Chevrolet Sonic Repair Manual: Manual Transmission Shift Lever Cable Adjustment
Special Tools
DT-527-A Adjuster or 5mm drill bit
For equivalent regional tools, refer to Special Tools.
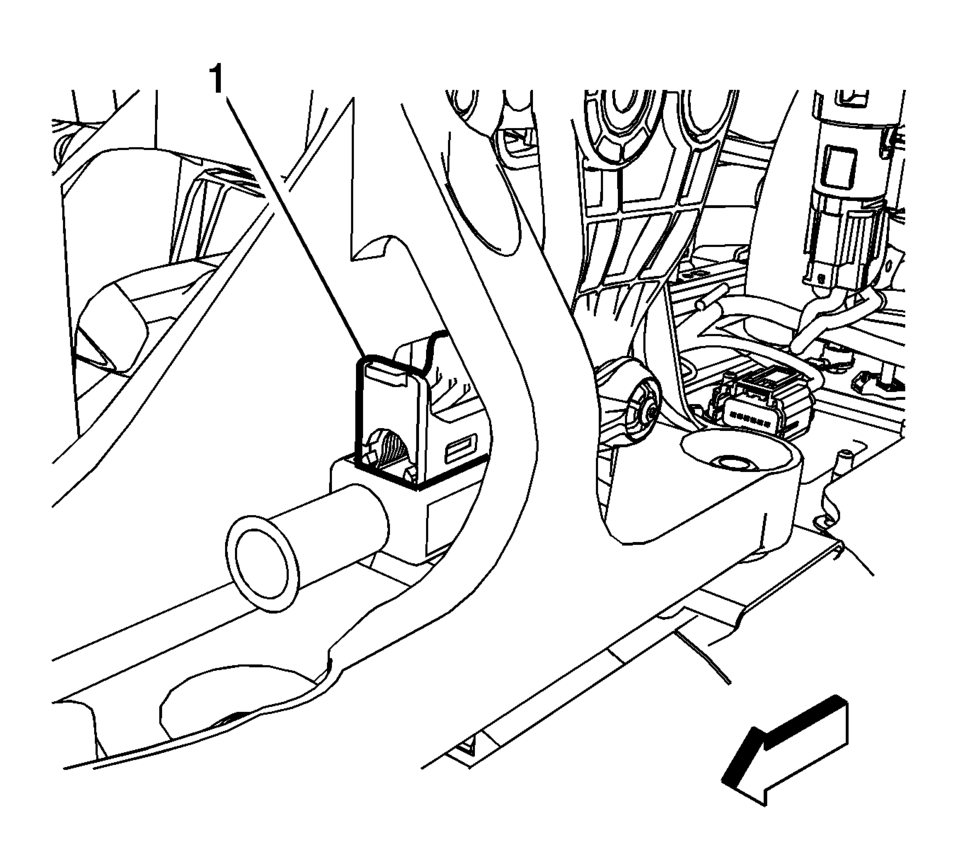
- Remove the floor console. Refer to Front Floor Console Replacement.
- Lift upward and disengage (do not remove) cable lock adjuster (1) to release the internal cable assembly, one for each cable.
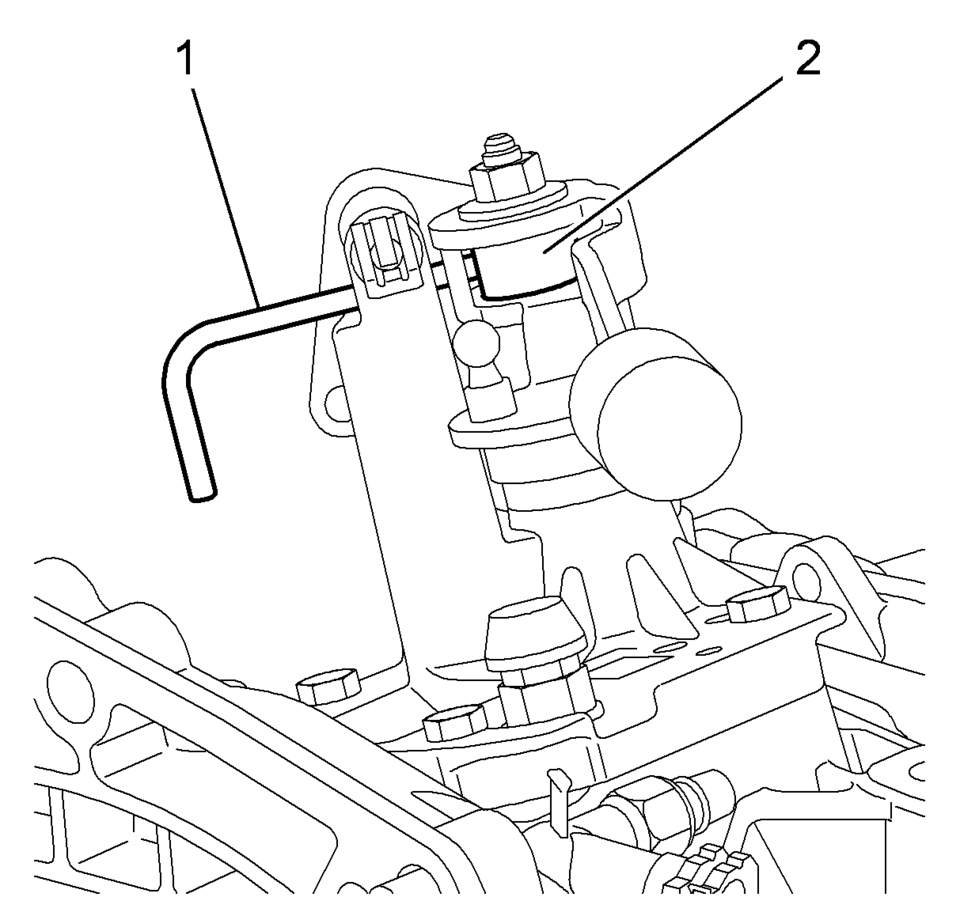
- Lock the transmission gear control with DT-527-A pin (1) or 5mm drill bit.
- Lock the position of the shifter control lever by rotating the reverse lockout device with the following instructions:
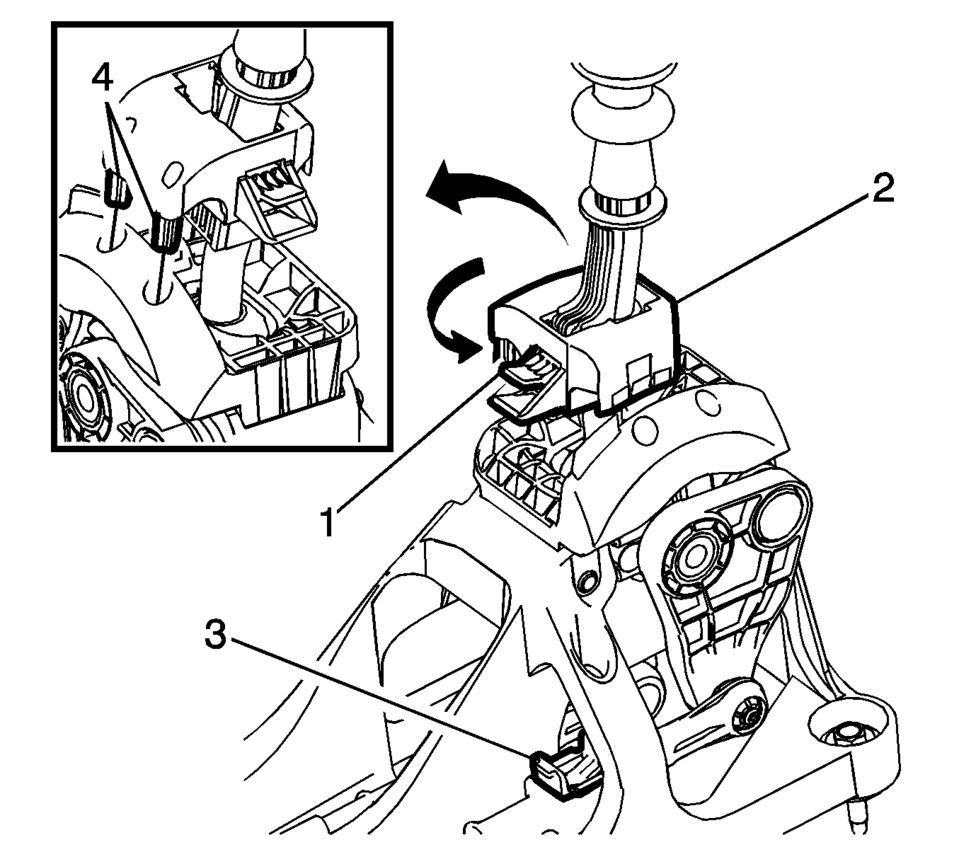
- Push down on tab (1) and pull up on device (2) to release from installed position.
- Rotate device 180 degrees so tab (1) is in the rear of the shift control assembly.
- Secure integral pins in holes located on shifter base by pushing down device (2) until seated.
- Secure adjuster locks (3) by pushing down until locked. One for each cable.
- Reposition the reverse lockout device with the following instructions:
- Push down on tab (1) and pull up on device (2) to release from installed position.
- Rotate device (2) 180 degrees so tab (1) is in the front of the shift control assembly.
- Push downward on the reverse lockout device (2) until tab (1) snaps into detent.
- Remove the DT-527-A lock pin or drill bit from the transmission gear control.
- Install the floor console. Refer to Front Floor Console Replacement.
- Verify correct operation of the transmission control assembly.
Note:
Not using the specified tools may lead to shift system mis-adjustment.
Note:
The hole of the transmission gear control (2) must be aligned to the hole in the base so the pin (1) can pass thru both. The transmission gear control will be locked in the 1? neutral position.

Note:
During this procedure DO NOT touch or preload the fixed shift lever as this may cause mis-adjustment to the shift system.
 Main Shaft Disassemble (Gen 2)
Special Tools
69604356 Gear Pullers
For equivalent regional tools, refer to Special Tools.
Remove the 1st gear thrust washer (1) and the 1st gear (2)
using 69604356 pull ...
 Manual Transmission Shift Lever and Selector Lever Cable Adjustment
Remove the floor console. Refer to
Front Floor Console Replacement.
Lift upward and disengage (do not remove) both cable lock
adjusters (1) to release the internal cable asse ...
Other materials:
Brake Fluid
The brake/clutch master cylinder reservoir is filled with DOT 3 brake fluid as
indicated on the reservoir cap. See Engine Compartment Overview for
the location of the reservoir.
There are only two reasons why the fluid level in the reservoir might go down:
The fluid level goes down ...
Instrument Panel Lower Airbag Replacement - Passenger Side
Instrument Panel Lower Airbag Replacement - Passenger Side
Callout
Component Name
Warning: Refer to SIR Inflator Module Handling and Storage
Warning.
Warning: Refer to SIR Warning.
Preliminary Procedu ...
Intake Manifold Replacement
Special Tools
EN-34730?E1 Pressure Tester
EN-6015 Closure Plugs
For equivalent regional tools, refer to Special Tools
Removal Procedure
Disconnect the battery negative cable. Refer to Battery Negative Cable
Disconnection and Connection.
Remove the engine sight shield. ...

0.0048