Chevrolet Sonic Repair Manual: Oil Pan Replacement
Special Tools
EN-49980 Guidance Pins
For equivalent regional tools, refer to Special Tools.
- Removal Procedure
-
- Remove the right front wheelhouse liner extension. Refer to Front Wheelhouse Liner Inner Front Extension Replacement.
- Remove the oil filter and drain the engine oil. Refer to Engine Oil and Oil Filter Replacement.
- Remove the front insulator cover. Refer to Front Compartment Front Insulator Cover Replacement.
- Remove the front exhaust pipe. Refer to Exhaust Front Pipe Replacement.
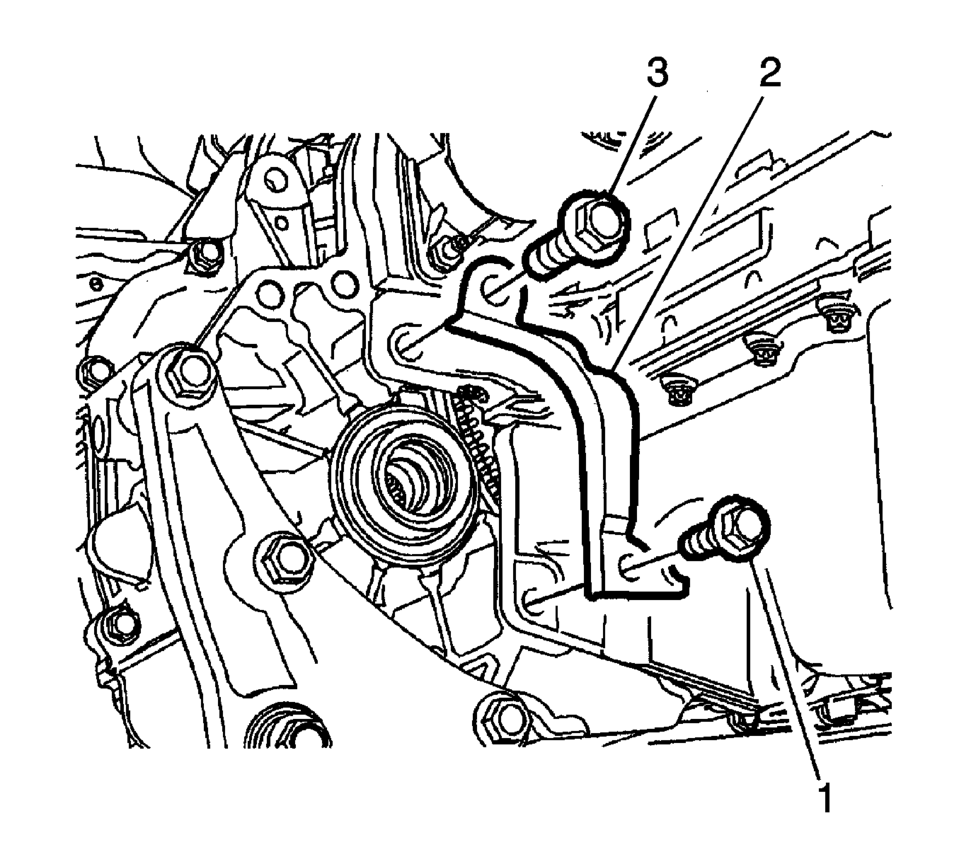
- If equipped with an automatic transmission, remove the oil pan to automatic transmission bolts (1, 3) and automatic transmission converter cover (2).
- Remove the oil pan to automatic transmission bolts (1) .
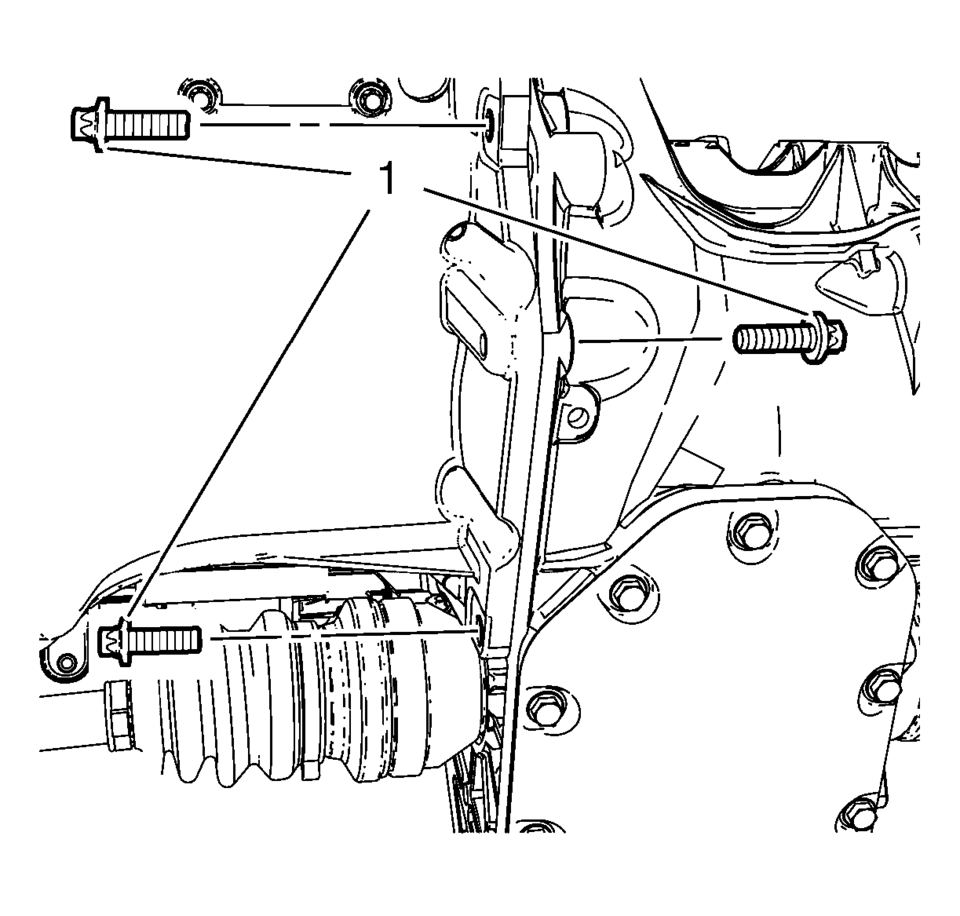
- If equipped with manual transmission, remove the 3 manual transmission to oil pan bolts (1).
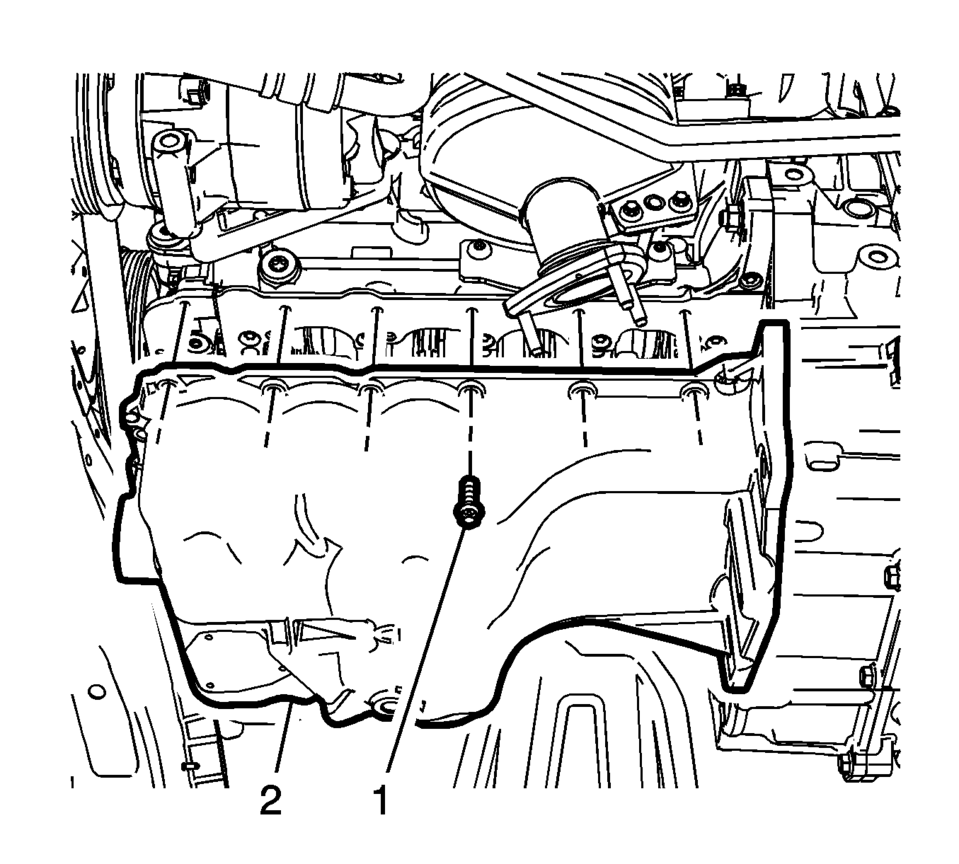
- Remove the oil pan bolts (1) and oil pan.
Note:
The intermediate shaft is shown removed for visual purposes only.

- Installation Procedure
-
- Clean the sealing surface of crankshaft bearing cap tie plate and the groove in the engine front cover from old gasket material, oil, dirt and grease.
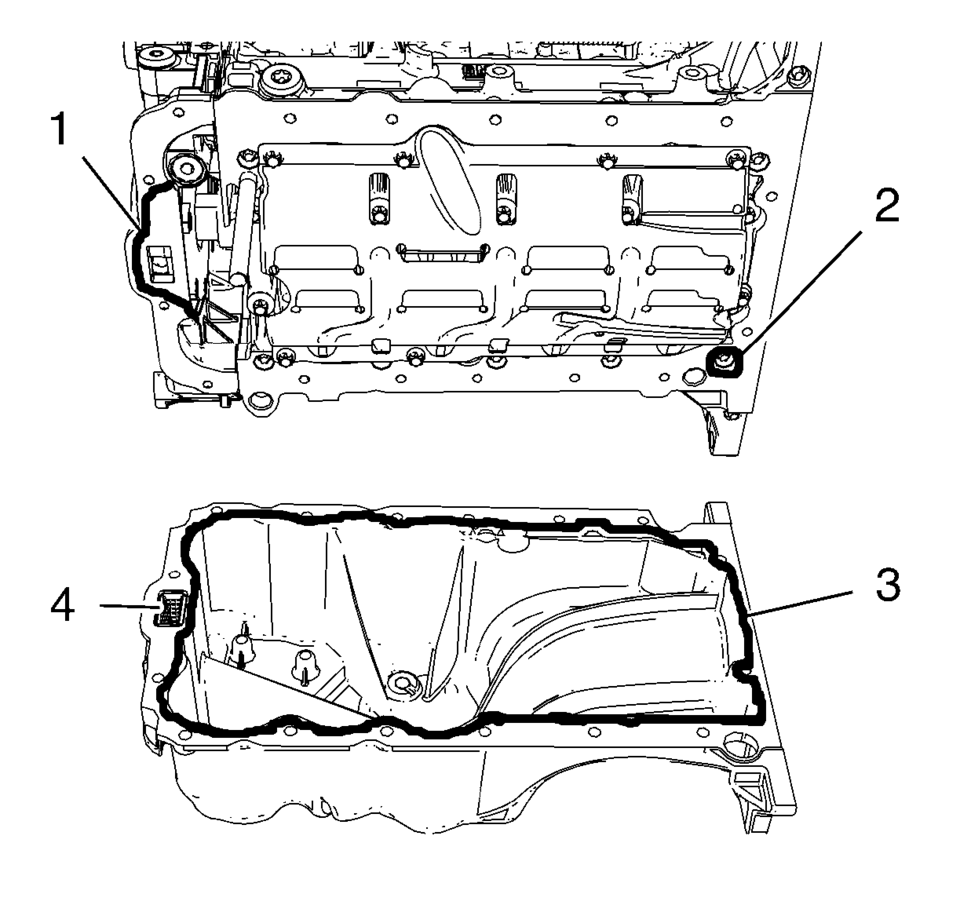
- Install the 2 EN-49980 guidance pins (1) to the shown oil pan screw bores.
- Apply 2 mm (0.0787 in)
thickness of sealing compound (3, 2, 1).
- Loosely install the oil pan bolts (1) in all but the guidance pin locations.
- Remove the EN-49980 guidance pins and install the remaining oil pan bolts.
- Tighten the oil pan bolts to 10 Y (89 lb in)
.
- If equipped with manual transmission, install the 3 manual transmission
to oil pan bolts (1) and tighten to 40 Y (30 lb ft)
.
- If equipped with an automatic transmission, install and the automatic
transmission converter cover (2) and tighten the cover to automatic transmission
bolt (1) to 40 Y (30 lb ft)
and automatic transmission bolt (3) to 60 Y (44 lb ft)
.
- Install the oil pan to automatic transmission bolts (1), and tighten
to 40 Y (30 lb ft)
.
- Install a NEW oil filter and fill the engine with oil. Refer to Engine Oil and Oil Filter Replacement.
- Install the exhaust pipe. Refer to Exhaust Front Pipe Replacement.
- Install the front insulator cover. Refer to Front Compartment Front Insulator Cover Replacement.
- Install the right front wheelhouse liner extension. Refer to Front Wheelhouse Liner Inner Front Extension Replacement.

Note:
The sealing bead should be applied close to the inner edge of the oil pan. Take care that the oil suction gallery (4) will not get contaminated with sealing compound or dirt.
Caution:
Refer to Fastener Caution.
Note:
The complete installation procedure of the oil pan should be done in 10 minutes.
 Oil Pan Removal
Remove the 16 oil pan bolts (1).
Caution: Pry the oil pan carefully in order to prevent damage
to the transaxle case or the oil pan sealing surfaces.
Place a ...

Other materials:
Special Tools
Illustration
Tool Number/Description
EL–50334–20
Multi-Media Interface Tester (MIT)
EL–50334–50
USB Cable and Adapter Kit
EL-48028
Digital Radio Test ...
Taillamps, Turn Signal, Stoplamps, and Back-Up Lamps
Sedan Taillamp Shown, Hatchback Taillamp Similar
Back-up Lamp
Turn Signal Lamp
Stop Lamp/Taillamp
Sidemarker Lamp
To replace one of these bulbs:
Open the trunk.
Remove the two screws, which secure the taillamp assembly.
Remove the taillamp assembly by pulling it straight ...
Engine Oil Cooler Replacement
Removal Procedure
Disconnect battery negative cable. Refer to Battery Negative Cable Disconnection
and Connection.
Drain engine coolant. Refer to Cooling System Draining and Filling
Remove the turbocharger oil feed pipe. Refer to Turbocharger Oil Feed
Pipe Replacement ...

0.0073