Chevrolet Sonic Repair Manual: Parking Brake Adjustment (Drum Brake)
Note:
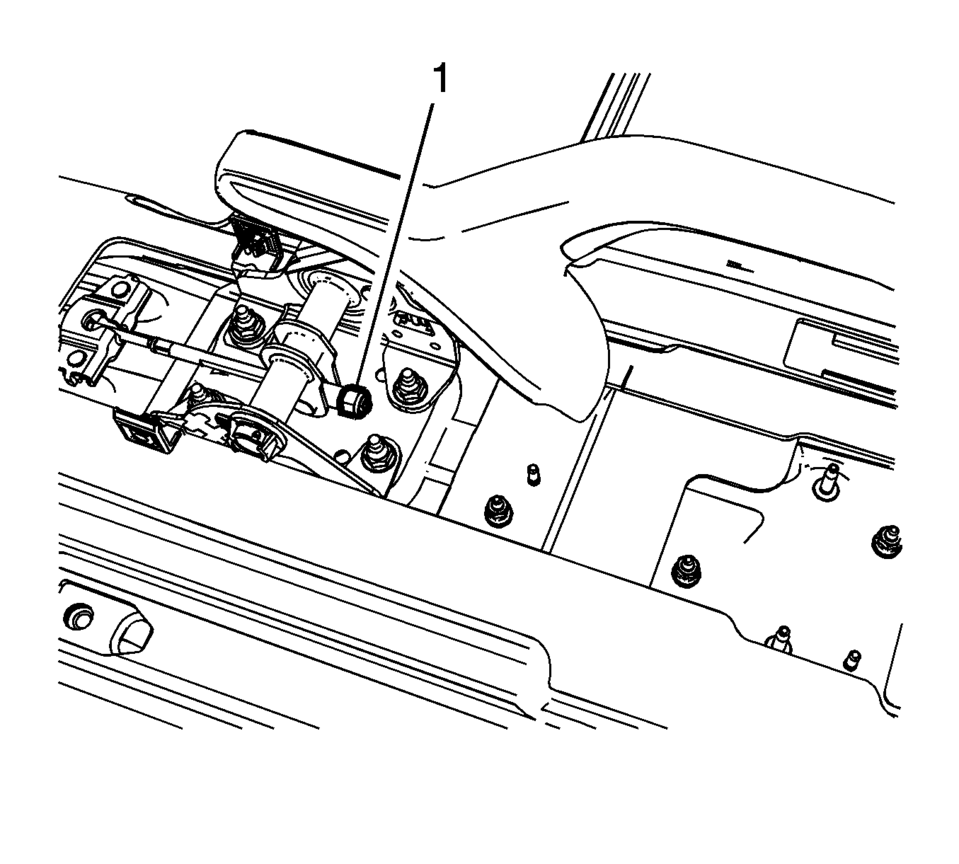
The park brake cable adjusting nut is a nylon lock type. Use ONLY HAND TOOLS whenever tightening or loosening the adjusting nut.
- Apply and fully release the park brake several times. Verify that the park brake lever releases completely.
- Turn ON the ignition. Verify the red BRAKE warning lamp is not illuminated.
- If the red BRAKE warning lamp is illuminated, verify the following:
- The park brake lever is in the fully released position and against the stop.
- There is no slack in the park brake cables.
- One of the brake drums should not rotate forward or rearward.
- The other brake drum should not rotate forward or rearward, or should require substantial effort to rotate.
 Drum Brake System Description and Operation
System Component Description
The drum brake system consists of the following:
Drum Brake Shoes
Applies mechanical output force, from hydraulic brake wheel cylinders,
to frict ...
 Parking Brake Cable Replacement (Drum Brake)
Removal Procedure
Remove the front floor console. Refer to Front Floor Console Replacement.
Ensure that the parking brake lever is in the fully released position.
Us ...
Other materials:
Automatic Transmission
Move the shift lever to P (Park) or N (Neutral). The engine will not start in
any other position. To restart the engine when the vehicle is already moving, use
N (Neutral) only.
Caution
Do not try to shift to P (Park) if the vehicle is moving. If you do, you could
damage the transmission. Sh ...
Difference between predictive and actual distances
Basic information
The Nissan Armada display guide lines and their projected positions on the ground
are intended as approximate references only and should not be relied upon as exact
measurements.
Due to factors such as road incline, uneven terrain, and objects that extend
outward, the actua ...
Sonar system limitations
WARNING
The following limitations apply to the Nissan Armada sonar system. Failure
to understand and follow these limitations may result in serious injury or even
fatal accidents.
Carefully review all limitations of the Nissan Armada sonar system. Environmental
conditions such as heavy r ...

0.0048