Chevrolet Sonic Repair Manual: Parking Brake Cable Replacement (Drum Brake)
- Removal Procedure
-
- Remove the front floor console. Refer to Front Floor Console Replacement.
- Ensure that the parking brake lever is in the fully released position.
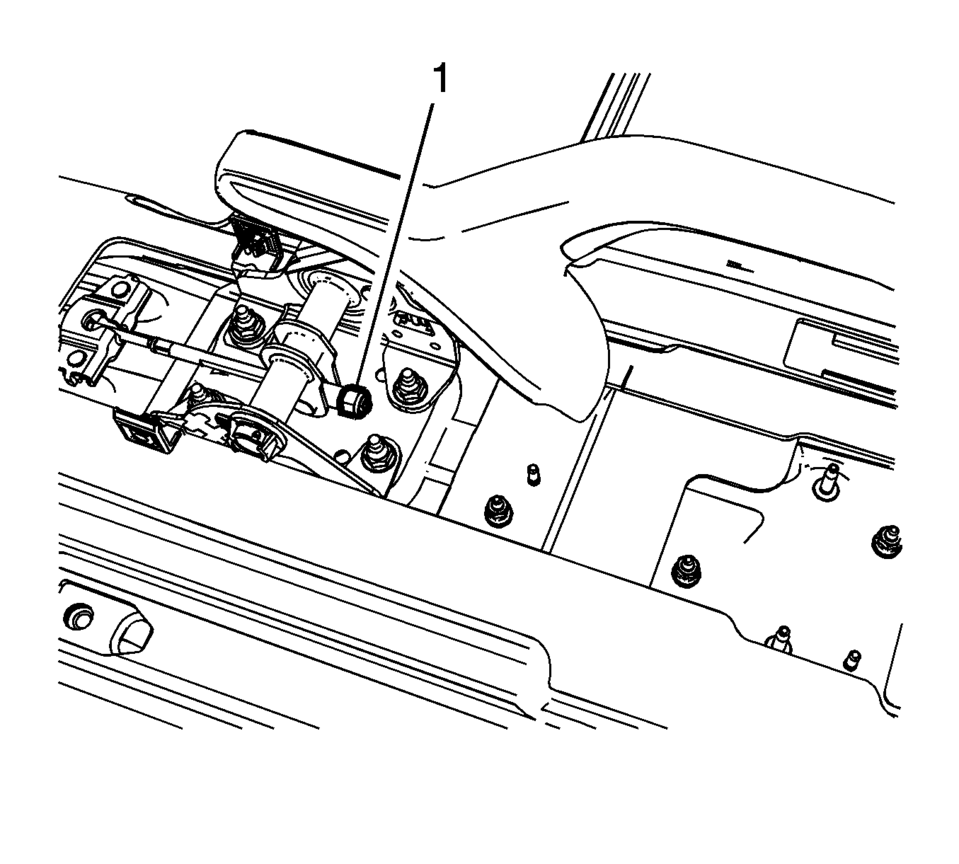
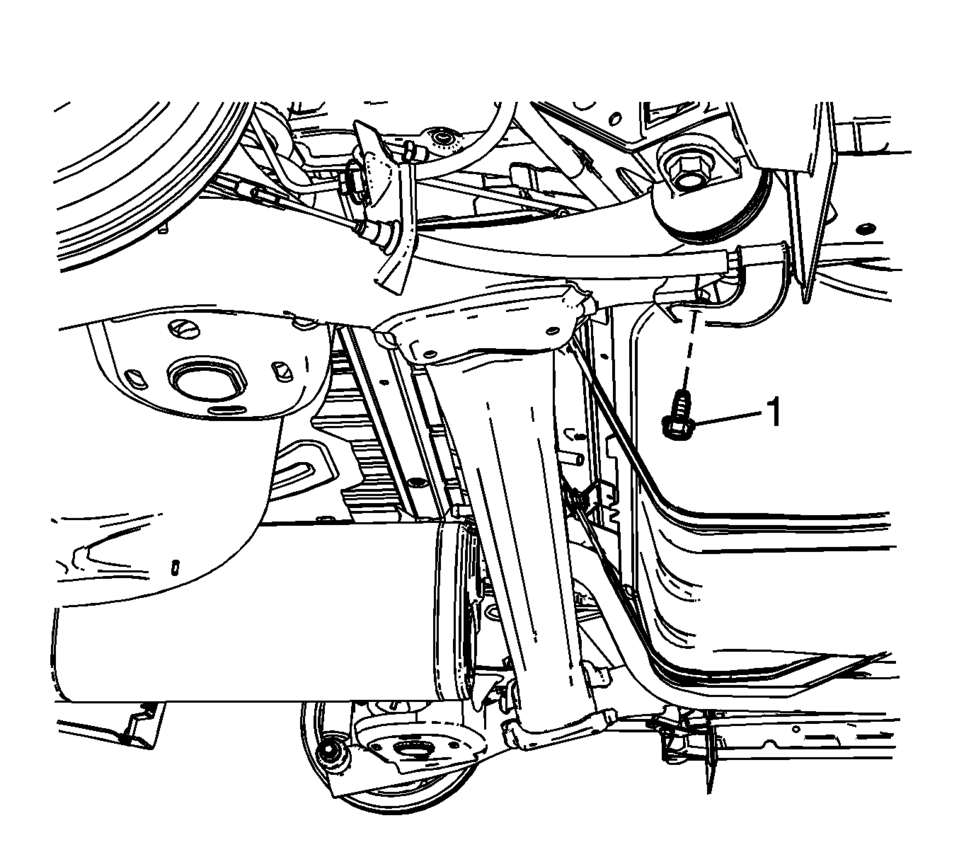
- Using ONLY HAND TOOLS, remove the adjusting nut (1) from the end of the front park brake cable threaded rod.
- Remove the rear seat cushion. Refer to Rear Seat Cushion Removal and Installation.
- Position the rear floor carpet forward to access the parking brake cable pass through grommets.
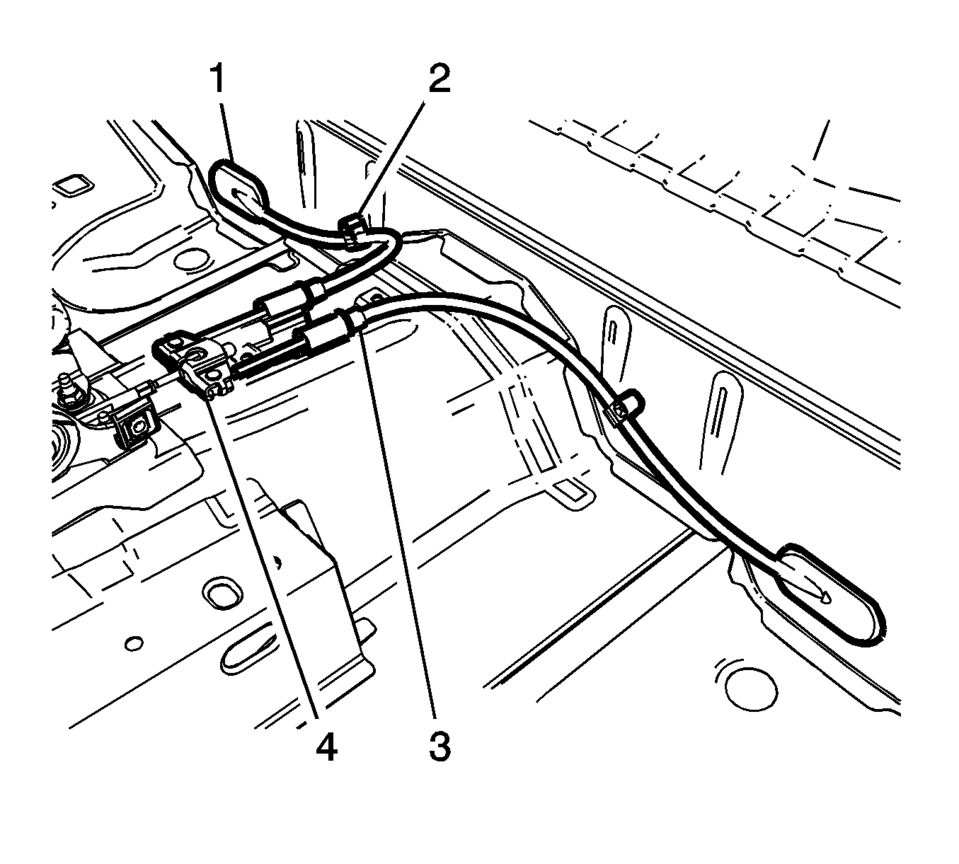
- Release the parking brake cable pass through grommets (1).
- Release the parking brake cable routing clips (2).
- Release the parking brake cable collars (3) from the floor tunnel bracket.
- Disconnect the park brake lever cable from the equalizer (4).
- Raise and support the vehicle. Refer to Lifting and Jacking the Vehicle.
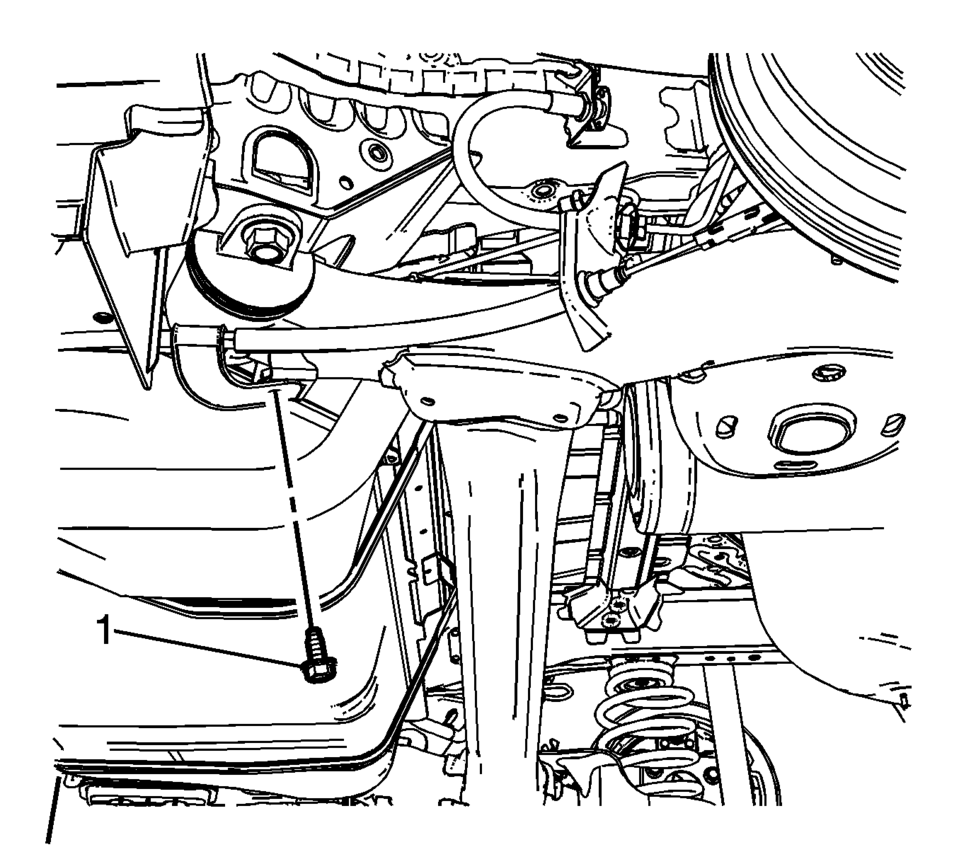
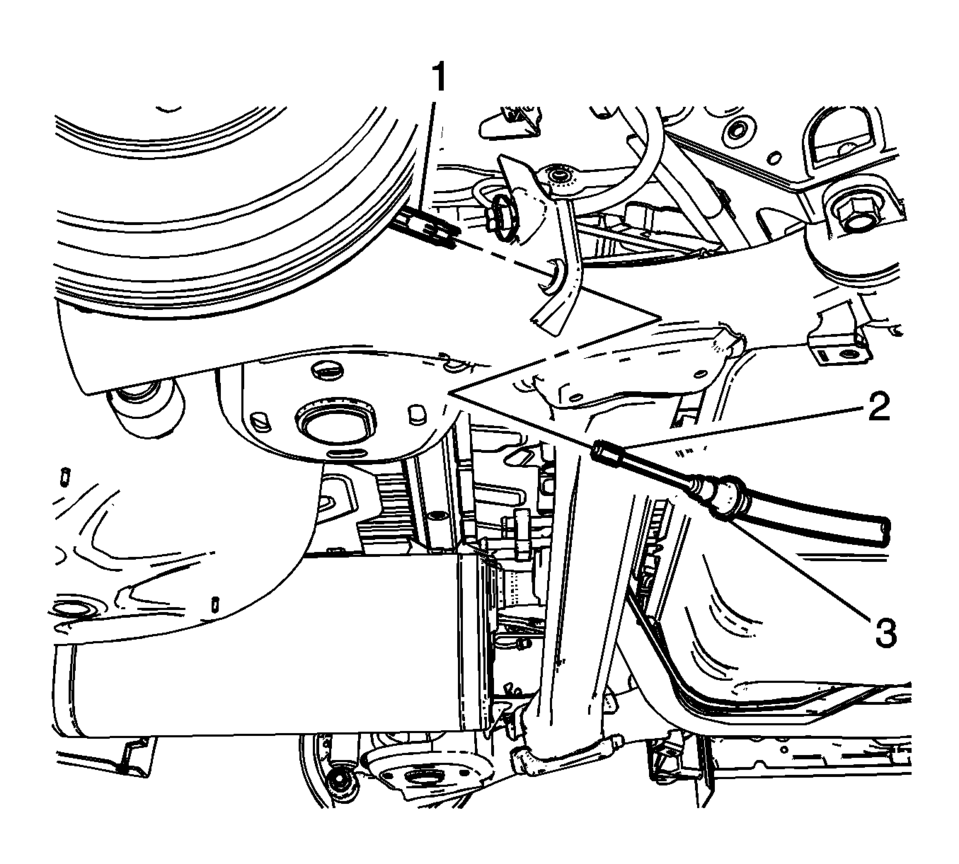
- Remove the left parking brake cable bracket bolt (1).
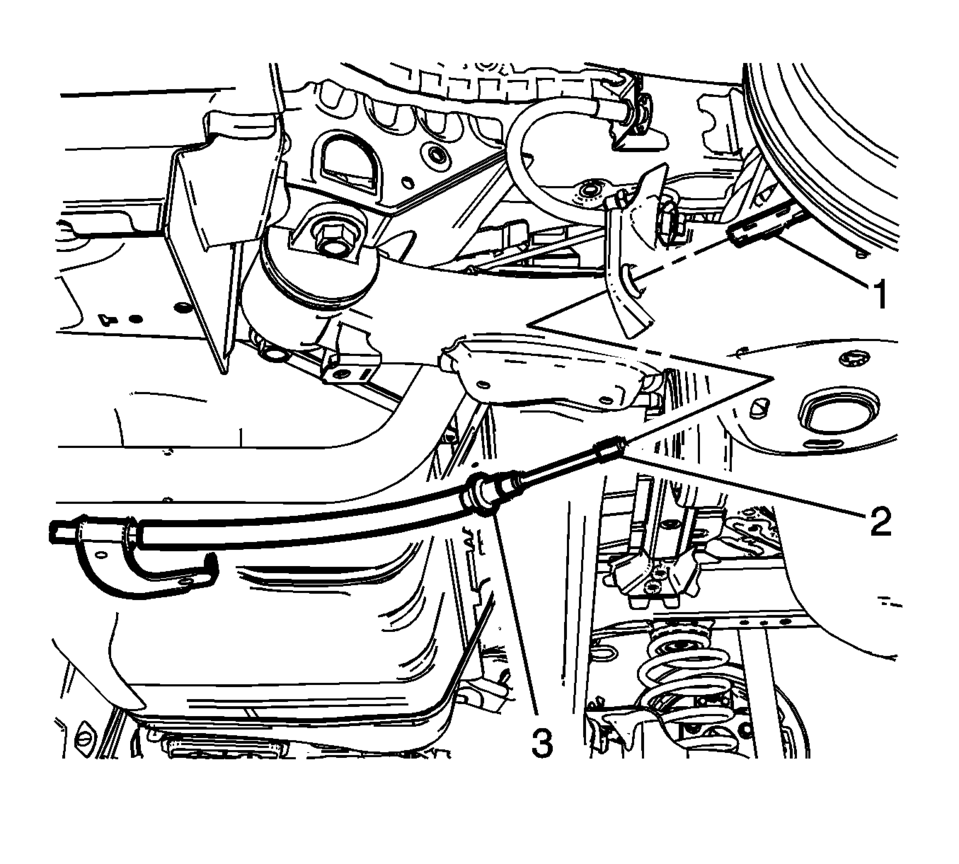
- Disconnect the left parking brake cable connector (1) from the left parking brake cable end (2)
- Release the left parking brake cable retainer (3) from the rear axle bracket.
- Remove the right parking brake cable bracket bolt (1).
- Disconnect the right parking brake cable connector (1) from the right parking brake cable end (2)
- Release the left parking brake cable retainer (3) from the rear axle bracket.
- Feed the parking brake cable through the vehicle body.
- Lower the vehicle and remove the parking brake cable and equalizer assembly from inside the vehicle.
..
- Installation Procedure
-
- Install the parking brake cable pass through grommets (1).
- Install the parking brake cable routing clips (2).
- Install the parking brake cable collars (3) to the floor tunnel bracket.
- Connect the park brake lever cable to the park brake cable equalizer (4).
- Reposition the rear floor carpet.
- Install the rear seat cushion. Refer to Rear Seat Cushion Removal and Installation.
- Raise and support the vehicle. Refer to Lifting and Jacking the Vehicle.
- Connect the right parking brake cable connector (1) to the right parking brake cable end (2)
- Install the right parking brake cable retainer (3) to the rear axle bracket.
- Install the right parking brake cable bracket bolt (1) and tighten to
22 Y (16 lb ft)
.
- Connect the left parking brake cable connector (1) to the left parking brake cable end (2)
- Install the left parking brake cable retainer (3) to the rear axle bracket.
- Install the left parking brake cable bracket bolt (1) and tighten to
22 Y (16 lb ft)
.
- Lower the vehicle.
- Using ONLY HAND TOOLS, loosely install the adjusting nut (1) to the front park brake cable threaded rod.
- Adjust the parking brake. Refer to Parking Brake Adjustment.
- Install the front floor console. Refer to Front Floor Console Replacement.
..
Caution:
Refer to Fastener Caution.
 Parking Brake Cable Replacement (Disc Brake)
Removal Procedure
Remove the front floor console. Refer to Front Floor Console Replacement.
Ensure that the parking brake lever is in the fully released position.
Using ...
 Steering
...
Other materials:
Remote Control Door Lock Receiver Replacement
Remote Control Door Lock Receiver Replacement
Callout
Component Name
Preliminary Procedure
Remove the windshield outside moisture sensor cover. Refer to Windshield
Outside Moisture Sensor Cover Replacement.
...
Ignition Coil Removal
Special Tools
EN-6009 Remover and Installer Ignition Module
For equivalent regional tools, refer to Special Tools.
Remove the 2 ignition coil bolts (1).
Install EN-6009 remover and installer (2) and remove the ignition
coil (1).
...
Intake Manifold Assemble (1.6L LDE)
Install the 4 multiport fuel injector seals (6).
Install the multiport fuel injection fuel rail (4) and the fuel injectors (5)
to the intake manifold (7).
Caution: Refer to Fastener Caution.
Install the 2 multiport fuel injection fue ...

0.0062