Chevrolet Sonic Repair Manual: Piston, Connecting Rod, and Bearing Installation
Special Tools
EN-470-B Angular Torque Wrench
For equivalent regional tools, refer to Special Tools.
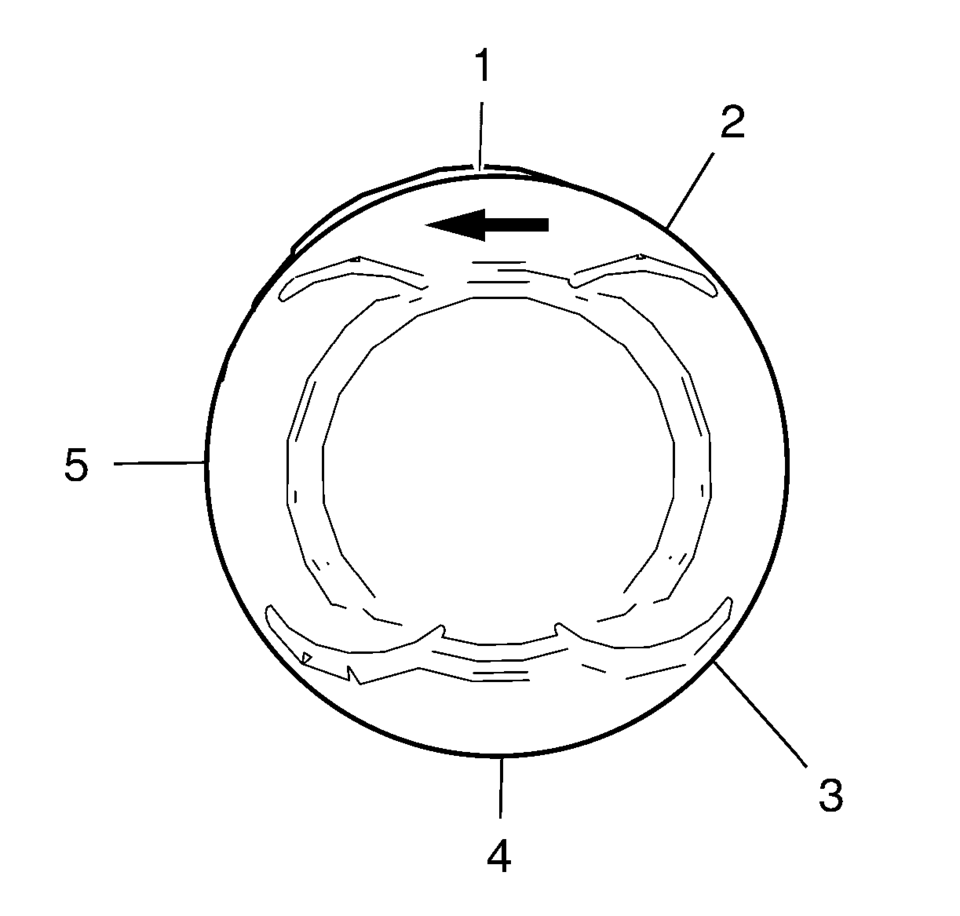
- Adjust the piston ring joints as follows:
- Upper compression ring (1).
- Lower compression ring (4).
- Oil rings (2) or (3).
- Oil ring spacer (5).
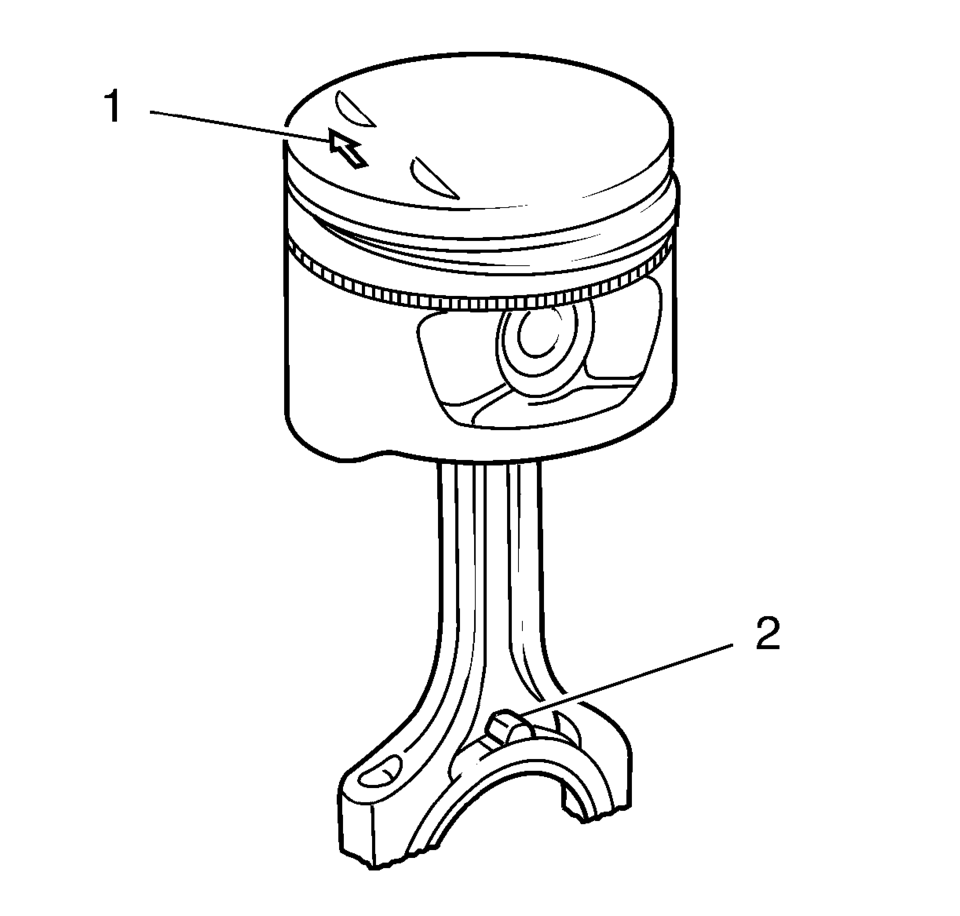
- The arrow (1) on the piston head must point to the timing side.
- The markings on the connecting rods (2) must point to the transmission side.
- Install a piston ring compressor to compress the piston rings.
- Install the pistons (1) in along with connecting rods (2) and upper connecting rod bearings (3) to the engine block and to the crankshaft.
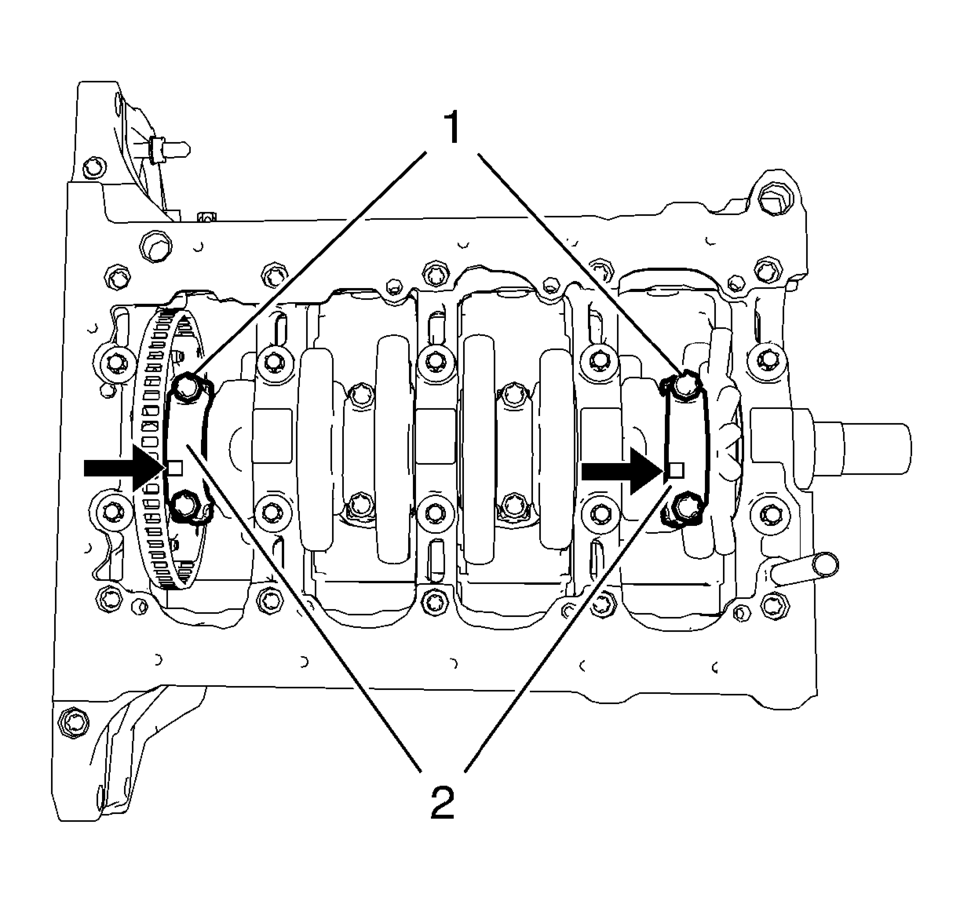
- Install the 2 connecting rod bearings and the 2 connecting rod bearing caps (2) of cylinder 1 and 4.
- Install the 4 NEW connecting rod bearing cap bolts (1) and tighten in the following sequence:
- Tighten the connecting rod bearing cap bolts to 25 Y (18 lb ft)
.
- Tighten the connecting rod bearing cap bolts an additional 45 degrees. Use EN-470 B wrench.
- Rotate the crankshaft 180 degrees.
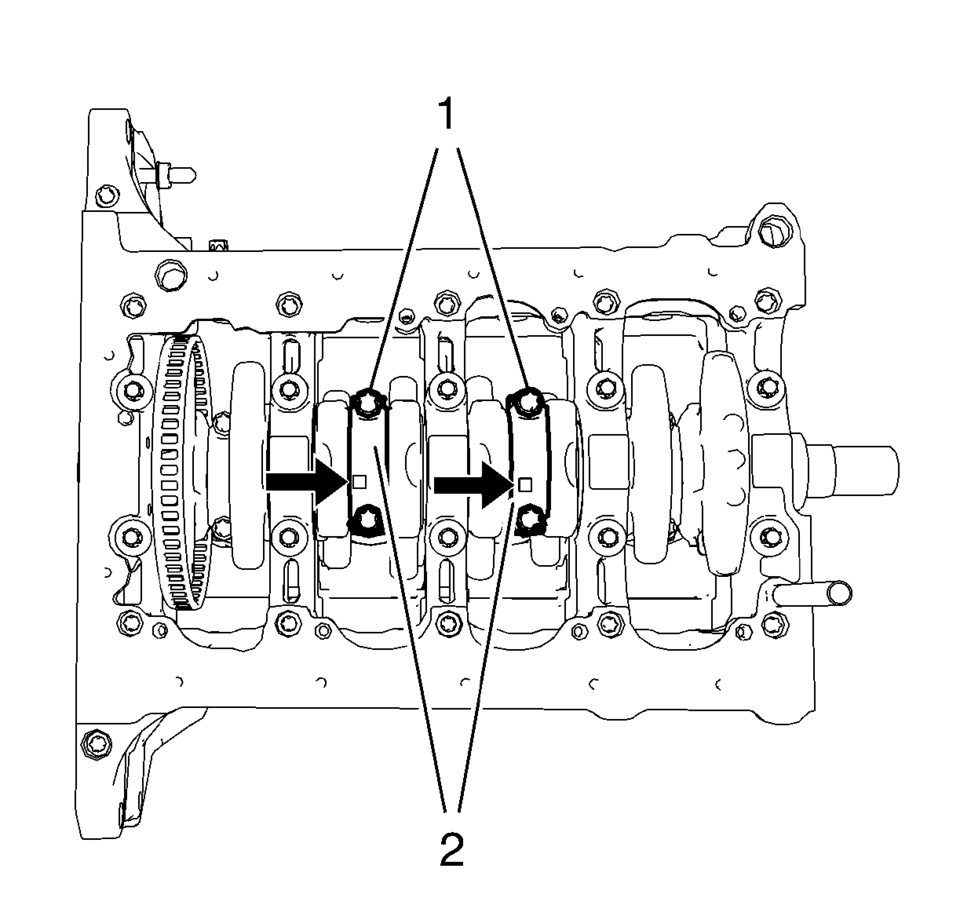
- Install the 2 connecting rod bearings and the 2 connecting rod bearing caps (2) of cylinder 3 and 2.
- Install the 4 NEW connecting rod bearing cap bolts (1) and tighten in the following sequence:
- Tighten the connecting rod bearing cap bolts to 25 Y (18 lb ft)
.
- Tighten the connecting rod bearing cap bolts an additional 45 degrees. Use EN-470–B wrench.

Note:
The flarings (arrows) on the connecting rod bearing caps must point to the transmission side. The connecting rod bearing caps must be installed in their original position.
Caution:
Refer to Fastener Caution.
Caution:
Refer to Torque-to-Yield Fastener Caution.
Note:
Do not reuse the old bolts.
Note:
The flarings (arrows) on the connecting rod bearing caps must point to the transmission side. The connecting rod bearing caps must be installed in their original position.
Note:
Do not reuse the old bolts.
 Piston, Connecting Rod, and Bearing Cleaning and Inspection
Special Tools
EN-470-B Angular Torque Wrench
For equivalent regional tools, refer to Special Tools.
Visual Inspection And Cleaning Procedure
Connecting Rod
Warning: Wear safety gla ...
 Piston, Connecting Rod, and Bearing Removal
Install the crankshaft balancer bolt.
Set the pistons 1 and 4 to TDC in direction of engine rotation.
Note: Note cylinder sequence.
Mark the connecting rod with the ...
Other materials:
Reclining Seatbacks
Warning
If either seatback is not locked, it could move forward in a sudden stop or
crash. That could cause injury to the person sitting there. Always push and pull
on the seatbacks to be sure they are locked.
To recline a manual seatback:
1. Lift the lever.
If necessary, move the safety b ...
Overview (Radio with CD/USB)
91011121314151617
O /VOL (Power/Volume)
Turns the system on or off and adjusts the volume.
Z (Eject)
Removes a disc from the CD slot.
Buttons 1−6
Radio: Saves and selects favorite stations.
AUX Port
3.5 mm (1/8 in) connection for external devices.
...
SIR Seatbelt Pretensioner Handling Warning
Warning: When carrying an undeployed inflatable restraint seat belt
retractor pretensioner:
Do not carry the seat belt pretensioner by the seat belt webbing or
pigtail connector, if equipped.
Carry the seat belt pretensioner by the housing, keeping hands and fingers
away fro ...

0.0056