Chevrolet Sonic Repair Manual: Plastic Collar Quick Connect Fitting Service
- Removal Procedure
-
Warning:
Refer to Gasoline/Gasoline Vapors Warning.
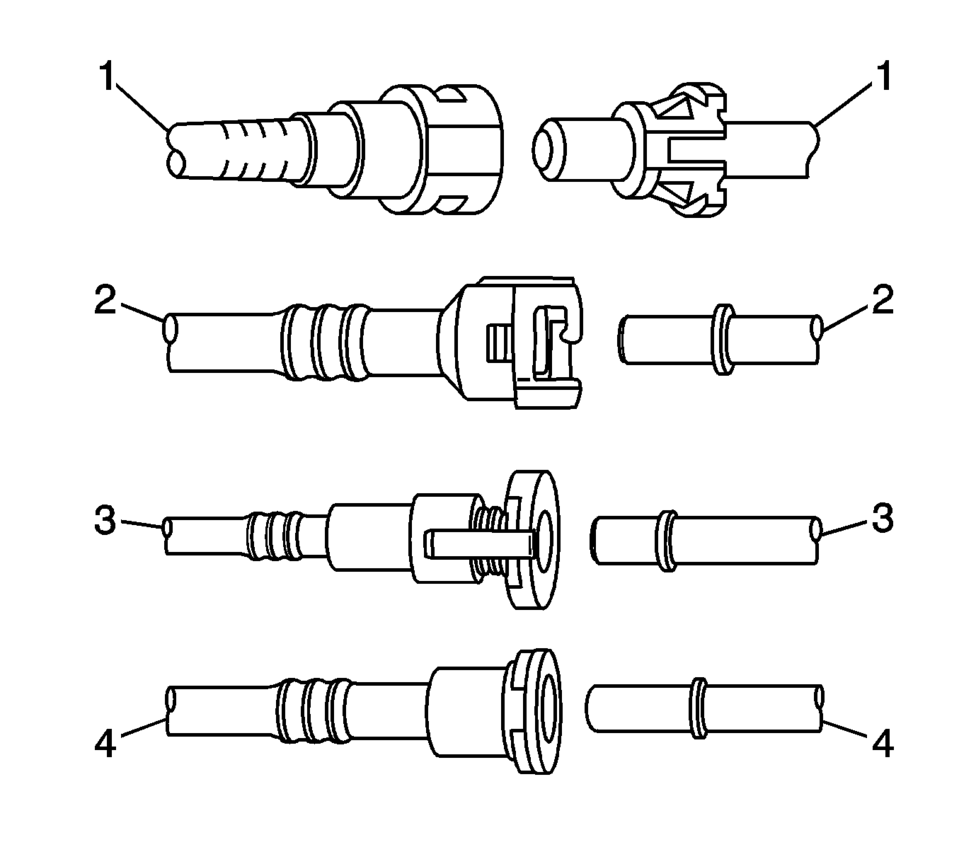
- Bartholomew (1)
- Q Release (2)
- Squeeze to Release (3)
- Sliding Retainer (4)
- Relieve the fuel system pressure. Refer to Fuel Pressure Relief.
- Using compressed air, blow any dirt out of the quick-connect fitting.
- This step applies to Bartholomew style connectors ONLY. Squeeze the plastic quick connect fitting release tabs.
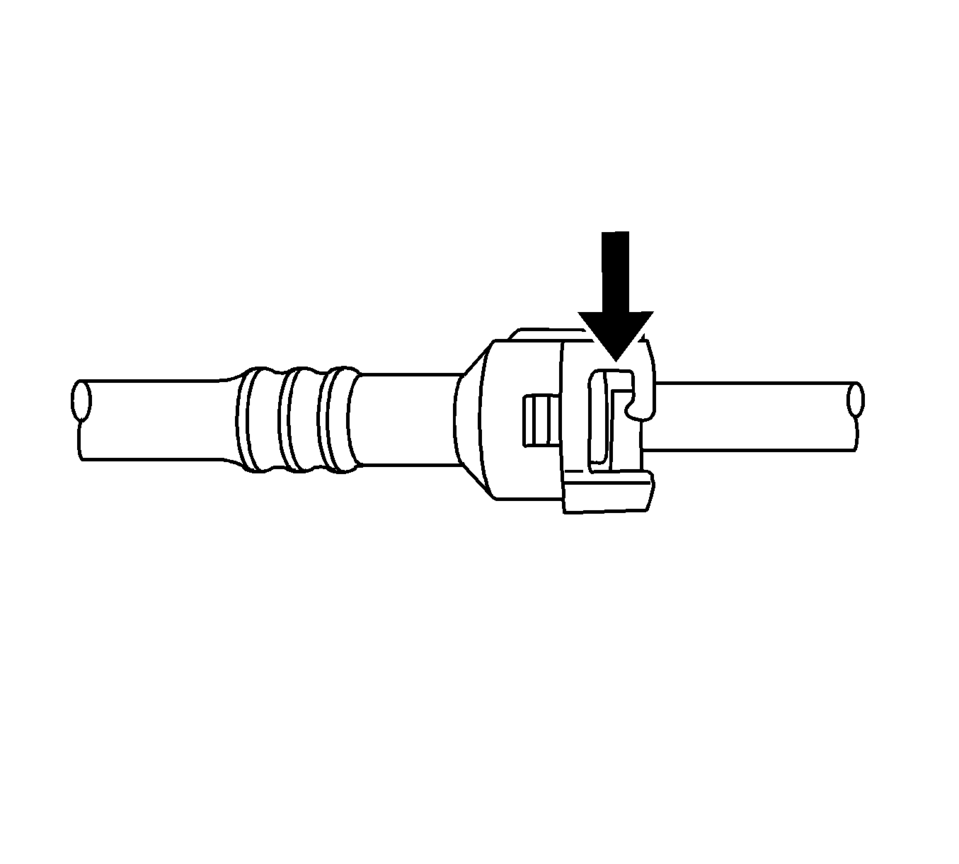
- This step applies to Q Release style connectors ONLY. Release the fitting by pushing the tab toward the other side of the slot in the fitting.
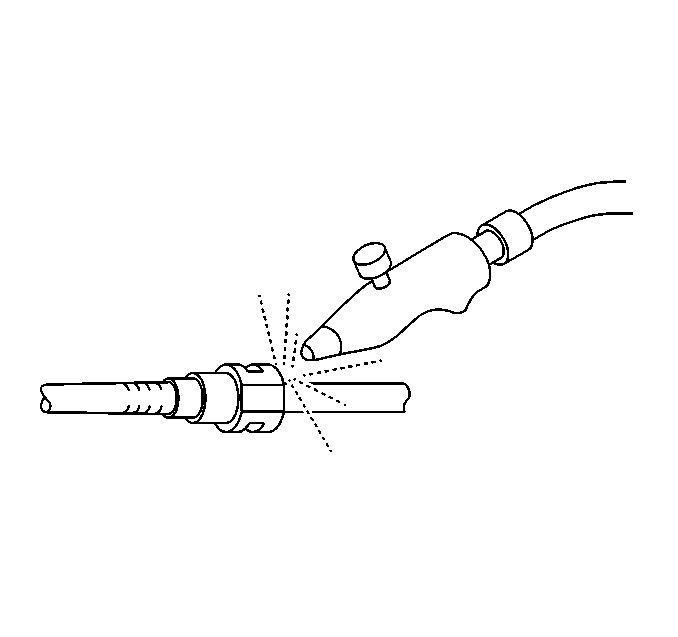
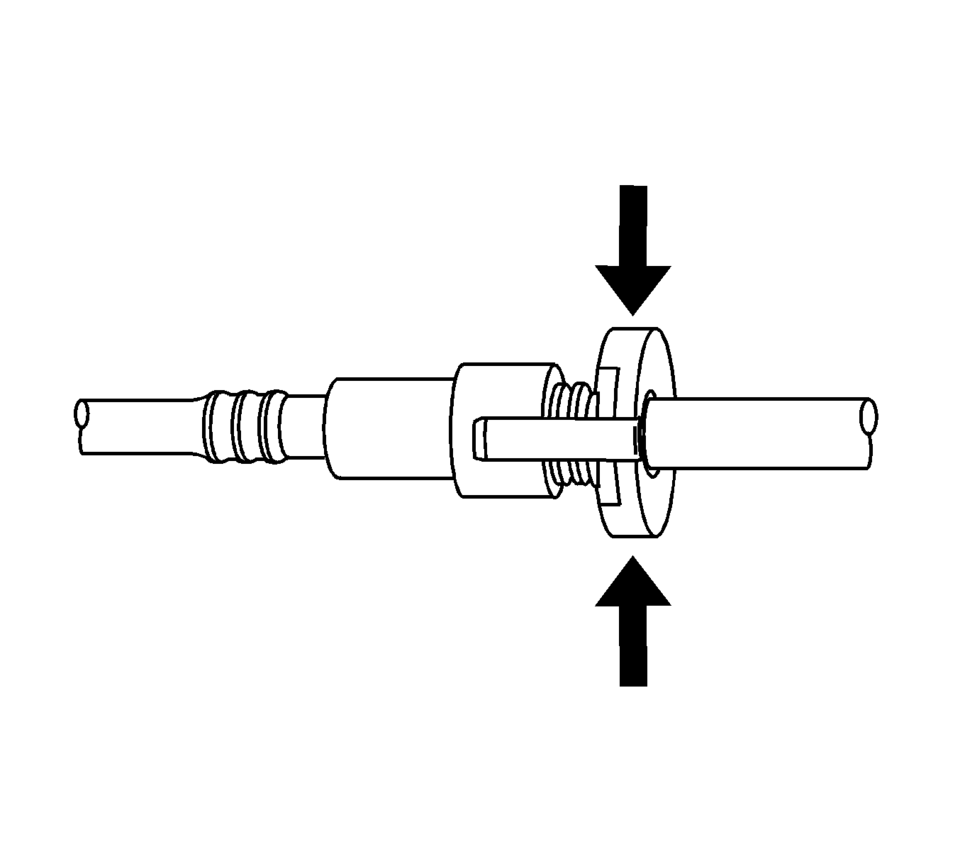
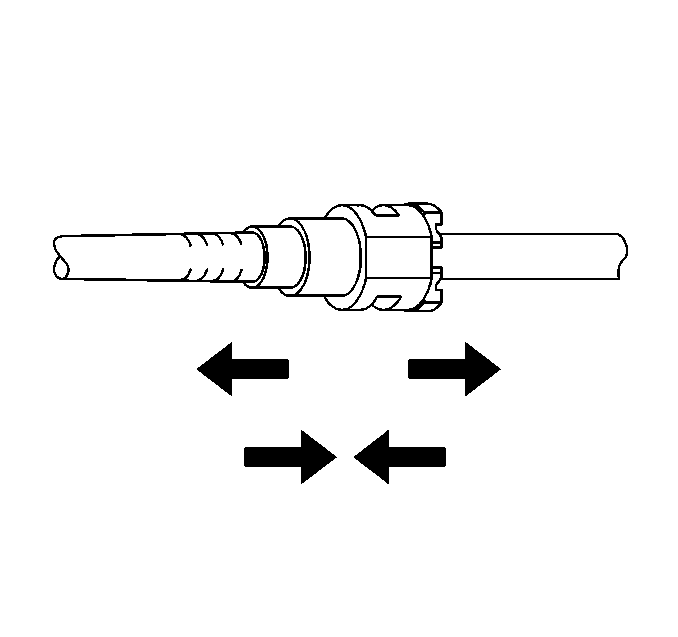
- This step applies to Squeeze to Release style connectors ONLY. Squeeze where indicated by arrows on both sides of the plastic ring surrounding the quick connect fitting.
- This step applies to Sliding Retainer style connectors ONLY. Release the fitting by pressing on one side of the release tab causing it to push in slightly. If the tab doesn't move try pressing the tab in from the opposite side. The tab will only move in one direction.
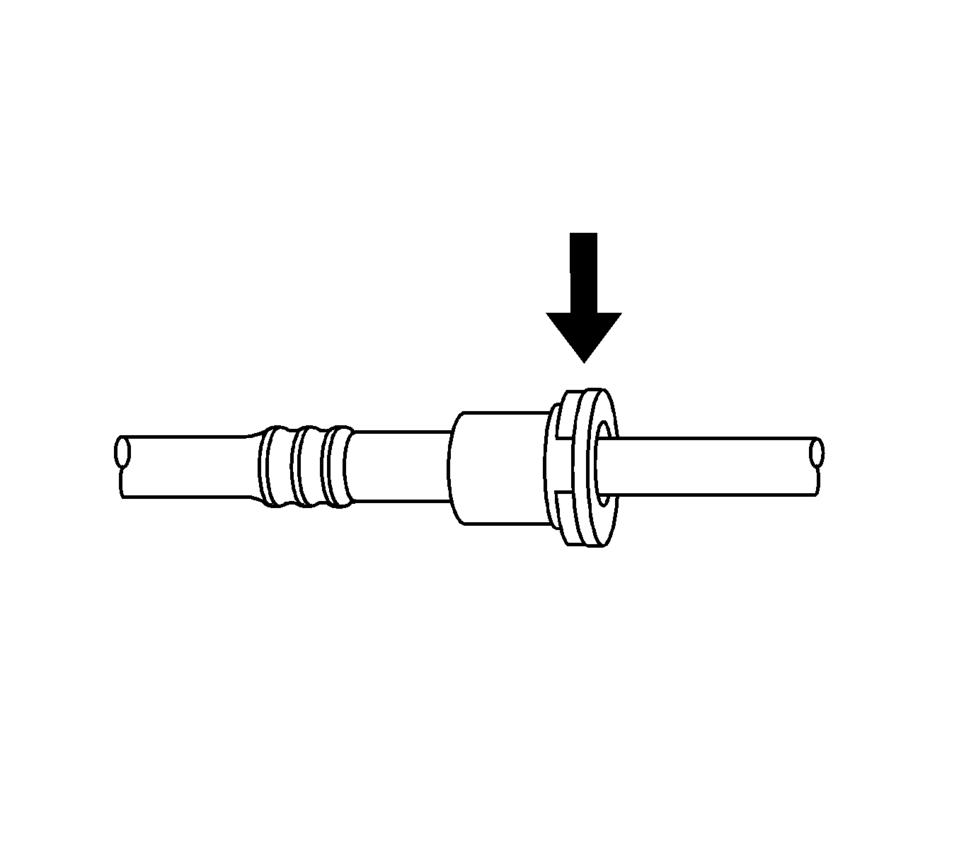
- Pull the connection apart.
Note:
There are several types of plastic collar fuel and evaporative emission quick connect fittings used on this vehicle.
Warning:
Refer to Safety Glasses Warning.
Warning:
Refer to Relieving Fuel Pressure Warning.
- Installation Procedure
-
- Apply a few drops of clean engine oil to the male connection end.
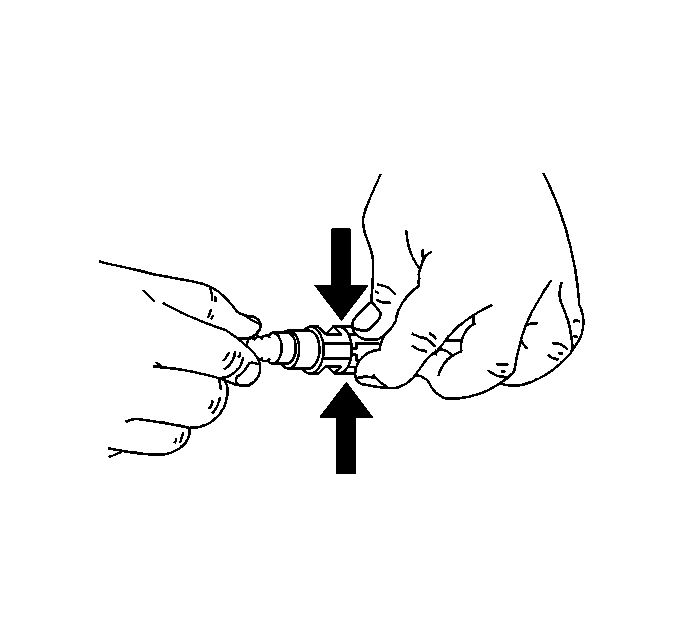
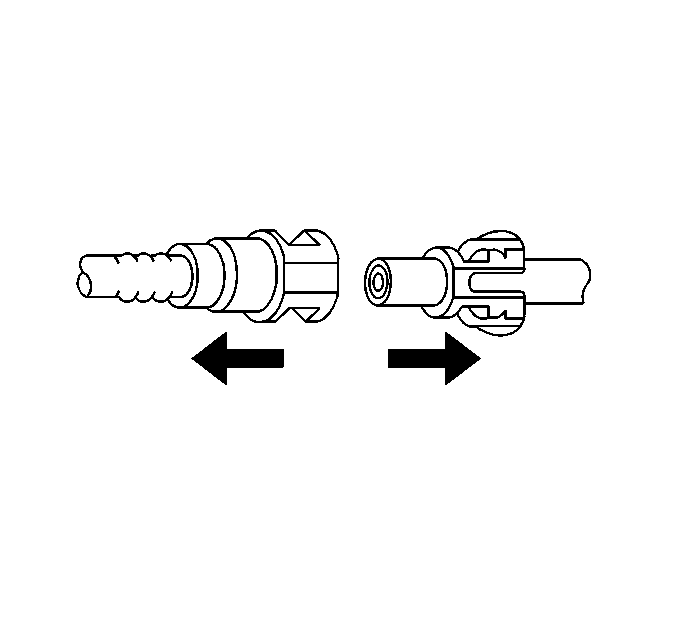
- Push both sides of the quick-connect fitting together in order to cause the retaining feature to snap into place.
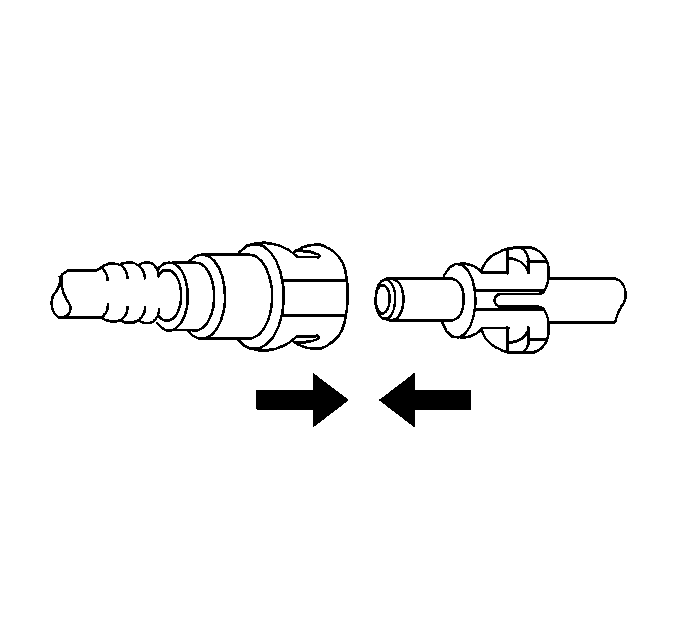
- Once installed, pull on both sides of the quick-connect fitting in order to make sure the connection is secure.

 Inspection/Maintenance System Check
Diagnostic Instructions
Perform the Diagnostic System Check - Vehicle
prior to using this diagnostic procedure.
Review Diagnostic System Check - Vehicle
for an overview of t ...
 Secondary Air Injection Check Valve Replacement
Secondary Air Injection Check Valve Replacement
Callout
Component Name
1
Secondary Air Injection Outlet Pipe
Not ...
Other materials:
Rail Dust Damage Repair
Warning: Refer to Eye Protection Warning.
Note: If rail dust has penetrated into the basecoat, the panel requires
refinishing. Ensure all the rail dust has been removed prior to refinishing
or the rust spots will return.
Rail dust damage comes from the tiny iron particles produce ...
Tire Rotation
In order to equalize wear, rotate the tires at the specified intervals. Also,
rotate the tire and wheel assembly whenever you notice uneven tire wear.
Radial tires tend to wear faster in the shoulder area, particularly in front
positions, due to design. Radial tires in non-drive locations may ...
Turbocharger Wastegate Regulator Solenoid Valve Replacement
Charge Air Bypass Regulator Solenoid Valve Replacement
Callout
Component Name
Preliminary Procedure
Disconnect the radiator outlet hose from the water inlet. Refer to
Water Inlet Replacement.
1
T ...

0.008