Chevrolet Sonic Repair Manual: Positive Crankcase Ventilation Hose/Pipe/Tube Replacement
- Removal Procedure
-
- Remove the air cleaner outlet duct. Refer to Air Cleaner Outlet Duct Replacement.
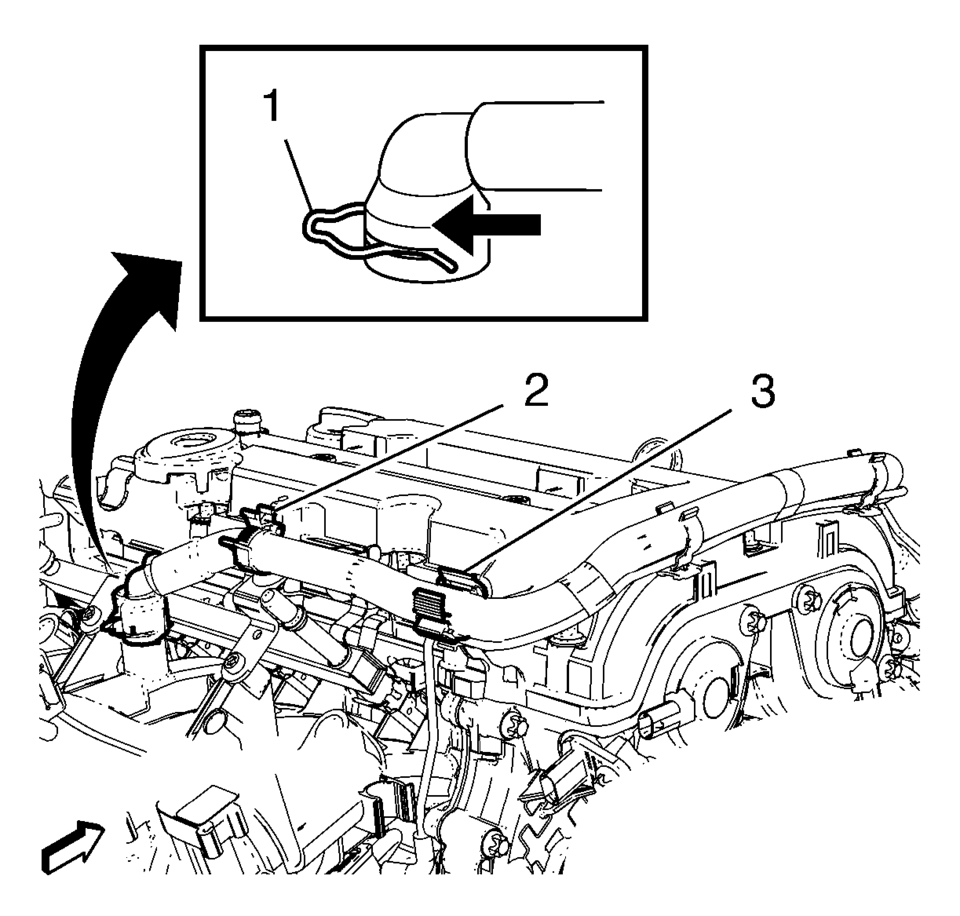
- Open the 2 positive crankcase ventilation pipe retainer clips (2) and (3).
- Remove the positive crankcase ventilation pipe from the intake manifold.
- Loosen the charger air bypass valve pipe clamp (3).
- Remove the charger air bypass valve pipe from turbocharger.
- Remove the charger air bypass valve pipe (2) from turbo charger wastegate regulator solenoid valve.
- Disconnect the positive crankcase ventilation pipe from turbocharger.
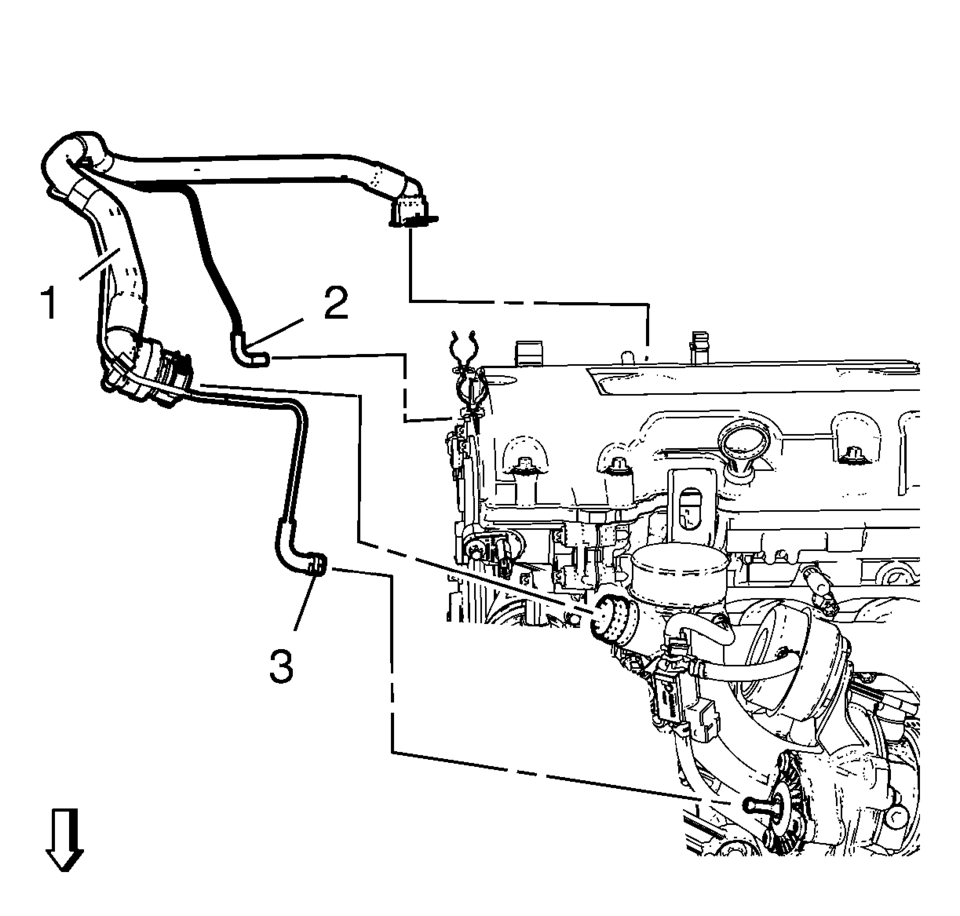
- Unclip and remove the positive crankcase ventilation pipe assembly (1) from the camshaft cover retainer clips.
Note:
Move retainer clamp (1) in direction of the arrow.
- Installation Procedure
-
- Install the positive crankcase ventilation pipe assembly (1) to the camshaft cover retainer clips.
- Connect the positive crankcase ventilation pipe to turbocharger.
- Install the charger air bypass valve pipe (2) to turbo charger wastegate regulator solenoid valve.
- Install the charger air bypass valve pipe to turbocharger.
- Fasten the charger air bypass valve pipe clamp (3).
- Install the positive crankcase ventilation pipe to the intake manifold and fix with retainer clamp (1).
- Clip in the positive crankcase ventilation pipe to the 2 retainer clips (2) and (3).
- Install the air cleaner outlet duct. Refer to Air Cleaner Outlet Duct Replacement.
 Crankcase Ventilation System Inspection/Diagnosis
Results of Incorrect Operation
A plugged positive crankcase ventilation (PCV) orifice or hose may cause
the following conditions:
Rough idle
Stalling or slow idle speed
Oil le ...
 Positive Crankcase Ventilation Pipe Installation
Install the positive crankcase ventilation tube (2).
Connect the 2 positive crankcase ventilation tube connectors (1).
Clip in the ECM wiring harness guide (3) t ...
Other materials:
Wheel Alignment and Tire Balance
The tires and wheels were aligned and balanced at the factory to provide the
longest tire life and best overall performance. Adjustments to wheel alignment and
tire balancing are not necessary on a regular basis. Consider an alignment check
if there is unusual tire wear or the vehicle is signi ...
Radio Antenna Replacement
Radio Antenna Replacement
Callout
Component Name
1
Radio Antenna
Procedure
Rotate the mast counterclockwise in order to release the mast from the
antenna base.
...
Exhaust Camshaft Removal
Remove the camshaft bearing cap bolts in a spiral sequence as shown one
turn at a time until there is no spring tension pushing on the camshaft.
Note: Mind the markings on the camshaft bearing caps to ensure
they will be installed in the same position.
Remove the ...

0.0053