
Chevrolet Sonic Repair Manual: Positive Crankcase Ventilation Pipe Removal
- Open the 2 positive crankcase ventilation pipe retainer clips (2) and (3).
- Remove the positive crankcase ventilation pipe from the intake manifold.
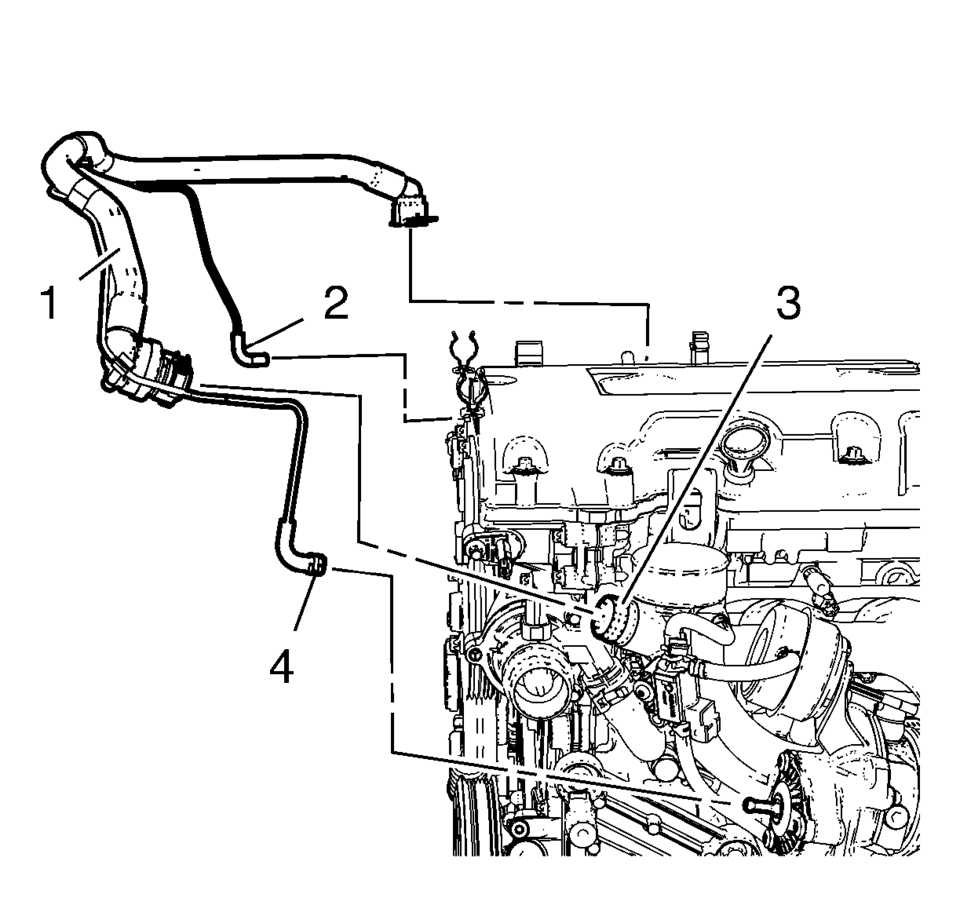
- Loosen the charger air bypass valve pipe clamp (4).
- Remove the charger air bypass valve pipe from turbocharger.
- Remove the charger air bypass valve pipe (2) from turbo charger waste regulator solenoid valve.
- Disconnect the positive crankcase ventilation pipe from turbocharger (3).
- Unclip and remove the positive crankcase ventilation pipe assembly (1) from the camshaft cover retainer clips.
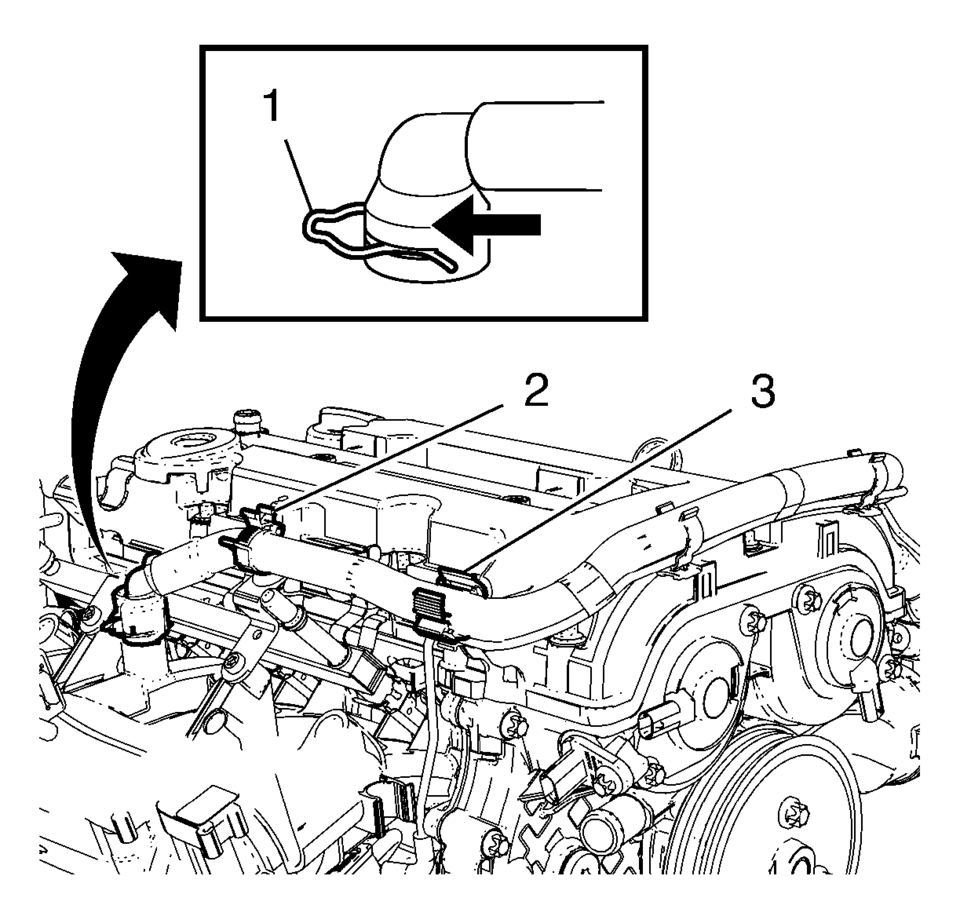
Note:
Move retainer clamp (1) in direction of the arrow.
 Positive Crankcase Ventilation Pipe Installation
Install the positive crankcase ventilation tube (2).
Connect the 2 positive crankcase ventilation tube connectors (1).
Clip in the ECM wiring harness guide (3) t ...
 Engine Block
...
Other materials:
Distracted Driving
Distraction comes in many forms and can take your focus from the task of driving.
Exercise good judgment and do not let other activities divert your attention away
from the road. Many local governments have enacted laws regarding driver distraction.
Become familiar with the local laws in your ...
Windshield Side Garnish Molding Replacement
Windshield Side Garnish Molding Replacement
Callout
Component Name
Preliminary Procedures
Disable the SIR system, if equipped. Refer to SIR Disabling and Enabling.
1
Windshield Side Garnish Moldi ...
Intelligent Key operation
Example
Example
The Nissan Armada Intelligent Key system allows seamless locking and unlocking
of doors without removing the key from your pocket or bag, enhancing both convenience
and everyday usability.
When carrying the Nissan Armada Intelligent Key within the operating range, you ...

0.0057