Chevrolet Sonic Repair Manual: Rear Axle Replacement
- Removal Procedure
-
- Raise and support the vehicle. Refer to Lifting and Jacking the Vehicle.
- Remove the tires and wheel assembly. Refer to Tire and Wheel Removal and Installation.
- Remove the park brake cables from the rear axle. Refer to Parking Brake Cable Replacement.
- Remove the rear brake line from the rear axle. Refer to Brake Pipe Replacement.
- Remove the rear wheel bearing/hub from the rear axle. Refer to Rear Wheel Bearing and Hub Replacement.
- Using a hydraulic jack stand, support the rear axle assembly.
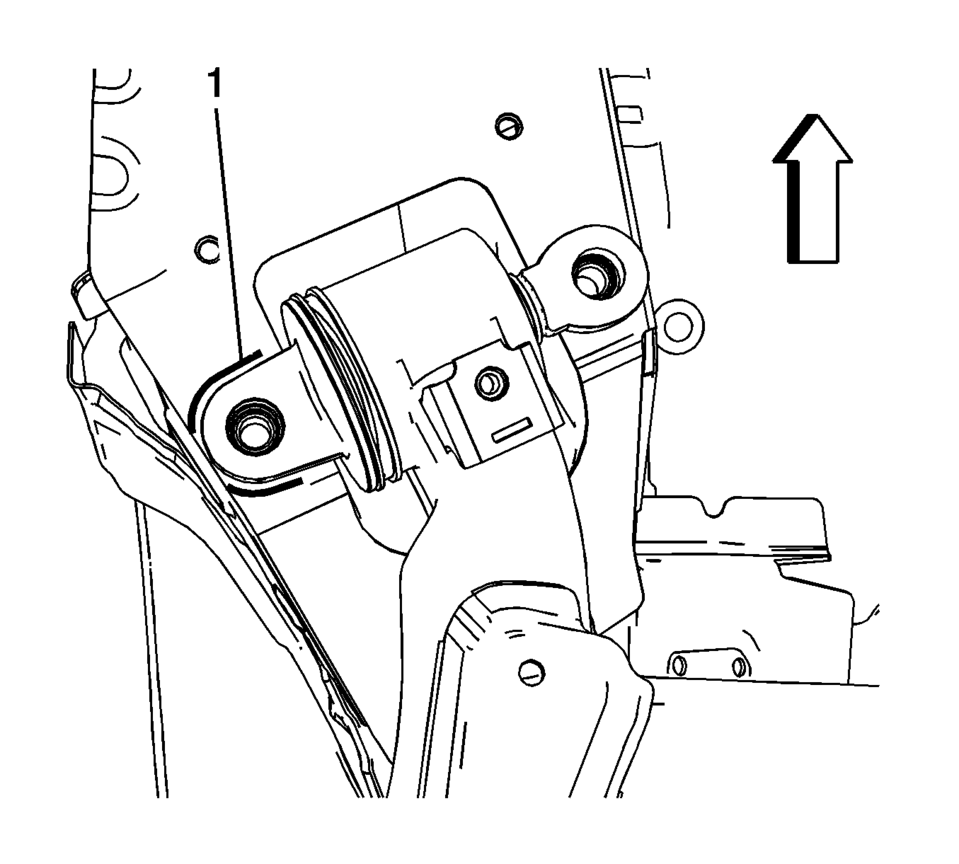
- Using a bright colored paint, mark (1) the outline of the rear axle mounting bracket to the chassis to properly align the rear axle to the chassis for installation.
- Lower the rear axle and remove the rear springs and the insulators. Refer to Rear Spring, Insulator, and Jounce Bumper Replacement.
- Loosen the mounting bolts (1) for the rear axle.
- With the aide of an assistant, remove the mounting bolts.
- With the mounting bolts removed, lower the rear axle assembly (1).
Note:
Cap the rear brakes lines so as to prevent the hydraulic brake system from being contaminated.
Note:
Relocate the rear brake assembly to the side using mechanics wire.
Note:
Before removing the spring and insulator's, note the relationship of the spring and insulators to the body and the rear axle.

Note:
DO NOT remove the rear axle mounting bolts at this time.
- Installation Procedure
-
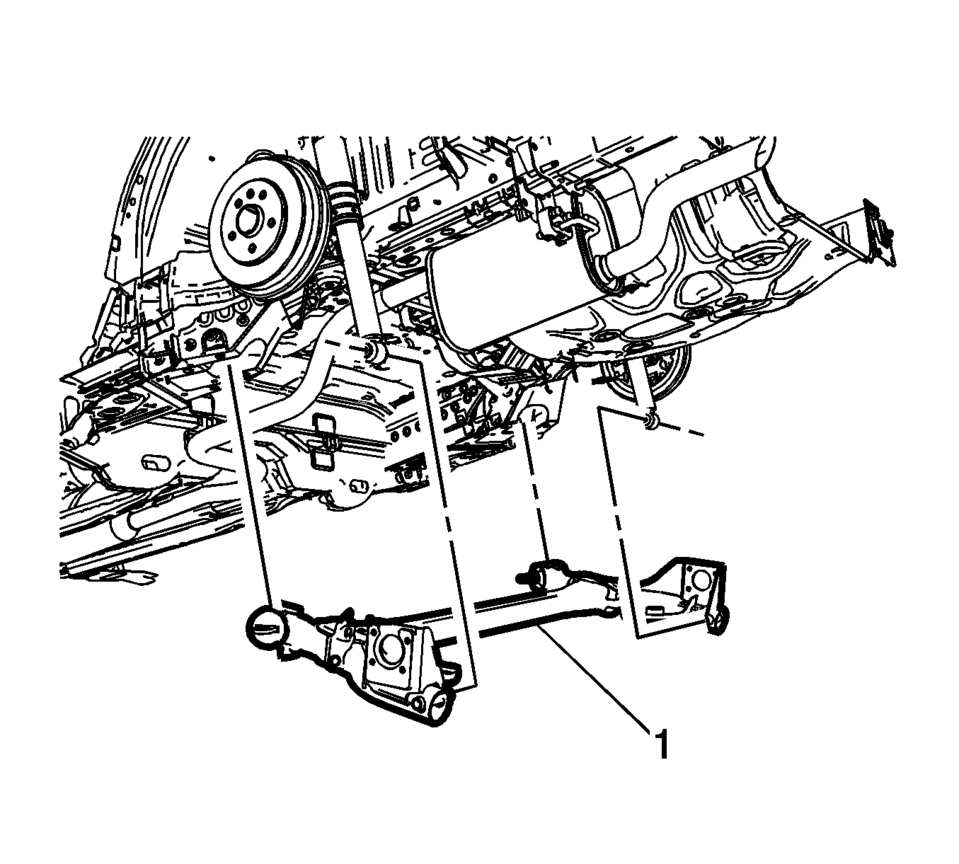
- Using a hydraulic jack stand and the aide of an assistant, position the rear axle assembly (1) in the vehicle.
- Align the mounting points of the rear axle to the painted outline (1) on the chassis.
- Install the rear axle mounting bolts (1) and tighten to:
Caution:
Refer to Fastener Caution.
- First Pass: 160 Y (118 lb ft)
- Final Pass: plus 30 degrees
Note:
Ensure that the rear springs and insulators are properly aligned seated in the rear axle.
- Install the rear spring and the insulators. Refer to Rear Spring, Insulator, and Jounce Bumper Replacement.
- Install the rear wheel bearing/hub mounting bolts to the rear axle. Refer to Rear Wheel Bearing and Hub Replacement.
- Install the rear park brake cables. Refer to Parking Brake Cable Replacement.
- Install the rear brake lines on the rear axle. Refer to Brake Pipe Replacement.
- Bleed the hydraulic brake system. Refer to Hydraulic Brake System Bleeding.
- Install the tire and wheel assembly. Refer to Tire and Wheel Removal and Installation.
- Remove the supports and lower the vehicle.
 Front and Rear Suspension Modification Kit Installation
Installation Instruction Part Number
23158166
23158167
Tools Required
CH 49375 Strut Rod Nut Socket
For equivalent regional tools, refer to Vehicle Service Manual.
Front Strut Remova ...
 Rear Suspension Description and Operation
This vehicle has a beam rear suspension system consisting of the following components:
An axle with integral trailing arms
A cross beam
Two coil springs
Two standard shock absorbers
...
Other materials:
Outside Rearview Mirror Housing Replacement
Outside Rearview Mirror Housing Replacement
Callout
Component Name
Preliminary Procedures
Remove the outside rearview housing cover. Refer to Outside Rearview
Mirror Housing Rear Cover Replacement.
Remove the outside rear ...
Engine Coolant Fan Replacement (LUV)
Engine Coolant Fan Replacement
Callout
Component Name
Preliminary Procedure
Remove the engine coolant fan shroud. Refer to Engine Coolant Fan Shroud
Replacement.
1
Engine Coolant Fan Motor Elect ...
Crankshaft and Bearing Cleaning and Inspection
Special Tools
EN-45059 Torque Angle Sensor Kit
GE-571-B Dial Gauge
For equivalent regional tools, refer to Special Tools.
Crankshaft End Play, Check
Note: Crankshaft attached with crankshaft bearing caps.
Install the GE-571-B gauge (1).
...

0.0061