Chevrolet Sonic Repair Manual: Rear Brake Hose Replacement (Axle to Caliper)
- Removal Procedure
-
Warning:
Refer to Brake Dust Warning.
Warning:
Refer to Brake Fluid Irritant Warning.
- Raise and support the vehicle. Refer to Lifting and Jacking the Vehicle.
- Remove the tire and wheel assembly. Refer to Tire and Wheel Removal and Installation.
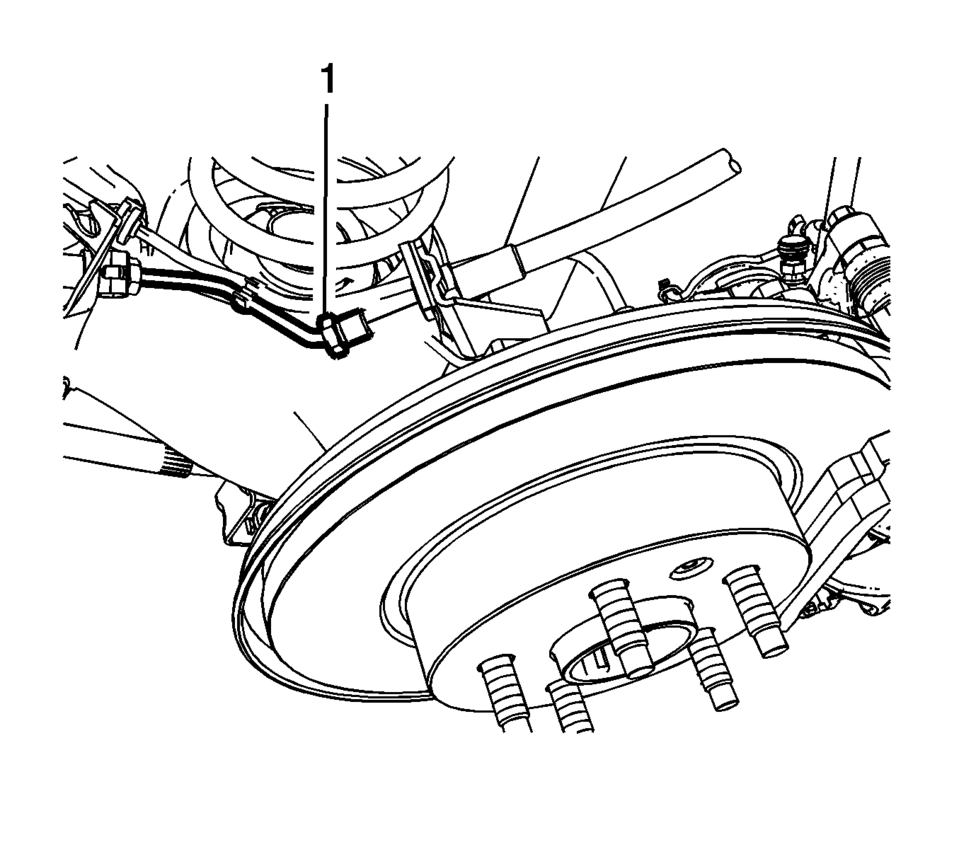
- Remove the brake pipe fitting (1) from the rear brake hose.
- Cap the brake pipe fitting to prevent brake fluid loss and contamination.
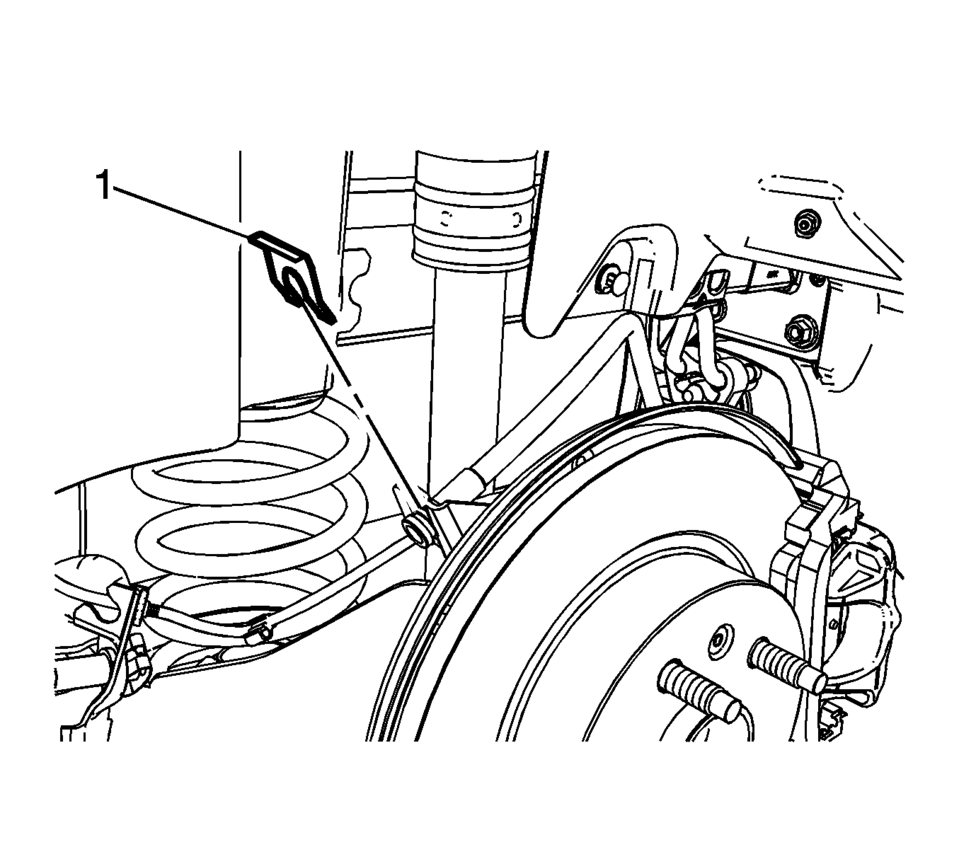
- Remove the brake hose retainer (1).
- Remove the brake hose fitting bolt (1).
- Remove and discard the brake hose fitting gaskets (2) from the brake hose fitting (3).
- Remove the brake hose.

Note:
Do not reuse the brake hose fitting gaskets.
- Installation Procedure
-
- Assemble the brake hose fitting bolt (1) and the new brake hose fitting gaskets (2) to the brake hose fitting (3).
- Install the brake hose assembly to the brake caliper and tighten the
fitting bolt to 40 Y (30 lb ft)
.
- Install the brake hose to the wheelhouse bracket and install the retainer (1).
- Install the brake pipe fitting (1) to the rear brake hose and tighten
the fitting to 18 Y (13 lb ft)
.
- Bleed the hydraulic brake system. Refer to Hydraulic Brake System Bleeding.
- Install the tire and wheel assembly. Refer to Tire and Wheel Removal and Installation.
Caution:
Refer to Fastener Caution.
 Hub/Axle Flange and Wheel Stud Runout Inspection
Special Tools
GE-8001 Dial Indicator Set , or equivalent
Raise and support the vehicle. Refer to Lifting and Jacking the Vehicle.
Mark the location of the wheels to the wheel studs and mar ...
 Rear Brake Hose Replacement (Body to Axle - Disc Brake)
Removal Procedure
Warning: Refer to Brake Dust Warning.
Warning: Refer to Brake Fluid Irritant Warning.
Raise and support the vehicle. Refer to Lifting and Jacking the ...
Other materials:
Traction Off Light
This light comes on briefly while starting the engine. If it does not, have the
vehicle serviced by your dealer. If the system is working normally, the indicator
light then turns off.
The traction off light comes on when the Traction Control System (TCS) has been
turned off by pressing and ...
Transmission Case Assemble (Gen 2)
Special Tools
3-9506289 Universal Adapter
J-840733 Driver
R-0007758 Holding Fixture
R-0007761 Universal Handle
R-0007770 Holding Fixture Adapter Plates
T-9804669 Seal Installer
T-0307000 Extractor and Driver Fixture
For equivalent regional tools, refer to Special Tools.
...
RearView Monitor system limitations
WARNING
The Nissan Armada RearView Monitor has certain operational limitations that
must always be taken into account. Ignoring these limitations or relying solely
on the system without proper visual checks may result in serious injury or even
fatal accidents.
The Nissan Armada camera sys ...

0.0069