Chevrolet Sonic Repair Manual: Rear Brake Rotor Replacement
Special Tools
- CH-41013 Rotor Resurfacing Kit
- CH-42450-A Wheel Hub Resurfacing Kit
For equivalent regional tools, refer to Special Tools.
- Removal Procedure
-
Warning:
Refer to Brake Dust Warning.
- Raise and support the vehicle. Refer to Lifting and Jacking the Vehicle.
- Remove the tire and wheel assembly. Refer to Tire and Wheel Removal and Installation.
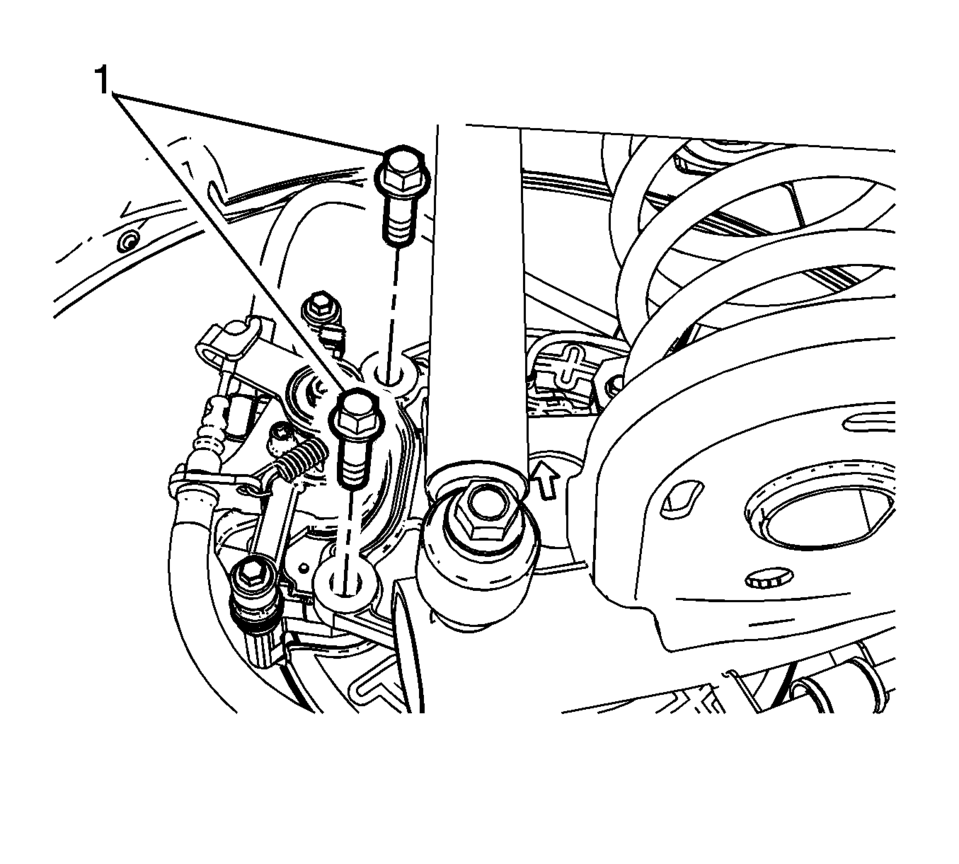
- Remove and discard the brake caliper bracket bolts (1).
- Remove the brake caliper and bracket as an assembly and support with heavy mechanics wire.
- Remove the brake rotor bolt (1).
- Remove the brake rotor (1).
Note:
Do not reuse the brake caliper bracket bolts.
Caution:
Support the brake caliper with heavy mechanic wire, or equivalent, whenever it is separated from its mount and the hydraulic flexible brake hose is still connected. Failure to support the caliper in this manner will cause the flexible brake hose to bear the weight of the caliper, which may cause damage to the brake hose and in turn may cause a brake fluid leak.

- Installation Procedure
-
- If installing a new brake rotor, clean the friction surfaces of the brake rotor with denatured alcohol.
- Using the CH-42450-A Wheel Hub Resurfacing Kit, thoroughly clean any rust or corrosion from the mating surface of the hub/axle flange.
- Using the CH-41013 Rotor Resurfacing Kit, thoroughly clean any rust or corrosion from the mating surface of the rotor to the hub/axle flange.
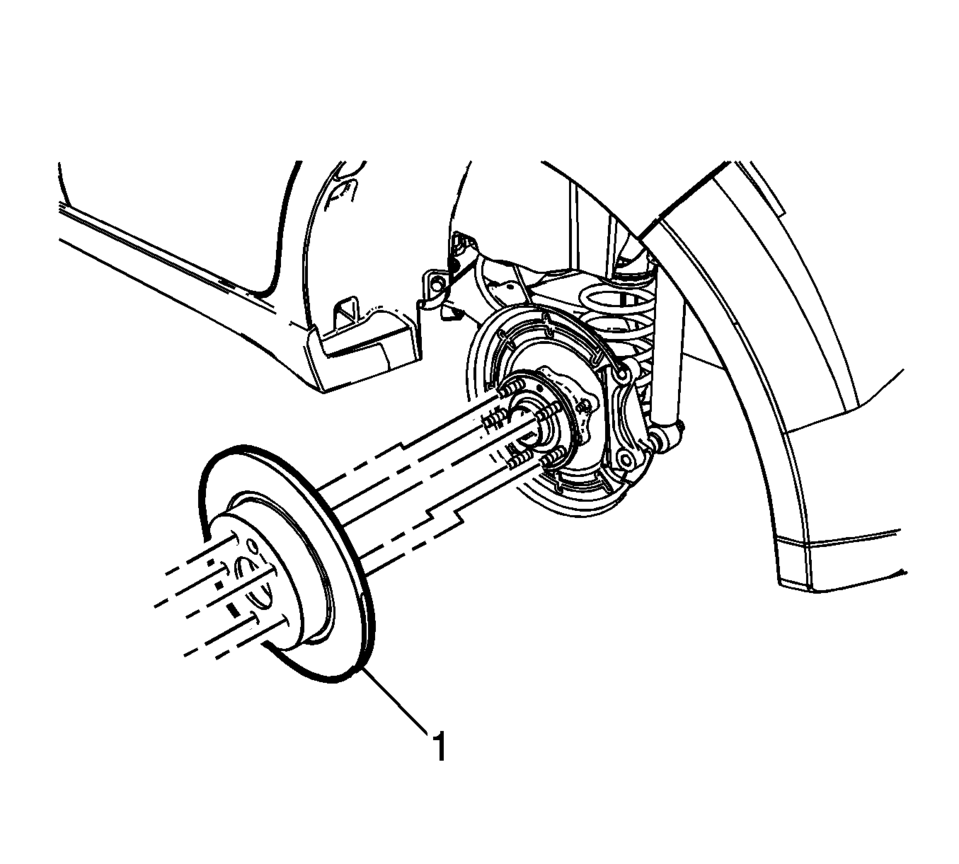
- Install the brake rotor (1).
- Install the brake rotor bolt (1) and tighten to 9 Y (80 lb in)
.
- Position the brake caliper and bracket assembly over the brake rotor and to the suspension knuckle.
- Install new brake caliper bracket bolts (1) and tighten to 100 Y
(74 lb ft)
.
- Install the tire and wheel assembly. Refer to Tire and Wheel Removal and Installation.
- Burnish the brake pads and rotors. Refer to Brake Pad and Rotor Burnishing.
Caution:
Refer to Fastener Caution.
 Rear Brake Hose Replacement (Body to Axle - Disc Brake)
Removal Procedure
Warning: Refer to Brake Dust Warning.
Warning: Refer to Brake Fluid Irritant Warning.
Raise and support the vehicle. Refer to Lifting and Jacking the ...
 Rear Brake Shield Replacement
Removal Procedure
Warning: Refer to Brake Dust Warning.
Raise and support the vehicle. Refer to Lifting and Jacking the Vehicle.
Remove the rear tire and wheel assembl ...
Other materials:
CD Player
The CD player can play audio CDs and MP3 CDs.
The CD player will not play 8 cm (3 in) CDs.
Care of CDs
Sound quality can be reduced due to disc quality, recording method, quality of
the music recorded, and how the disc has been handled. Handle discs carefully and
store them in their original ...
Interior Care
To prevent dirt particle abrasions, regularly clean the vehicle's interior. Immediately
remove any soils. Note that newspapers or dark garments that can transfer color
to home furnishings can also permanently transfer color to the vehicle's interior.
Use a soft bristle brush to remove d ...
Front Side Door Lock Cylinder Coding (Free Wheeling)
Special Tools
BO-49753 Assembly Tool
The door lock cylinder uses 8 of the 8 cut positions. The tumbler positions are
staggered from side to side, 4 on one side and 4 on the other, are not self-retaining,
and are not snap in.
Note: All lock cylinders for side milled keys ha ...

0.0053