Chevrolet Sonic Repair Manual: Rear Bumper Fascia Replacement (Hatchback)
|
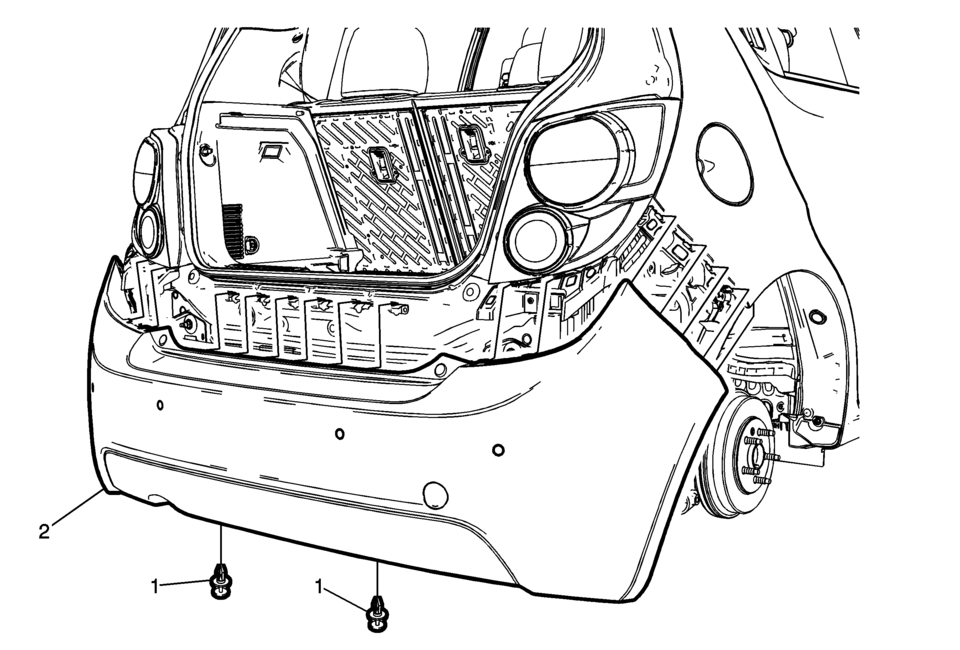
Callout |
Component Name |
|---|---|
Preliminary Procedures
|
|
|
1 |
Rear Fascia Lower Push-In Retainer (Qty:?€‰2) |
|
2 |
Rear Fascia Procedure
|
 Rear Bumper Fascia Outer Guide Replacement (Sedan)
Rear Bumper Fascia Outer Guide Replacement
Callout
Component Name
Warning: Refer to Eye Protection Warning.
Preliminar ...
 Rear Bumper Fascia Tow Eye Access Hole Cover Replacement
Rear Bumper Fascia Tow Eye Access Hole Cover Replacement
Callout
Component Name
1
Rear Bumper Fascia Rear Tow Eye Access ...
Other materials:
Safety Locks
The rear door safety locks prevent passengers from opening the rear doors from
inside the vehicle.
Manual Safety Locks
If equipped, the safety lock is located on the inside edge of the rear doors.
To use the safety lock:
1. Insert the key into the safety lock slot and turn it so the slot is ...
Starting Procedure
1. With your foot off the accelerator pedal, turn the ignition to START. When
the engine cranks, let go of the key. The idle speed will go down as the engine
gets warm.
The vehicle has a Computer-Controlled Cranking System. It assists in starting
the engine and protects components. If the ign ...
Front Compartment Fuse Block Replacement
Removal Procedure
Disconnect the battery negative cable. Refer to Battery Negative Cable
Disconnection and Connection.
Remove the junction block cover (1).
Remove the positive battery cable nut (1) from the junction block.
Remove the pos ...

0.0055