Chevrolet Sonic Repair Manual: Rear Compartment Lid Hinge Torque Rod Replacement
|
Callout |
Component Name |
|---|---|
|
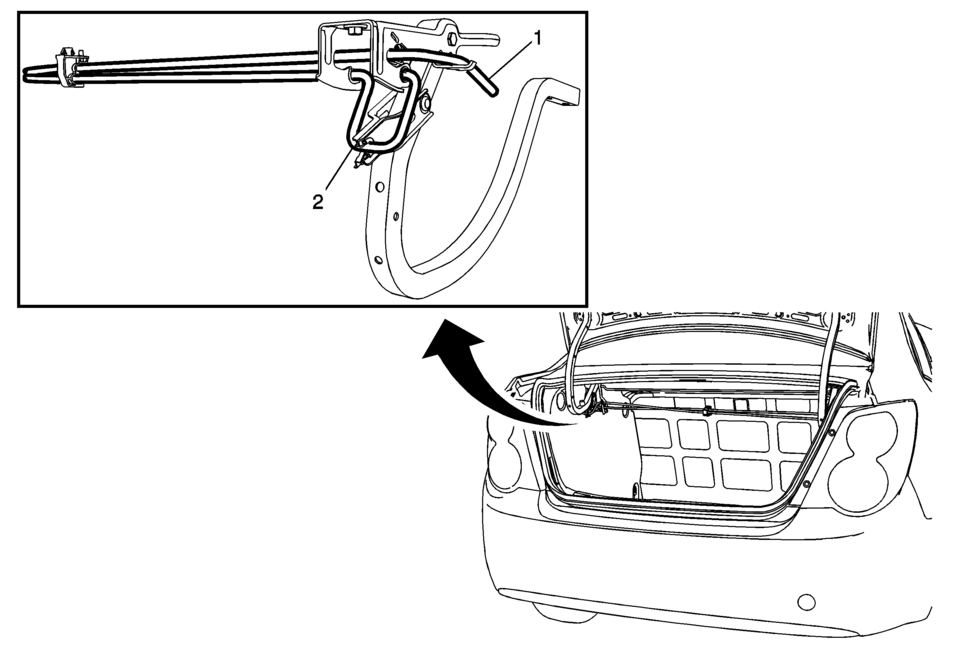
Warning: Refer to Hood Hold-Open Device Warning. Preliminary Procedure
Open and support the rear compartment lid. Special Tools
BO-125 Torque Rod Lifter For equivalent regional tools, refer to Special Tools. |
|
|
1 |
Rear Compartment Lid Hinge Torque Rod– Right Side Note: Only use the special tool to remove and install the rear compartment lid hinge torque rod. |
|
2 |
Rear Compartment Lid Hinge Torque Rod– Left Side Note: Only use the special tool to remove and install the rear compartment lid hinge torque rod. |
 Rear Spring, Insulator, and Jounce Bumper Replacement
Rear Spring, Insulator, and Jounce Bumper Replacement
Callout
Component Name
Preliminary Procedure
Raise and support the vehicl ...
 Lower Control Arm Replacement
Removal Procedure
Raise and support the vehicle. Refer to Lifting and Jacking the Vehicle.
Remove the tire and wheel assembly. Refer to Tire and Wheel Removal
and Installation. ...
Other materials:
Wheel Alignment and Tire Balance
The tires and wheels were aligned and balanced at the factory to provide the
longest tire life and best overall performance. Adjustments to wheel alignment and
tire balancing are not necessary on a regular basis. Consider an alignment check
if there is unusual tire wear or the vehicle is signi ...
Instrument Panel Fuse Block Access Hole Cover Replacement (With AAL)
Instrument Panel Fuse Block Access Hole Cover Replacement
Callout
Component Name
1
Instrument Panel Fuse Block Access Hole Cover
Procedure
Grasp the lower edge of the fuse block cover and pull outward disengaging ...
Lights
Basic information
Example
Front parking light / daytime running light / front turn signal
Map light
Headlight (low beam)
Front fog light (if equipped)
Headlight (high beam)
Front side marker light
Puddle light (if equipped)
Side turn signal (if equipped)
Rear personal light
...

0.0047