Chevrolet Sonic Repair Manual: Rear Seat Back Cushion Removal and Installation (60%)
|
Callout |
Component Name |
|---|---|
Preliminary Procedure
|
|
|
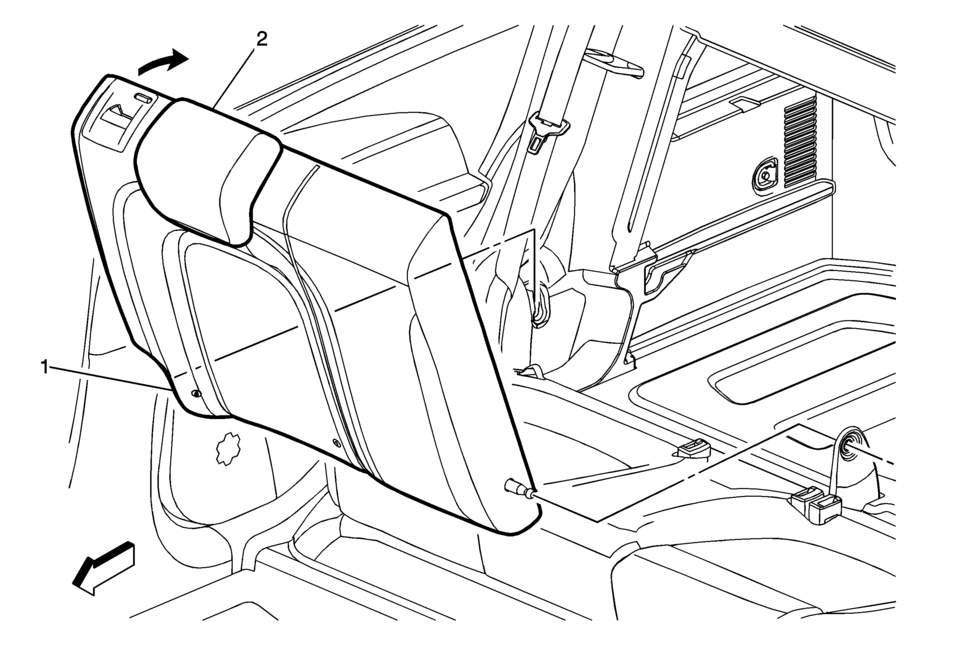
1 |
Rear Seat Back Cushion Pivot Support Procedure
|
|
2 |
Rear Seat Back Cushion Procedure
|
 Rear Seat Back Cushion Removal and Installation (40%)
Rear Seat Back Cushion Removal and Installation
Callout
Component Name
Preliminary Procedure
Remove the rear seat cushion. Refer to ...
 Rear Seat Center Shoulder Belt Replacement (Hatchback)
Rear Seat Center Shoulder Belt Replacement
Callout
Component Name
Preliminary Procedures
Remove the rear seat cushion. Refer to Rea ...
Other materials:
Wheel Replacement
Replace any wheel that is bent, cracked, or badly rusted or corroded. If wheel
nuts keep coming loose, the wheel, wheel bolts, and wheel nuts should be replaced.
If the wheel leaks air, replace it. Some aluminum wheels can be repaired. See your
dealer if any of these conditions exist.
Your d ...
Radiator Inlet Hose Replacement (LUV)
Radiator Inlet Hose Replacement
Callout
Component Name
Preliminary Procedures
Drain the engine coolant. Refer to Cooling System Draining and Filling.
Remove the fasteners securing the radiator surge tank to the vehicle
...
Hood
1. To open the hood of the Nissan Armada, pull the hood release handle 1 located
beneath the driver’s side instrument panel. This action will cause the hood to pop
up slightly.
2. Move to the front of the Nissan Armada and locate the secondary safety lever
2. Slide it sideways with your ...

0.0057