Chevrolet Sonic Repair Manual: Rear Side Door Stationary Window Replacement
|
Callout |
Component Name |
|---|---|
|
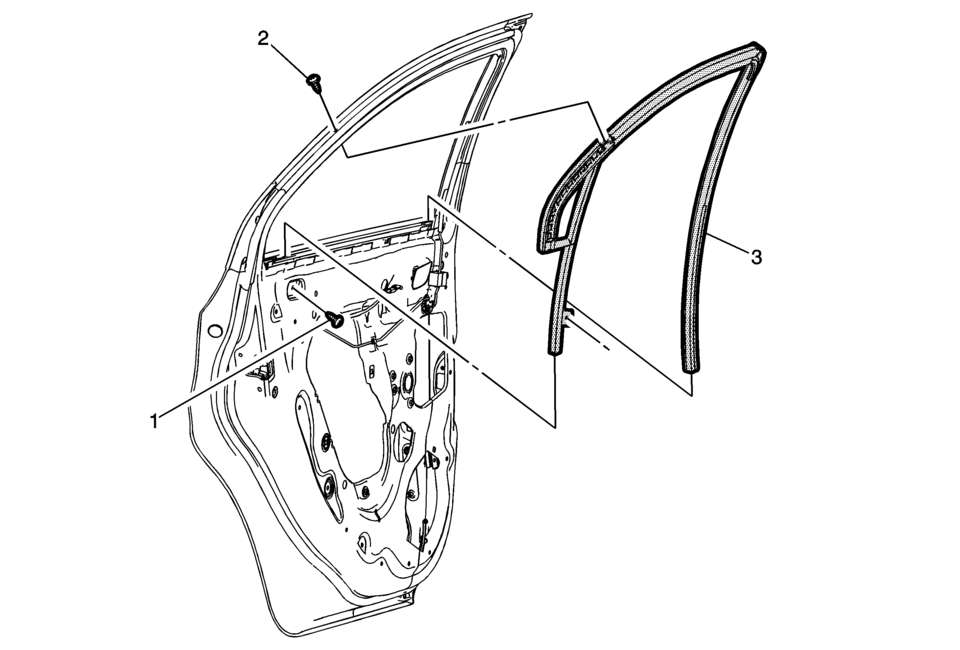
Warning: Refer to Glass and Sheet Metal Handling Warning. Preliminary Procedures
Remove the rear side door window. Refer to Rear Side Door Window Replacement. |
|
|
1 |
Rear Side Door Window Weatherstrip Lower Bolt Caution: Refer to Fastener Caution.
9?‚ā¨‚ÄįY (80?‚ā¨‚Äįlb?‚ā¨‚Äįin) Tip: The weatherstrip and window is serviced as one assembly. |
|
2 |
Rear Side Door Window Weatherstrip Upper Screw Procedures
3?‚ā¨‚ÄįY (27?‚ā¨‚Äįlb?‚ā¨‚Äįin) |
|
3 |
Rear Side Door Window Weatherstrip Procedures
|
 Liftgate Window Replacement
Special Tools
BO-24402-A Glass Sealant Remover (Cold Knife)
BO-39032 Stationary Glass Removal Tool
Use an adhesive that is approved by GM
For equivalent regional tools, refer to Special Too ...
 Rear Side Door Window Outer Sealing Strip Replacement (Hatchback)
Rear Side Door Window Outer Sealing Strip Replacement
Callout
Component Name
1
Rear Side Door Window Outer Sealing Strip ...
Other materials:
Radiator Grille Emblem/Nameplate Replacement
Radiator Grille Emblem/Nameplate Replacement
Callout
Component Name
Preliminary Procedure
Remove the front bumper fascia. Refer to Front Bumper Fascia Replacement.
Remove the front bumper energy absorber. Refer to Front Bu ...
Seat Belt Latch Stop Installation
Seat Belt Latch Stop Installation
Callout
Component Name
Preliminary Procedure
Locate the hole in the seat belt webbing where the original seat
belt stop button was located.
If the original hole in the seat belt webbing i ...
Front Wheel Drive Shaft Seal Replacement - Left Side
Special Tools
DT-446 Installer Drift
DT-7004 Slide Hammer
DT-23129 Universal Seal Remover
For equivalent regional tools, refer to Special Tools.
Removal Procedure
Raise and support the vehicle. Refer to Lifting and Jacking the Vehicle.
Remove the front suspension sk ...

0.0083