Chevrolet Sonic Repair Manual: Rear Side Door Trim Replacement (Hatchback)
|
Callout |
Component Name |
|---|---|
|
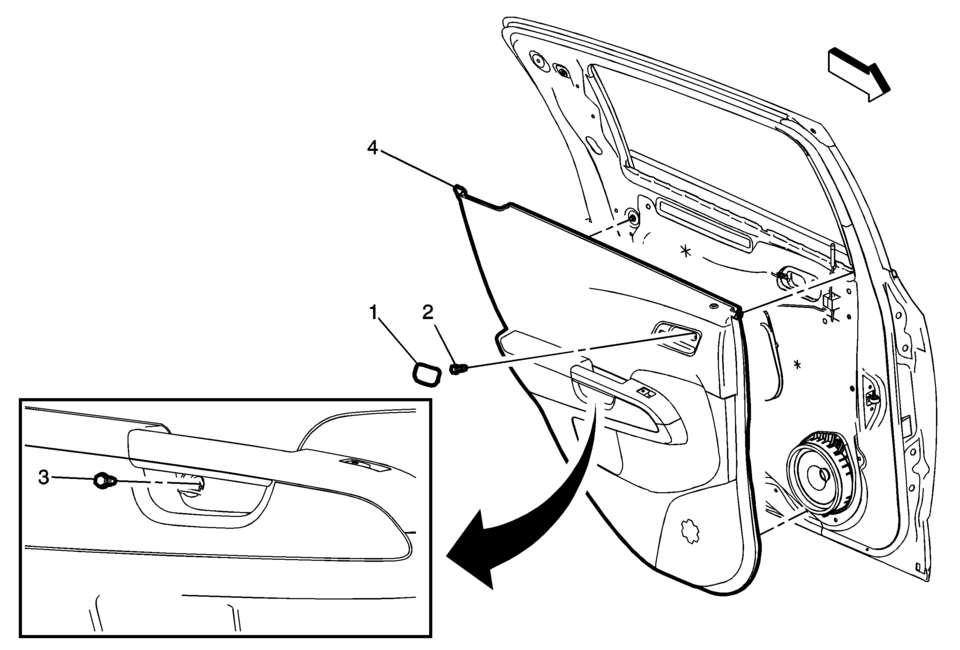
Preliminary Procedure
Remove the rear side door upper rear trim panel. Refer to Rear Side Door Upper Rear Trim Panel Replacement. |
|
|
1 |
Rear Side Door Inside Handle Bolt Cap |
|
2 |
Rear Side Door Inside Handle Fastener Caution: Refer to Fastener Caution. Procedure
Pull handle back to remove cap. Use suitable tool to unsnap. |
|
3 |
Rear Side Door Trim Fastener Procedure
Use a small flat-bladed tool to open the rear side door trim integral cap to access the fastener. |
|
4 |
Rear Side Door Trim Assembly Procedure
|
 Rear Side Door Stationary Window Replacement
Rear Side Door Stationary Window Replacement
Callout
Component Name
Warning: Refer to Glass and Sheet Metal Handling Warning.
...
 Rear Side Door Trim Replacement (Sedan)
Rear Side Door Trim Replacement
Callout
Component Name
1
Rear Side Door Inside Handle Bolt Cap
2
...
Other materials:
Radiator Grille Emblem/Nameplate Replacement
Radiator Grille Emblem/Nameplate Replacement
Callout
Component Name
Preliminary Procedure
Remove the front bumper fascia. Refer to Front Bumper Fascia Replacement.
Remove the front bumper energy absorber. Refer to Front Bu ...
Rear Side Door Window Regulator Replacement (Hatchback)
Rear Side Door Window Regulator Replacement
Callout
Component Name
Warning: Refer to Glass and Sheet Metal Handling Warning.
Preliminary Procedure
Remove the front side door window from the guide. Do not remove ...
Secondary Air Injection Pump Air Cleaner Pipe Replacement
Secondary Air Injection Pump Air Cleaner Pipe Replacement
Callout
Component Name
1
Hose Retainer (QTY:2)
Note: Squeeze the retainer on opposite sides to release.
2
Secondary A ...

0.0089