Chevrolet Sonic Repair Manual: Rear Side Door Window Rear Guide Replacement
|
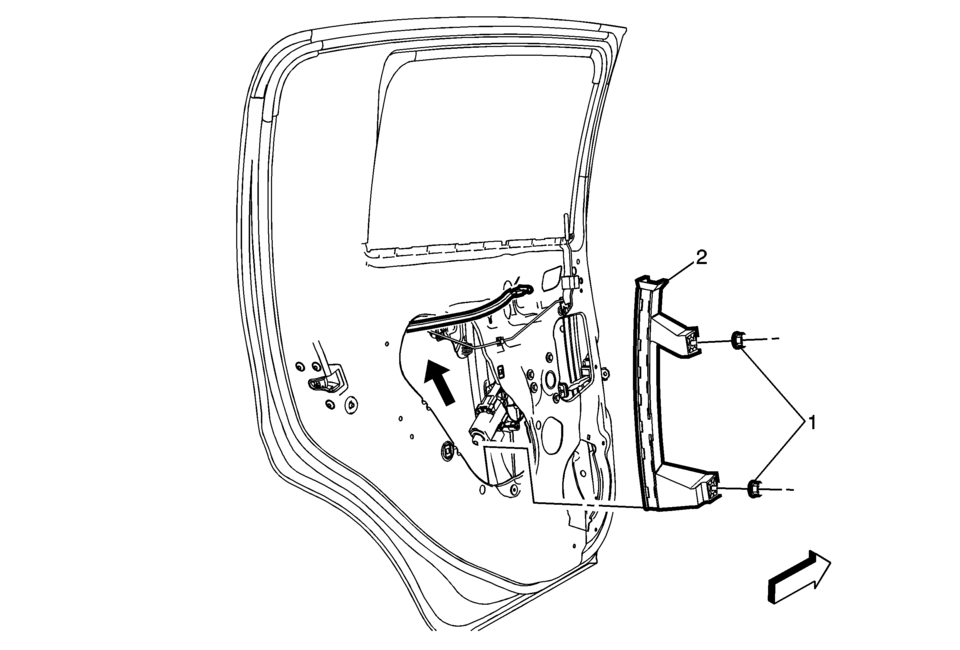
Callout |
Component Name |
|---|---|
|
Preliminary Procedure
Remove the rear side door trim panel. Refer to Rear Side Door Trim Replacement. |
|
|
1 |
Rear Side Door Window Rear Guide Nut (Qty:?€‰3) Caution: Refer to Fastener Caution.
11?€‰Y?€‰(97?€‰lb?€‰in) |
|
2 |
Rear Side Door Window Rear Guide Tip: Inspect the door window for proper operation before installing the door trim panel. |
 Rear Side Door Window Outer Sealing Strip Replacement (Sedan)
Rear Side Door Window Outer Sealing Strip Replacement
Callout
Component Name
1
Rear Side Door Window Outer Sealing Strip ...
 Rear Side Door Window Replacement (Hatchback)
Rear Side Door Window Replacement
Callout
Component Name
Warning: Refer to Glass and Sheet Metal Handling Warning.
...
Other materials:
Front Side Door Window Regulator Replacement
Front Side Door Window Regulator Replacement
Callout
Component Name
Warning: Refer to Glass and Sheet Metal Handling Warning.
Preliminary Procedure
Remove the front side door window from the guide. Do Not remov ...
Definitions and Abbreviations
Throttle Positions
Engine Braking
A condition where the engine is used to slow the vehicle by manually
downshifting during a zero throttle coastdown.
Full Throttle Downshift
A quick apply of the accelerator pedal to its full travel, forcing a
downshift.
...
Drive Range, Fifth Gear Default (Gen 1)
If the transmission encounters an electrical component malfunction, the transmission
will default to Fifth gear. All solenoids will default to their normal state. If
the torque converter clutch is applied, it will release. The transmission will remain
in Drive Range?Fifth Gear Default until th ...

0.0079