Chevrolet Sonic Repair Manual: Rear Side Door Window Replacement (Sedan)
|
Callout |
Component Name |
|---|---|
|
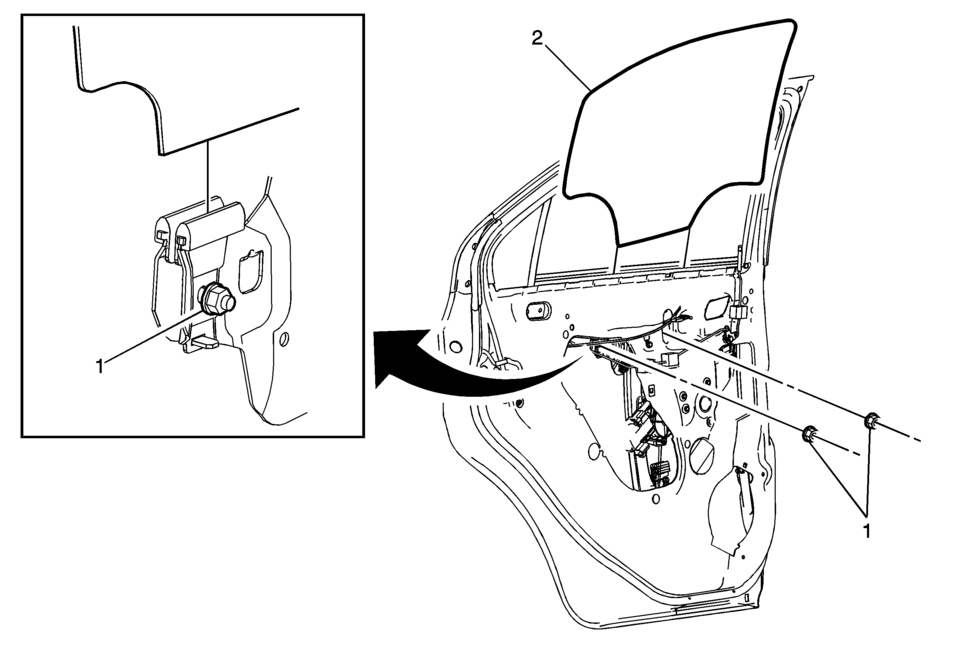
Warning: Refer to Glass and Sheet Metal Handling Warning.
|
|
|
1 |
Rear Side Door Window Guide Nut (Qty:?€‰2) Caution: Refer to Fastener Caution.
11?€‰Y?€‰(97?€‰lb?€‰in) |
|
2 |
Rear Side Door Window Procedure
|
 Rear Side Door Window Replacement (Hatchback)
Rear Side Door Window Replacement
Callout
Component Name
Warning: Refer to Glass and Sheet Metal Handling Warning.
...
 Rear Side Door Window Weatherstrip Replacement (Hatchback)
Rear Side Door Window Weatherstrip Replacement
Callout
Component Name
Preliminary Procedure
Remove the rear side door window . ...
Other materials:
Parking and Turn Signal Lamp Bulb Replacement
Parking and Turn Signal Lamp Bulb Replacement
Callout
Component Name
Preliminary Procedures
Open and support the hood assembly.
Reposition the air cleaner inlet duct on the passenger side of the
engine compartment.
Re ...
Air Conditioning Condenser Replacement (LUV)
Air Conditioning Condenser Replacement
Callout
Component Name
Preliminary Procedure
Drain the refrigerant. Refer to Refrigerant Recovery and Recharging
Remove the front bumper fascia assembly. Refer to Front Bumper Fascia ...
Seat belt extenders
If, due to body size or seating position, the standard lap-shoulder belt in the
Nissan Armada cannot be comfortably or properly fastened, a compatible seat belt
extender is available. This accessory is specifically designed to work with the
original seat belt system installed in the Nissan Arm ...

0.0071