Chevrolet Sonic Repair Manual: Rear Side Door Window Weatherstrip Replacement (Sedan)
|
Callout |
Component Name |
|---|---|
Preliminary Procedures
|
|
|
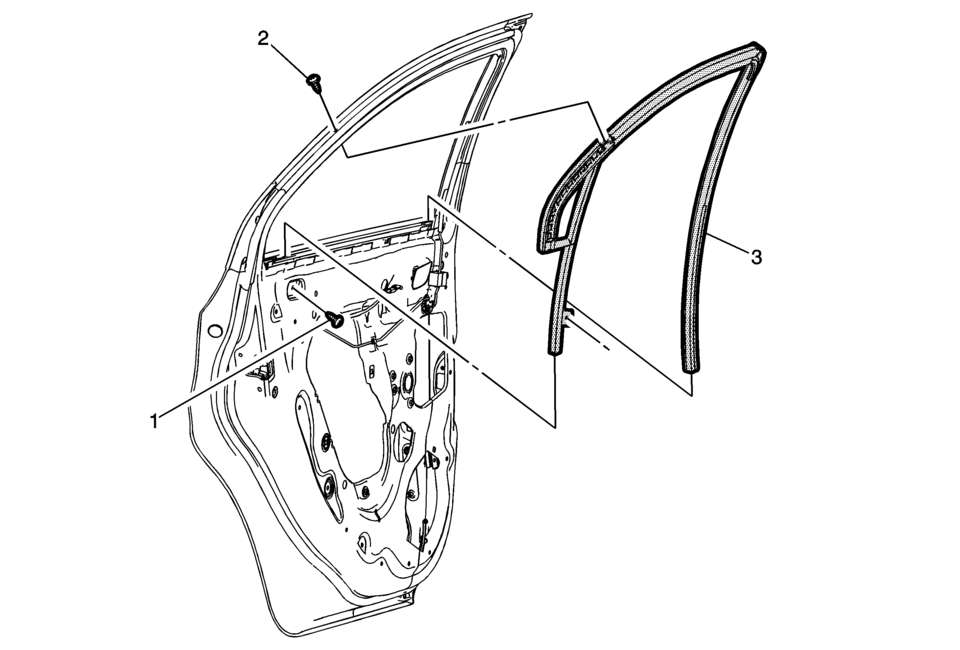
1 |
Rear Side Door Window Weatherstrip Lower Bolt Caution: Refer to Fastener Caution. Procedure
Remove the rear side door water deflector. Tighten
9?€‰Y (80?€‰lb?€‰in) |
|
2 |
Rear Side Door Window Weatherstrip Upper Screw Procedure
3?€‰Y (27?€‰lb?€‰in) |
|
3 |
Rear Side Door Window Weatherstrip Procedure
|
 Rear Side Door Window Weatherstrip Replacement (Hatchback)
Rear Side Door Window Weatherstrip Replacement
Callout
Component Name
Preliminary Procedure
Remove the rear side door window . ...

Other materials:
Vehicle Personalization
Personalization Menu (Radio without Touchscreen)
Use the audio system controls to access the personalization menus for customizing
vehicle features.
The following are all possible personalization features. Depending on the
vehicle, some may not be available.
CONFIG (Configur ...
Instrument Panel Outer Air Outlet Replacement - Left Side
Instrument Panel Outer Air Outlet Replacement - Left Side
Callout
Component Name
Preliminary Procedure
Remove the left instrument panel upper trim panel. Refer to Instrument
Panel Upper Trim Panel Replacement - Left Side.
...
All Seasons Tires Description
Most GM vehicles are equipped with steel belted all-season radial tires as standard
equipment. These tires qualify as snow tires, with a higher than average rating
for snow traction than the non-all season radial tires previously used. Other performance
areas, such as wet traction, rolling ...

0.009