
Chevrolet Sonic Repair Manual: Relay Replacement (Within an Electrical Center)
Special Tools
EL-43244 Relay Puller Pliers
- Removal Procedure
-
- Remove the electrical center cover.
- Always note the orientation of the relay.
- If equipped with a notch style relay; observe the location of the notch on the old relay to verify the new relay is installed with the notch in the same location.
- Ensure that the electrical center is secure, as not to put added stress on the wires or terminals.
- Locate the relay. Refer to Electrical Center Identification Views to locate the electrical center where the relay exists.
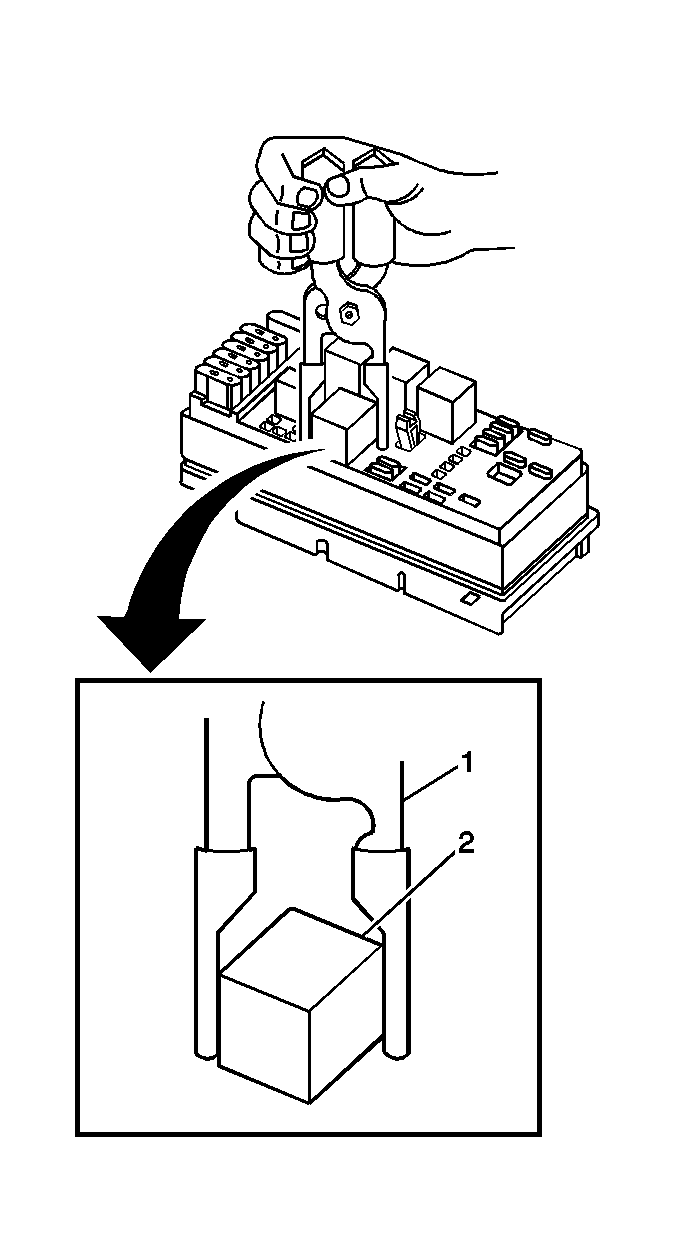
- Using the EL-43244 (1) position the tool on opposing corners of the relay (2).
- Remove the relay (2) from the electrical center.
Note:
Caution:
Use EL-43244 to pull the relay straight out from the electrical center terminals. The use of pliers or a flat bladed tool could damage the electrical center.
- Installation Procedure
-
- Install the relay (2) in the same position as removed.
- Install the electrical center cover.
 Relay Replacement (Attached to Wire Harness)
Removal Procedure
Locate the relay. Refer to the Master Electrical Component List to locate
the relay in the vehicle.
Remove any fasteners which hold the relay in place.
...
 HVAC
HVAC
...
Other materials:
TPMS Sensor Matching Process
Each TPMS sensor has a unique identification code. The identification code needs
to be matched to a new tire/wheel position after rotating the tires or replacing
one or more of the TPMS sensors. The TPMS sensor matching process should also be
performed after replacing a spare tire with a road ...
Front Floor Console Cup Holder Replacement
Front Floor Console Cup Holder Replacement
Callout
Component Name
Preliminary Procedure
Remove the front floor console assembly. Refer to Front Floor Console
Replacement.
1
Front Floor Console C ...
Forward-facing child restraint installation using the seat belts
WARNING
When installing a forward-facing child restraint in the Nissan Armada,
the three-point seat belt must be placed into Automatic Locking Retractor (ALR)
mode.
If ALR mode is not activated, the child restraint may not be securely
fastened. This can cause the seat to shift or t ...

0.0059