Chevrolet Sonic Repair Manual: Starter Replacement (LUV)
- Removal Procedure
-
- Disconnect the battery negative cable. Refer to Battery Negative Cable Disconnection and Connection.
- Raise and support the vehicle. Refer to Lifting and Jacking the Vehicle.
- If equipped with a front suspension skid plate, remove the drivetrain and suspension frame skid plate. Refer to Drivetrain and Front Suspension Frame Skid Plate Replacement.
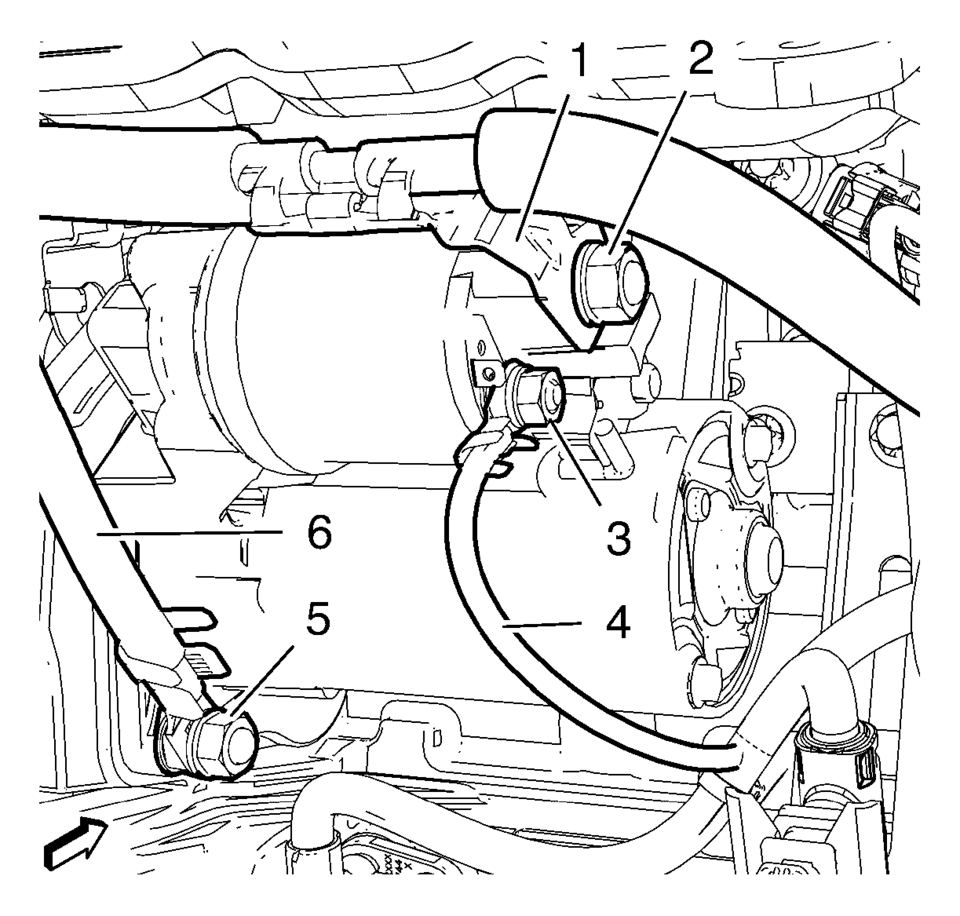
- Remove the battery positive cable fastener (2) and the battery positive cable terminal (1), from the starter solenoid.
- Remove the starter battery positive fastener (3) and the positive terminal (4), from the starter solenoid.
- Remove the battery negative cable fastener (5) and the battery negative ground terminal (6), from the starter mounting stud.
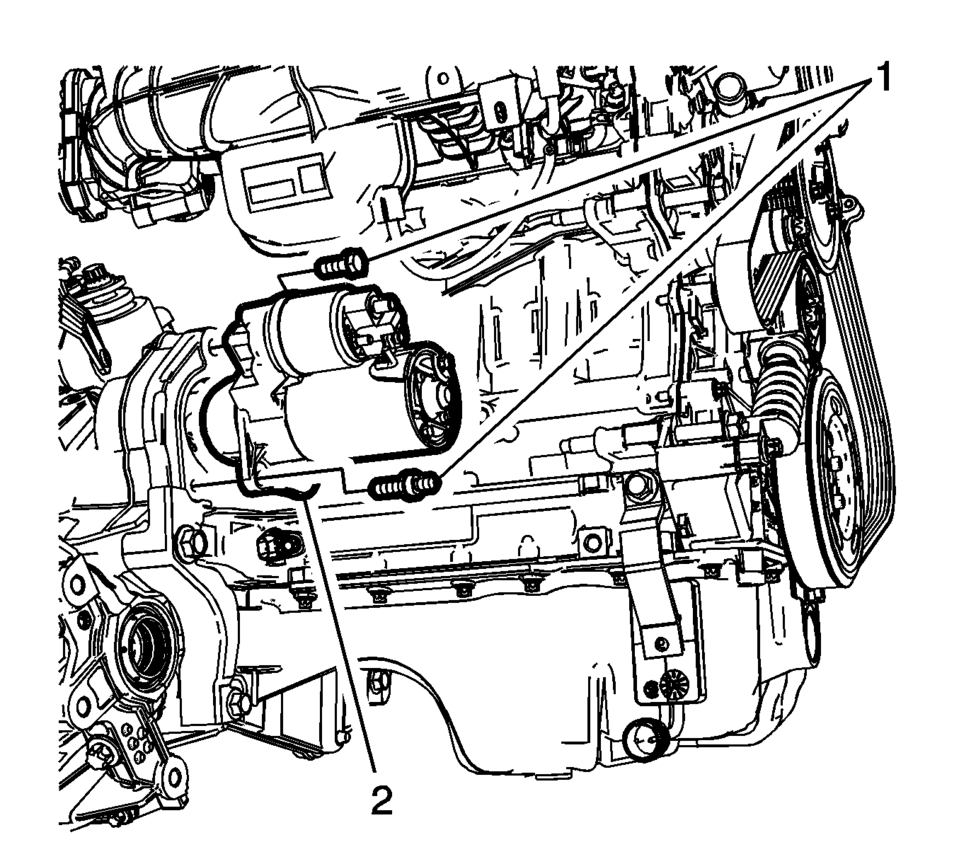
- Remove the starter mounting fasteners (1) and remove the starter from the vehicle.
- Installation Procedure
-
- Install the starter (2).
- Install the starter fasteners (1) and tighten to 25 Y (18 lb ft)
.
- Install the ground cable (6).
- Install the ground cable fastener (5) and tighten to 12.5 Y (111 lb in)
.
- Install the starter positive cable (4) to starter.
- Install the starter positive cable fastener (3) and tighten to 12.5 Y (111 lb in)
.
- Install the battery positive cable terminal (1).
- Install the battery positive cable fastener (2) and tighten to 12.5 Y (111 lb in)
.
- Install the drivetrain and suspension skid plate, if equipped. Refer to Drivetrain and Front Suspension Frame Skid Plate Replacement.
- Lower the vehicle.
- Connect the battery negative cable. Refer to Battery Negative Cable Disconnection and Connection.
Caution:
Refer to Fastener Caution.
 Special Tools
Illustration
Tool Number/Description
EL 38758
EL 50074
J 38758
Parasitic Draw Test Switch
...
 Starter Replacement (LUW)
Removal Procedure
Disconnect the negative battery cable. Refer to Battery Negative Cable
Disconnection and Connection.
Raise and support the vehicle. Refer to Lifting and Jacking ...
Other materials:
Special Tools
Illustration
Tool Number/ Description
EL 42059
J 42059
Cigar Lighter Socket Remover
...
Oil Level Indicator and Tube Installation
Install a NEW oil level indicator tube gasket.
Install the oil level indicator tube (2).
Caution: Refer to Fastener Caution.
Install the oil level indicator tube bolt (1) and tighten to 15 Y (11 lb ft).
Install the oil dipstick.
...
How to park with predictive course lines
Basic information
WARNING
If the Nissan Armada is equipped with tires of a different size than
standard, the predictive course lines may become inaccurate.
On slippery or snow-covered roads, the Nissan Armada predictive course
lines may not correspond precisely to the actual path of the ...

0.0082