Chevrolet Sonic Repair Manual: Starter Replacement (LUV)
- Removal Procedure
-
- Disconnect the battery negative cable. Refer to Battery Negative Cable Disconnection and Connection.
- Raise and support the vehicle. Refer to Lifting and Jacking the Vehicle.
- If equipped with a front suspension skid plate, remove the drivetrain and suspension frame skid plate. Refer to Drivetrain and Front Suspension Frame Skid Plate Replacement.
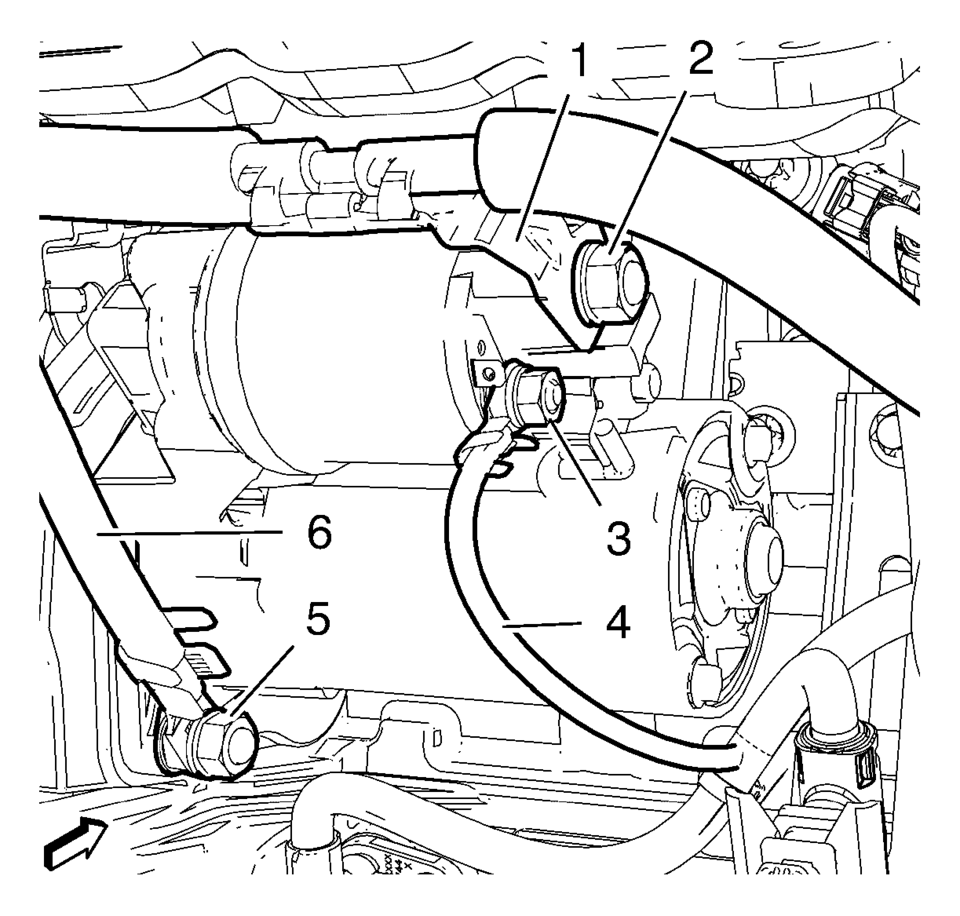
- Remove the battery positive cable fastener (2) and the battery positive cable terminal (1), from the starter solenoid.
- Remove the starter battery positive fastener (3) and the positive terminal (4), from the starter solenoid.
- Remove the battery negative cable fastener (5) and the battery negative ground terminal (6), from the starter mounting stud.
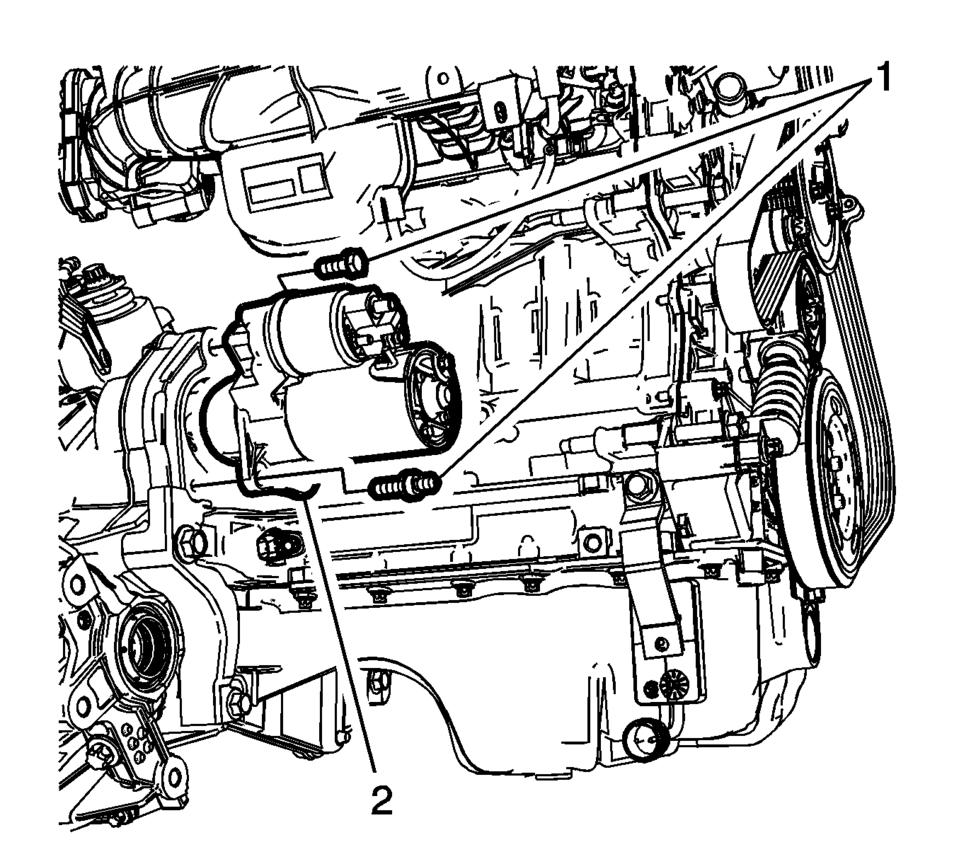
- Remove the starter mounting fasteners (1) and remove the starter from the vehicle.
- Installation Procedure
-
- Install the starter (2).
- Install the starter fasteners (1) and tighten to 25 Y (18 lb ft)
.
- Install the ground cable (6).
- Install the ground cable fastener (5) and tighten to 12.5 Y (111 lb in)
.
- Install the starter positive cable (4) to starter.
- Install the starter positive cable fastener (3) and tighten to 12.5 Y (111 lb in)
.
- Install the battery positive cable terminal (1).
- Install the battery positive cable fastener (2) and tighten to 12.5 Y (111 lb in)
.
- Install the drivetrain and suspension skid plate, if equipped. Refer to Drivetrain and Front Suspension Frame Skid Plate Replacement.
- Lower the vehicle.
- Connect the battery negative cable. Refer to Battery Negative Cable Disconnection and Connection.
Caution:
Refer to Fastener Caution.
 Starter Removal
Remove the upper starter bolt (2) and if equipped the washer (1).
Remove the lower starter bolt stud (3) and if equipped the washer.
Remove the starter (4).
...
 Starter Replacement (LUW)
Removal Procedure
Disconnect the negative battery cable. Refer to Battery Negative Cable
Disconnection and Connection.
Raise and support the vehicle. Refer to Lifting and Jacking ...
Other materials:
Turning the System On or Off
/VOL (Power/Volume): Press to turn
the system on and off.
Automatic Switch-Off
If the infotainment system is on after the ignition is turned off, the system
will turn off automatically after 10 minutes.
Volume Control
/VOL (Power/Volume): Turn to adjust
the volume.
(Phone/Mute): For ve ...
Hood Primary Latch Release Cable Replacement
iv
Hood Primary Latch Release Cable Replacement
Callout
Component Name
Preliminary Procedures
Remove the radiator opening upper cover. Refer to Front Opening
Upper Cover Replacement.
Remove the air inlet grille. Refer to A ...
How to activate/deactivate the automatic brake hold function
To enable the automatic brake hold feature in your Nissan Armada, ensure the
ignition switch is in the ON position, then press the automatic brake hold switch
1. Once activated, the indicator light on the switch 2 will illuminate, confirming
that the system is ready for operation.
When ...

0.0062