Chevrolet Sonic Repair Manual: Transmission Mount Replacement - Left Side
- Removal Procedure
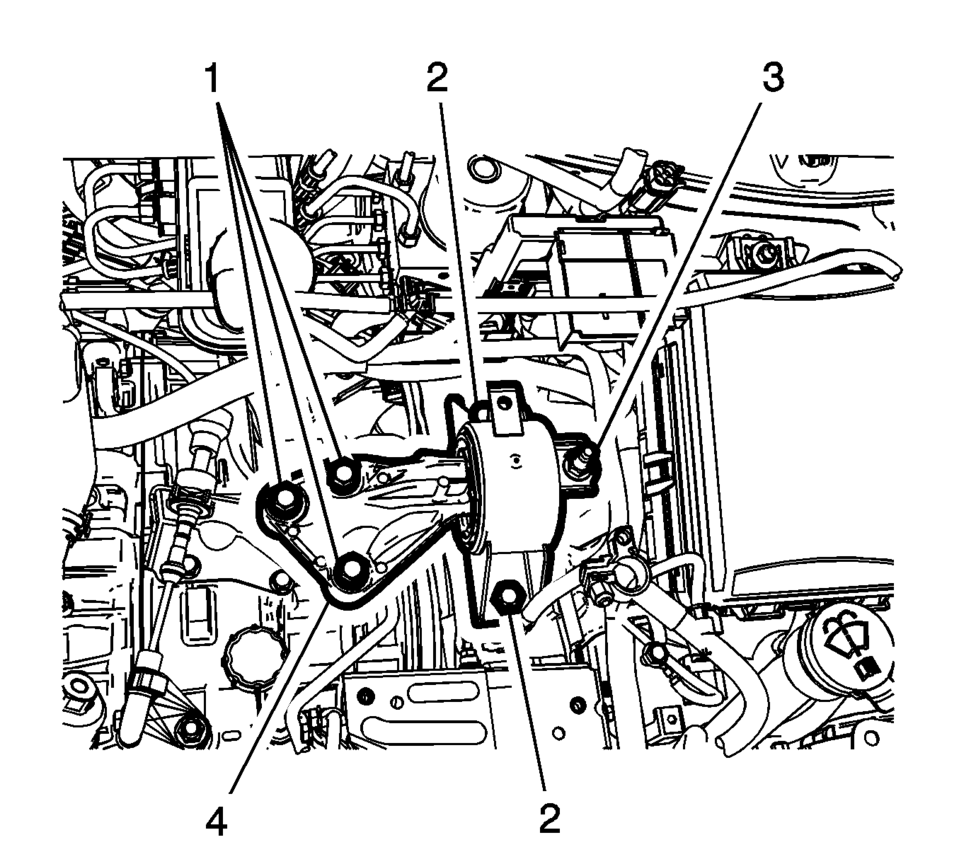
-
- Remove the battery tray. Refer to Battery Tray Replacement.
- Install the engine support fixture. Refer to Engine Support Fixture.
- Remove and DISCARD the left transmission mount to bracket bolts (1).
- Remove the left transmission mount to body bolts (2).
- Remove the left transmission mount to body nut (3).
- Remove the transmission mount (4) from the vehicle.
- Installation Procedure
-
- Install the left transmission mount (4) to the vehicle.
- Install the transmission mount to body bolts (2) and
tighten to 58 Y (43 lb ft)
.
- Install the transmission mount to body nut (3) and
tighten to 58 Y (43 lb ft)
.
- Install the NEW left transmission mount to transmission
bolts (1) and tighten to 50 Y (37 lb ft)
plus 60?5 degrees
.
- Remove the engine support fixture. Refer to Engine Support Fixture.
- Install the battery tray. Refer to Battery Tray Replacement.
Caution:
Refer to Fastener Caution.
 Transmission Mount Bracket Replacement - Rear
Removal Procedure
Raise and support the vehicle. Refer to
Lifting and Jacking the Vehicle.
Using a suitable jack stand, support the rear of the
transmission.
Remove ...
 Front Wheel Drive Shaft Seal Replacement - Right Side
Front Wheel Drive Shaft Seal Replacement - Right Side
Callout
Component Name
Preliminary Procedures
Raise and support the vehicle. ...
Other materials:
Front Side Door Trim Replacement
Front Side Door Trim Replacement
Callout
Component Name
Preliminary Procedure
Remove the front side door upper front trim panel. Refer to Front Side
Door Upper Front Trim Panel Replacement.
1
Fr ...
Front Suspension Description and Operation
The front suspension has 2 primary purposes:
Isolate the driver from irregularities in the road surface.
Define the ride and handling characteristics of the vehicle.
The front suspension absorbs the impact of the tires travelling over irregular
road surfaces and dissipates this energy t ...
How to enable/disable the I-BSI system
Example
ProPILOT Assist switch (design may vary depending on the Nissan Armada model)
Vehicle information display
Steering-wheel-mounted control (right side)
To configure the Nissan Armada Intelligent Blind Spot Intervention (I-BSI) system,
follow these steps:
1. Press the
butt ...

0.0055