Chevrolet Sonic Repair Manual: Transmission Mount Replacement - Left Side
- Removal Procedure
-
- Remove the battery tray. Refer to Battery Tray Replacement.
- Install the engine support fixture. Refer to Engine Support Fixture.
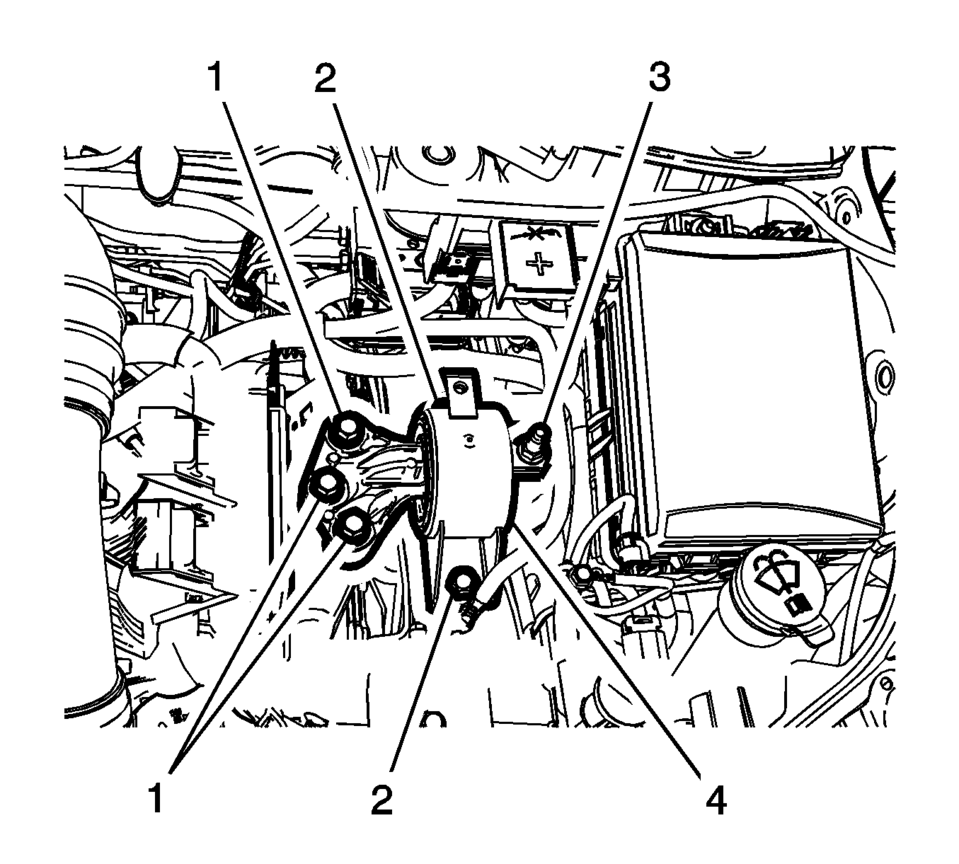
- Remove and DISCARD the left transmission mount to bracket bolts (1).
- Remove the left transmission mount to body bolts (2).
- Remove the left transmission mount to body nut (3).
- Remove the left transmission mount (4) from the vehicle.
- Installation Procedure
-
- Install the left transmission mount (4) to the vehicle.
- Install the left transmission mount to body bolts (2)
and tighten to 58 Y (43 lb ft)
.
- Install the left transmission mount to body nut (3)
and tighten to 58 Y (43 lb ft)
.
- Install the NEW left transmission mount to transmission
bolts (1) and tighten to 50 Y (37 lb ft)
plus 60?5 degrees
.
- Remove the engine support fixture. Refer to Engine Support Fixture.
- Install the battery tray. Refer to Battery Tray Replacement.
Caution:
Refer to Fastener Caution.
 Transmission Mount Bracket Replacement - Rear
Removal Procedure
Raise and support the vehicle. Refer to
Lifting and Jacking the Vehicle.
Remove the front suspension skid plate, if equipped.
Refer to Drivetrain and Front Su ...
Other materials:
Audio Disc Player and USB Receptacle Replacement
Audio Disc Player and USB Receptacle Replacement
Callout
Component Name
1
Audio Disc Player and USB Receptacle
Procedure
Open the instrument panel compartment door and
using a small flat bladed tool, release ...
Front Floor Console Bracket Replacement
Front Floor Console Bracket Replacement
Callout
Component Name
Preliminary Procedure
Remove the left front floor console extension panel. Refer to Front Floor
Console Extension Replacement - Left Side.
1
...
Event Data Recorders (EDR)
Basic information
Your Nissan Armada is equipped with an Event Data Recorder (EDR), a system designed
to capture critical vehicle data during specific crash or near-crash situations.
These events may include airbag deployment or impact with road obstacles. The
primary function of the EDR is to ...

0.0078