Chevrolet Sonic Repair Manual: Wheel Stud Replacement
Special Tools
CH 43631 Ball Joint Separator
For equivalent regional tools, refer to Special Tools.
- Removal Procedure
-
- Raise and support the vehicle. Refer to Lifting and Jacking the Vehicle.
- Remove the tire and wheel assembly. Refer to Tire and Wheel Removal and Installation.
- Without disconnecting the hydraulic brake flex hose, remove and support the brake caliper and bracket as an assembly. Refer to Front Brake Rotor Replacement.
- Remove the front wheel hub. Refer to Front Wheel Bearing and Hub Replacement.
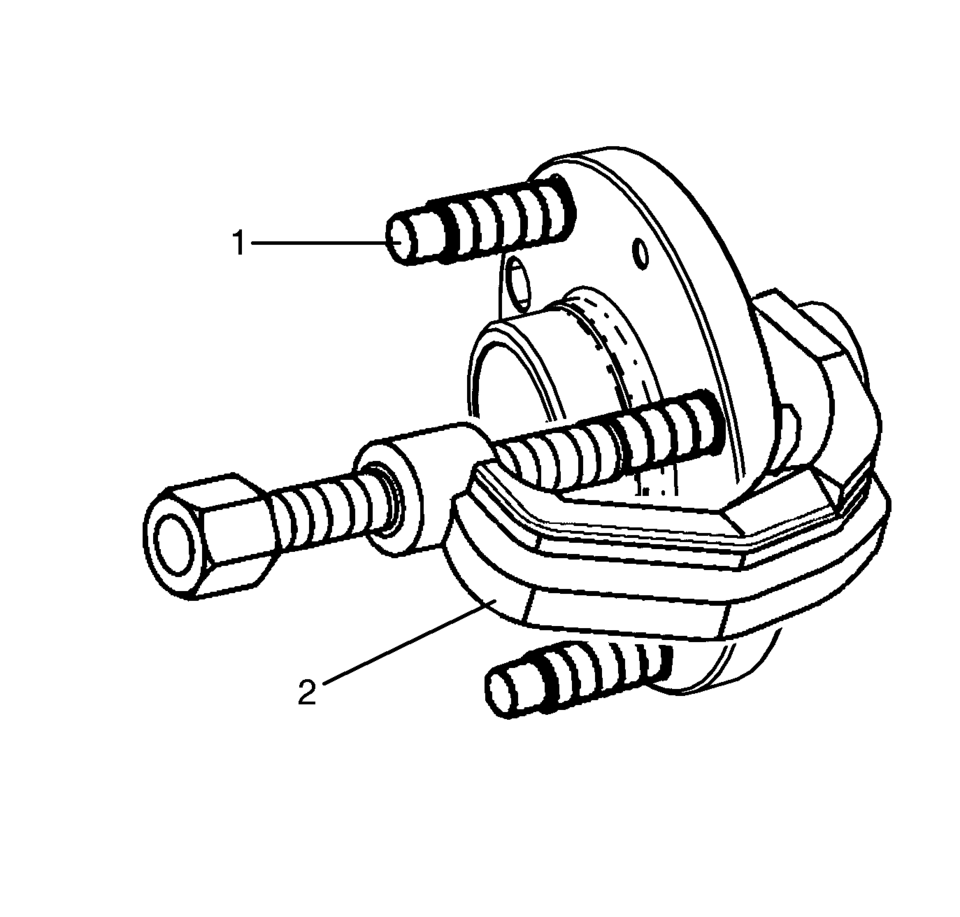
- Using the CH 43631 separator (2), remove the wheel stud (1) from the wheel bearing and hub.
- Installation Procedure
-
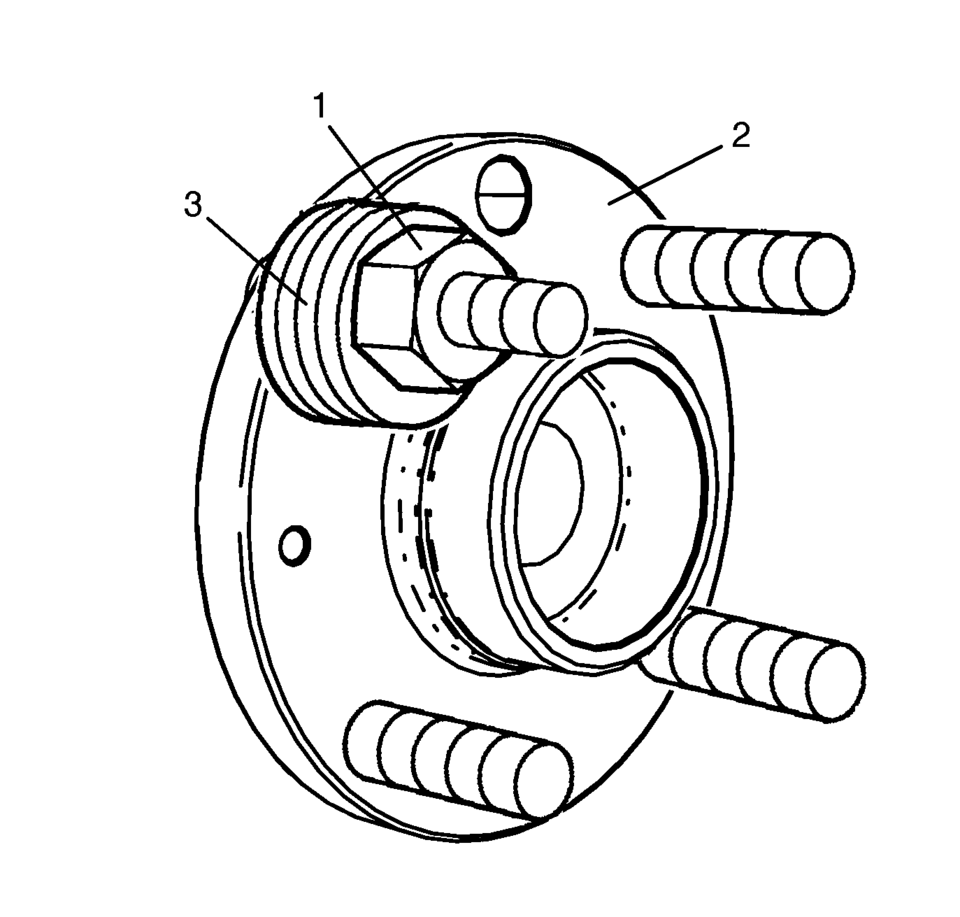
- Install a NEW wheel stud to the wheel hub flange (2).
- Position three washers (3) and an old lug nut (1) on the stud to be replaced.
- Position the pry bar to hold the wheel bearing flange while tightening the wheel lug nut.
- Tighten the old lug nut (1) until the wheel stud is firmly seated in the wheel hub flange.
- Remove the washers (3) and the old lug nut (1) and the pry bar.
- Install the front wheel hub. Refer to Front Wheel Bearing and Hub Replacement.
- Install the front brake rotor. Refer to Front Brake Rotor Replacement.
- Install the tire and wheel assembly. Refer to Tire and Wheel Removal and Installation.
- Lower the vehicle.
 Wheel Replacement
Replace any wheel that is bent, cracked, or badly rusted or corroded. If wheel
nuts keep coming loose, the wheel, wheel bolts, and wheel nuts should be replaced.
If the wheel leaks air, replace it ...
 Electrical
...
Other materials:
Driver Information Center (DIC)
The DIC displays information about your vehicle. It also displays warning messages
if a system problem is detected. See Vehicle Messages. All messages appear in the
DIC display in the instrument cluster.
DIC Operation and Displays
The DIC has different displays which can be accessed b ...
Air Conditioning Condenser Replacement (LUV)
Air Conditioning Condenser Replacement
Callout
Component Name
Preliminary Procedure
Drain the refrigerant. Refer to Refrigerant Recovery and Recharging
Remove the front bumper fascia assembly. Refer to Front Bumper Fascia ...
Secondary Air Injection Pump Air Cleaner Pipe Replacement
Secondary Air Injection Pump Air Cleaner Pipe Replacement
Callout
Component Name
1
Hose Retainer (QTY:2)
Note: Squeeze the retainer on opposite sides to release.
2
Secondary A ...

0.0047