Chevrolet Sonic Repair Manual: Windshield Replacement
Special Tools
- BO-24402-A Glass Sealant Remover (Cold Knife)
- BO-39032 Stationary Glass Removal Tool
- Use an adhesive that is approved by GM
For equivalent regional tools, refer to Special Tools.
- Removal Procedure
-
- Open the hood.
- Remove the windshield wiper arms. Refer to Windshield Wiper Arm Replacement.
- Remove the air inlet grille. Refer to Air Inlet Grille Panel Replacement.
- Remove the inside rearview mirror. Refer to Inside Rearview Mirror Replacement.
- Remove the interior windshield garnish moldings. Refer to Windshield Side Garnish Molding Replacement.
- Cover to protect the following parts from broken glass:
Warning:
If broken glass falls into the defroster outlets, it can be blown into the passenger compartment and cause personal injury.
- Upper dash pad
- Defroster outlets and A/C outlets
- Seats and carpeting
Warning:
Refer to Glass and Sheet Metal Handling Warning.
Note:
Before cutting out a stationary window, apply a double layer of masking tape around the perimeter of the painted surfaces and the interior trim.
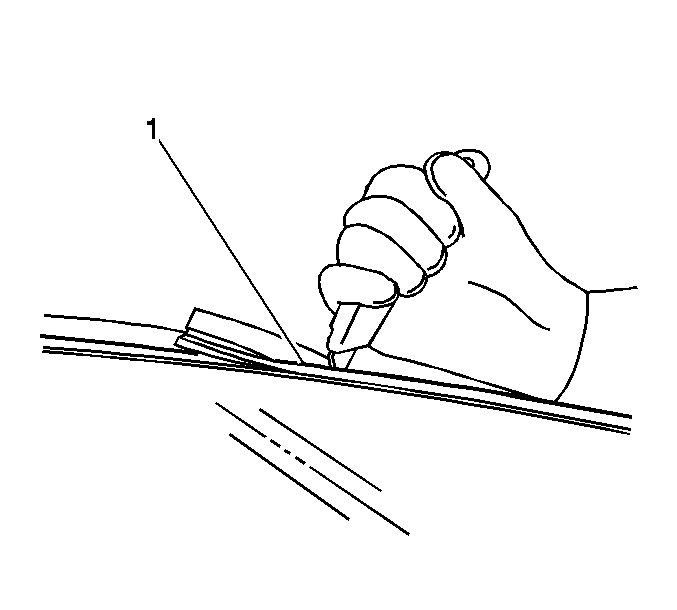
- Using the appropriate tool, carefully cut the windshield reveal molding?€‰(1) in order to access the auto-adhesive bead. Refer to Windshield Upper Reveal Molding Replacement.
Note:
Keep the cutting edge of the appropriate tool against the window. There are window locating pins, one in each upper corner of the window. Use care Not to remove or cut them off when removing the window. If the window locator pins are cut, it will be necessary to tape the window in place.
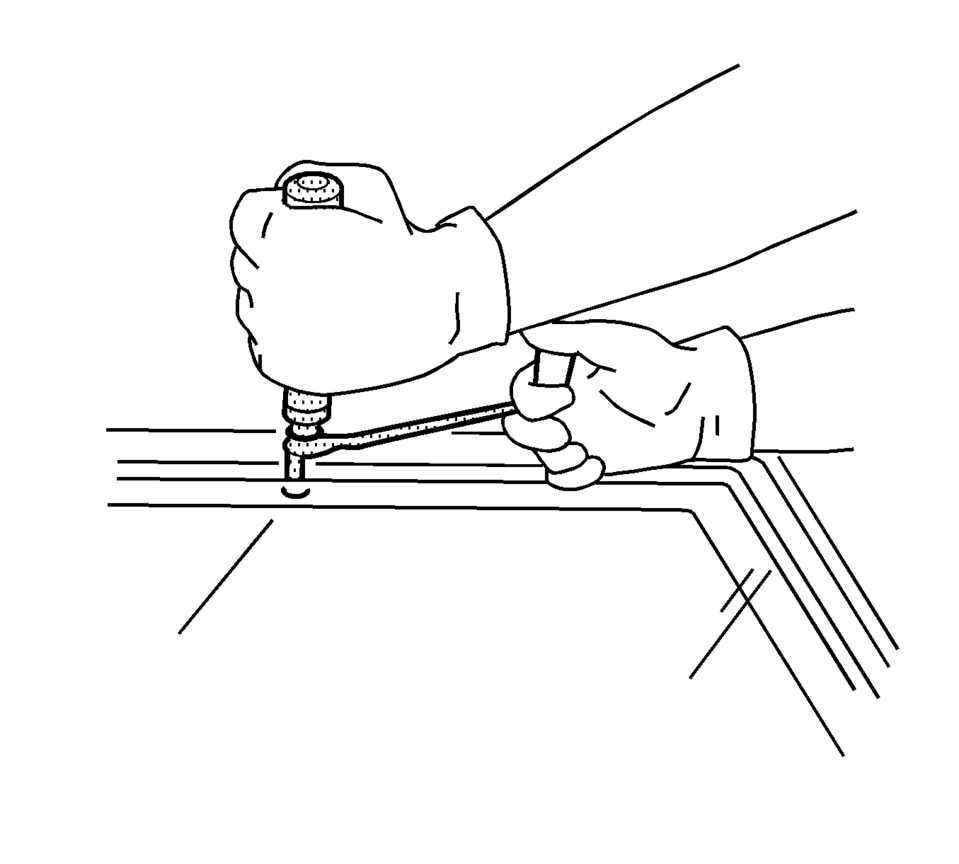
- This will allow the auto-adhesive to be separated from the window.
- Leave a base of auto-adhesive on the pinchweld flange.
- The only suitable lubrication is clean water.
- Use BO-24402-A Glass Sealant Remover (Cold Knife).
- BO-39032 Stationary Glass Removal Tool, or equivalent in order to remove the window.
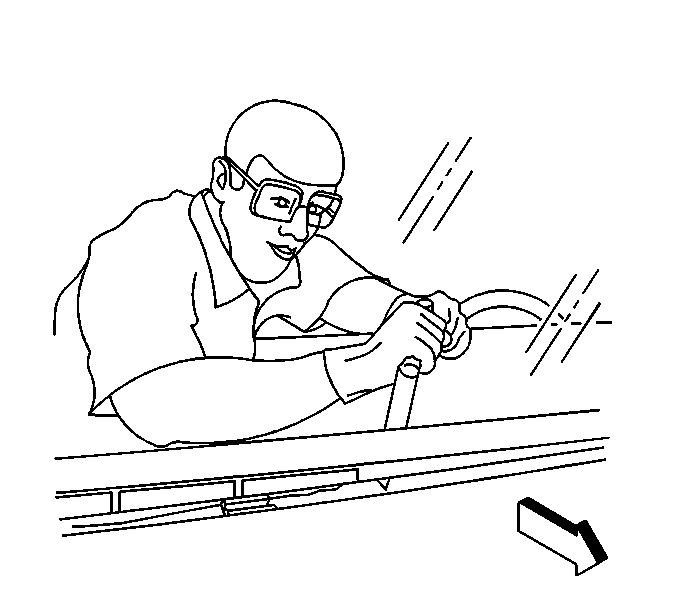
- Use the appropraite tool to remove the bottom of the window from the auto-adhesive. Keep the cutting edge of the tool against the window. Do this from inside the vehicle.
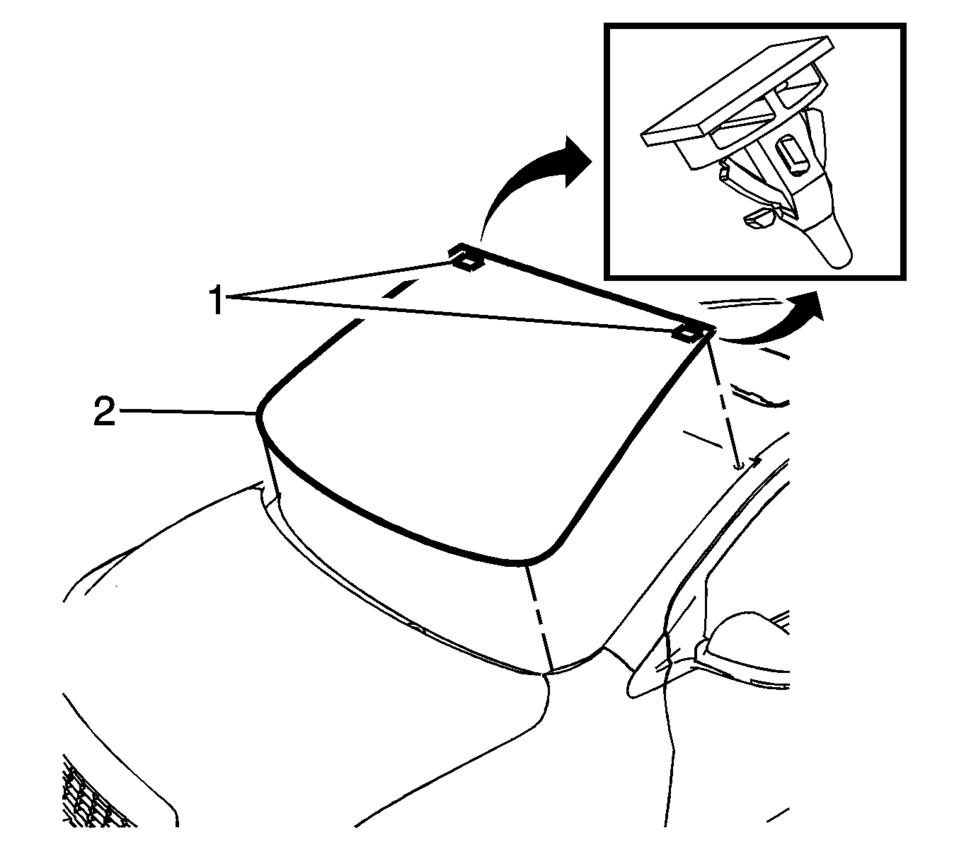
- With an assistant, remove the window?€‰(2) from the vehicle. Check that the retainers?€‰(1) are still attached to the window before installing.
- Installation Procedure
-
- Install the windshield into the opening. Refer to Adhesive Installation of Windshields.
- Install the rearview mirror. Refer to Inside Rearview Mirror Replacement.
- Install the interior windshield garnish moldings. Refer to Windshield Side Garnish Molding Replacement.
- Install the air inlet grille. Refer to Air Inlet Grille Panel Replacement.
- Install the windshield wipers arms. Refer to Windshield Wiper Arm Replacement.
- Remove the double layer of masking tape around the perimeter of the painted surfaces and the interior trim.
- Close the hood.
 Windshield Outside Moisture Sensor Cover Replacement
Windshield Outside Moisture Sensor Cover Replacement
Callout
Component Name
1
Windshield Outside Moisture Sensor Cover
...
 Windshield Side Garnish Molding Replacement
Windshield Side Garnish Molding Replacement
Callout
Component Name
Preliminary Procedures
Disable the SIR system, if equipped. ...
Other materials:
Cruise Control
If the vehicle is equipped with cruise control, a speed of about 40 km/h (25
mph) or more can be maintained without keeping your foot on the accelerator. Cruise
control does not work at speeds below 40 km/h (25 mph).
Warning
Cruise control can be dangerous where you cannot drive safely at a st ...
Vehicle Data
Capacities and Specifications
The following approximate capacities are given in metric and English conversions.
See Recommended Fluids and Lubricants for more information.
Engine Specifications
Engine Drive Belt Routing
1.4L L4 Engine
1.8L L4 Engine (with Air Conditioning)
1. ...
Radio Windshield Side Garnish Molding Speaker Replacement
Radio Windshield Side Garnish Molding Speaker Replacement
Callout
Component Name
Preliminary Procedure
Remove the windshield side garnish molding. Refer to
Windshield Side Garnish Molding Replacement.
1
...

0.0049