Chevrolet Sonic Repair Manual: Air Conditioning Compressor and Condenser Hose Replacement (LDE/LWE)
- Removal Procedure
-
- Recover the refrigerant. Refer to Refrigerant Recovery and Recharging.
- Disconnect the A/C refrigerant pressure sensor electrical connector.
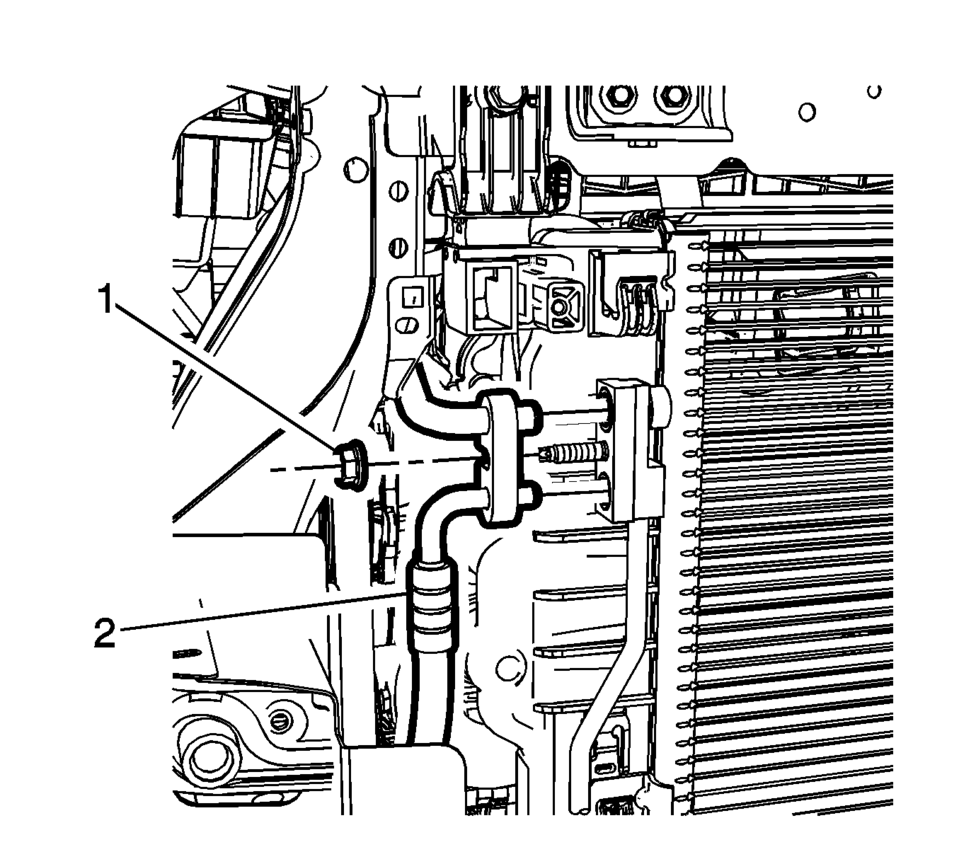
- Remove air conditioning compressor and condenser hose nut (1).
- Remove air conditioning compressor and condenser hose (2) from A/C condenser.
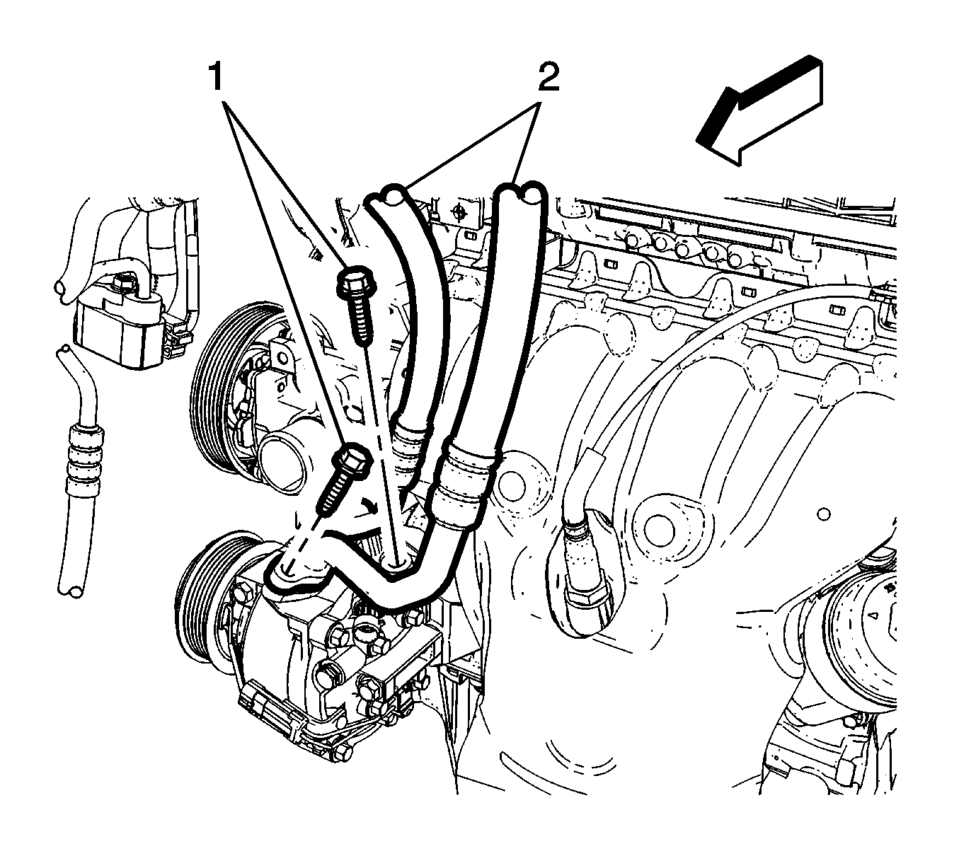
- Remove A/C compressor and condenser hose bolts (1).
- Remove A/C compressor and condenser hose (2) from A/C compressor.
- Remove air conditioning compressor and condenser hose nut (1).
- Remove air conditioning compressor and condenser hose (2) from refrigerant hose.
- Remove air conditioning compressor and condenser hose from the vehicle.

- Installation Procedure
-
- Install air conditioning compressor and condenser hose.
- Install air conditioning compressor and condenser hose (2) to the refrigerant hose.
- Install air conditioning compressor and condenser hose nut (1). Tighten
nut to 22 Y (16 lb ft)
.
- Install air conditioning compressor and condenser hose (2) to the A/C compressor.
- Install air conditioning compressor and condenser hose bolts (1). Tighten
bolt to 22 Y (16 lb ft)
.
- Install air conditioning compressor and condenser hose (2) to the A/C condenser.
- Install air conditioning compressor and condenser hose nut (1). Tighten
nut to 22 Y (16 lb ft)
.
- Connect the A/C refrigerant pressure sensor electrical connector.
- Evacuate and charge the refrigerant system. Refer to Refrigerant Recovery and Recharging.
Note:
Use NEW system seals. Refer to Air Conditioning System Seal Replacement.
Caution:
Refer to Fastener Caution.
 Air Conditioning Compressor Replacement (LUV)
Air Conditioning Compressor Replacement
Callout
Component Name
Preliminary Procedure
Recover the refrigerant. Refer to Refrigerant ...
 Air Conditioning Compressor and Condenser Hose Replacement (LUV)
Removal Procedure
Recover the refrigerant. Refer to Refrigerant Recovery and Recharging.
Remove the drivetrain and front suspension frame skid plate if equipped.
Refer to Drive ...
Other materials:
Securing Child Restraints (Right Front Passenger Seat)
This vehicle has airbags. A rear seat is a safer place to secure a forward-facing
child restraint. See Where to Put the Restraint.
In addition, the vehicle has a passenger sensing system which is designed to
turn off the front outboard passenger frontal airbag and knee airbag under certain
co ...
Special Tools
Illustration
Tool Number/ Description
EN-45059
J-45059
Angle Meter
...
System operation
The Nissan Armada sonar system provides both visual and audible alerts under
the following conditions:
Detection of front obstacles when the transmission is in D (Drive)
Detection of both front and rear obstacles when the transmission is in R
(Reverse)
How the system alerts of obstacle ...

0.0063