
Chevrolet Sonic Repair Manual: Differential Case Assemble
Special Tools
- J-810721 Axle Shaft Seal Remover Support Base
- R-0407011 Bearing Race Remover
- R-0407012 Differential Carrier Cone Bearing Cap Driver
- R-0007761 Universal Handle for Pullers and Installers
- S-9407194 Speed Sensor Impeller Ring Installer
- S-9407195 Pinion Gear Case Bearing Installer
- S-9707500 Seal Installer
For equivalent regional tools, refer to Special Tools.
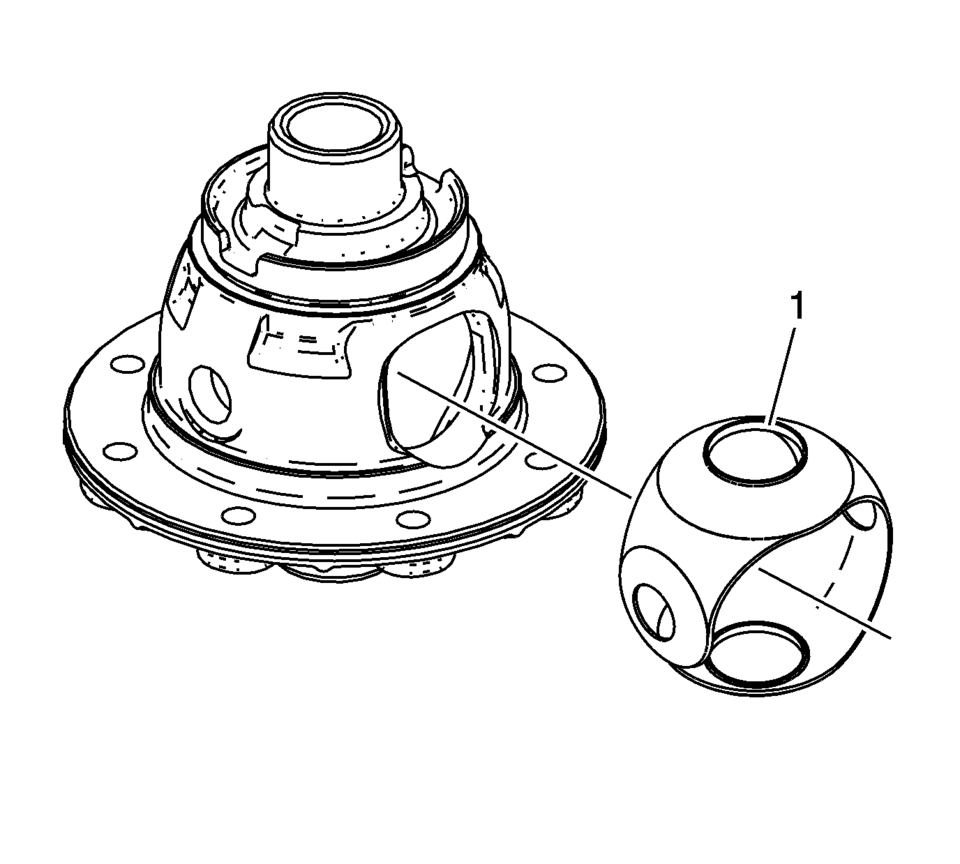
- Install the front differential pinion and side gear thrust washer. It must be possible to insert the collar (1) of the thrust washer into the guide for the pinion gears in the housing.
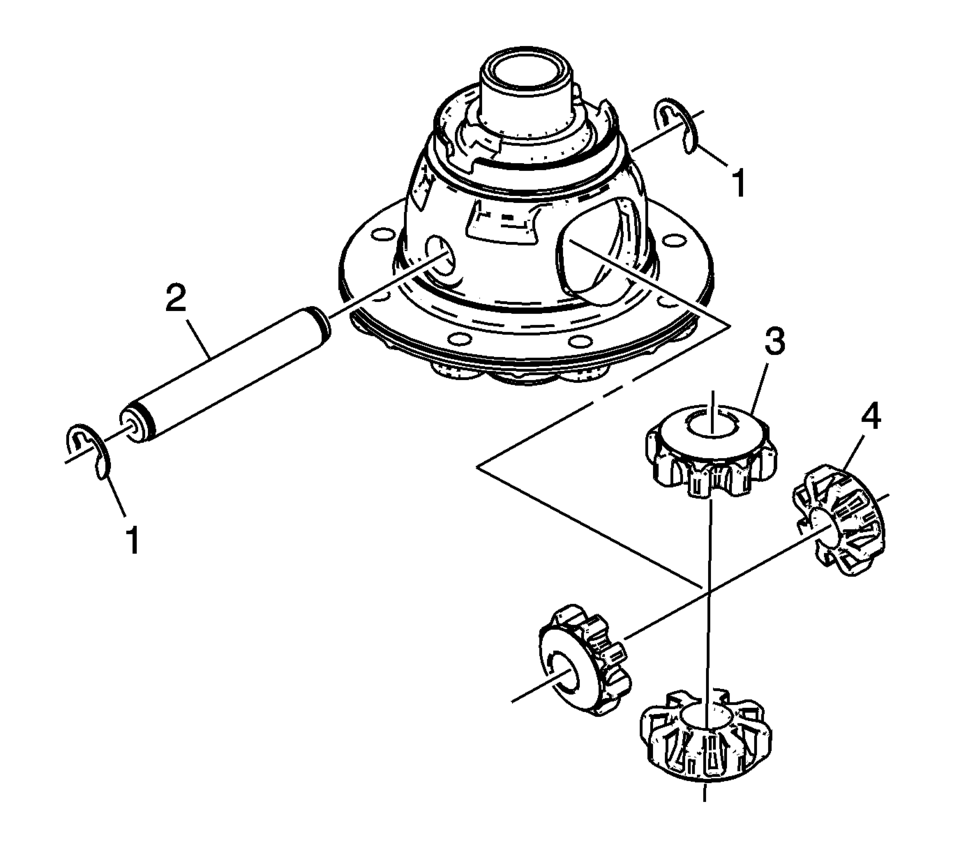
- Install the front differential pinion gears (3) and side gears (4).
- Install the front differential pinion gear shaft (2) and the pinion gear shaft retaining washers (1).
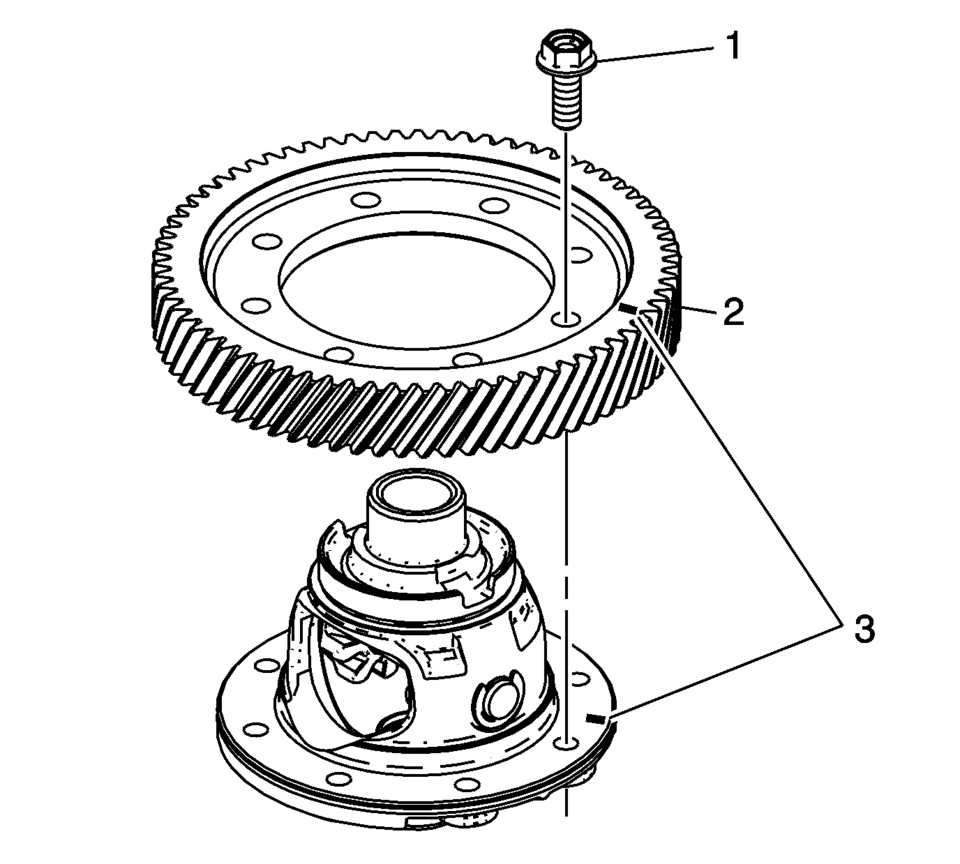
- If both components are reused align the assembly marks (3).
- Install the front differential ring gear (2).
- Install the front differential ring gear bolts (1). Tighten
to 90 N? (66.4 lb ft)
.
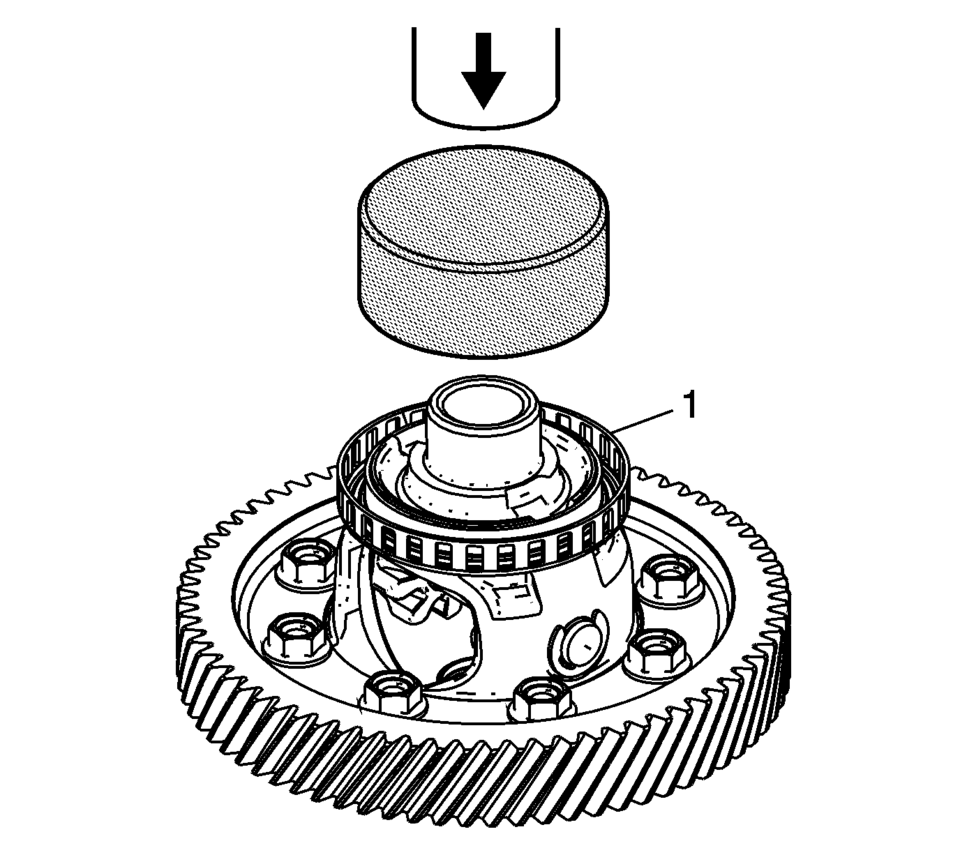
- Install the ring front wheel speed sensor reluctor wheel (1) using the S-9407194 installer and a hydraulic press.
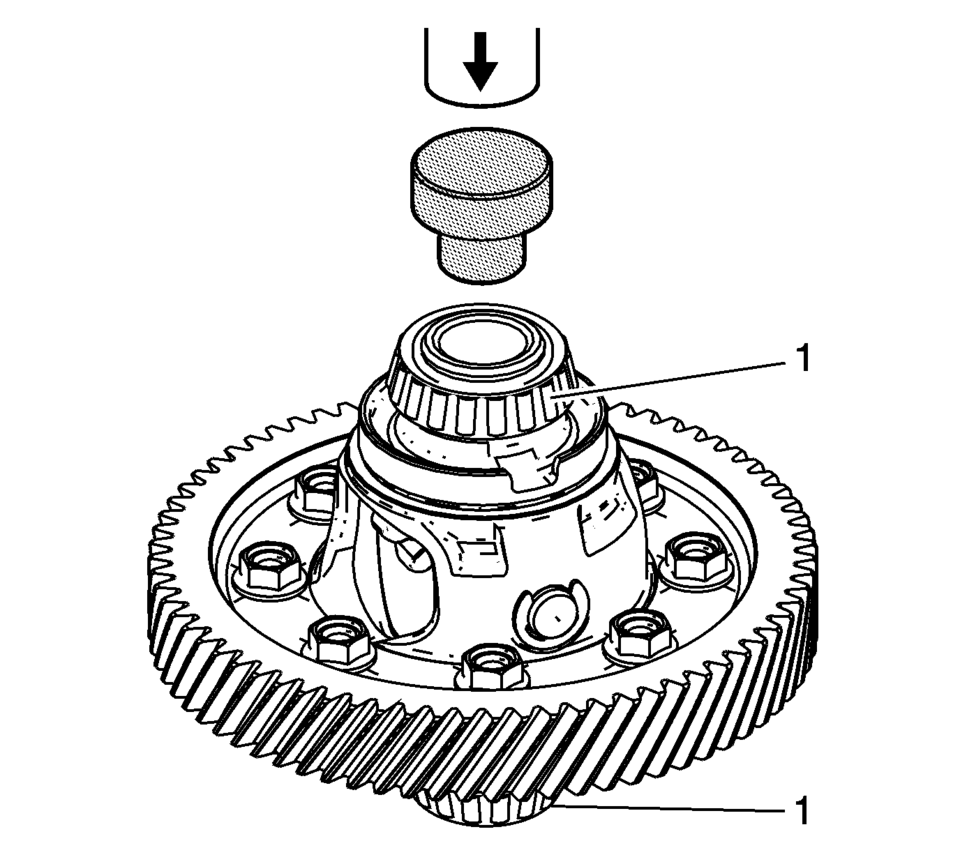
- Install the front differential bearing assemblies (1) using the S-9407195 installer and a hydraulic press.
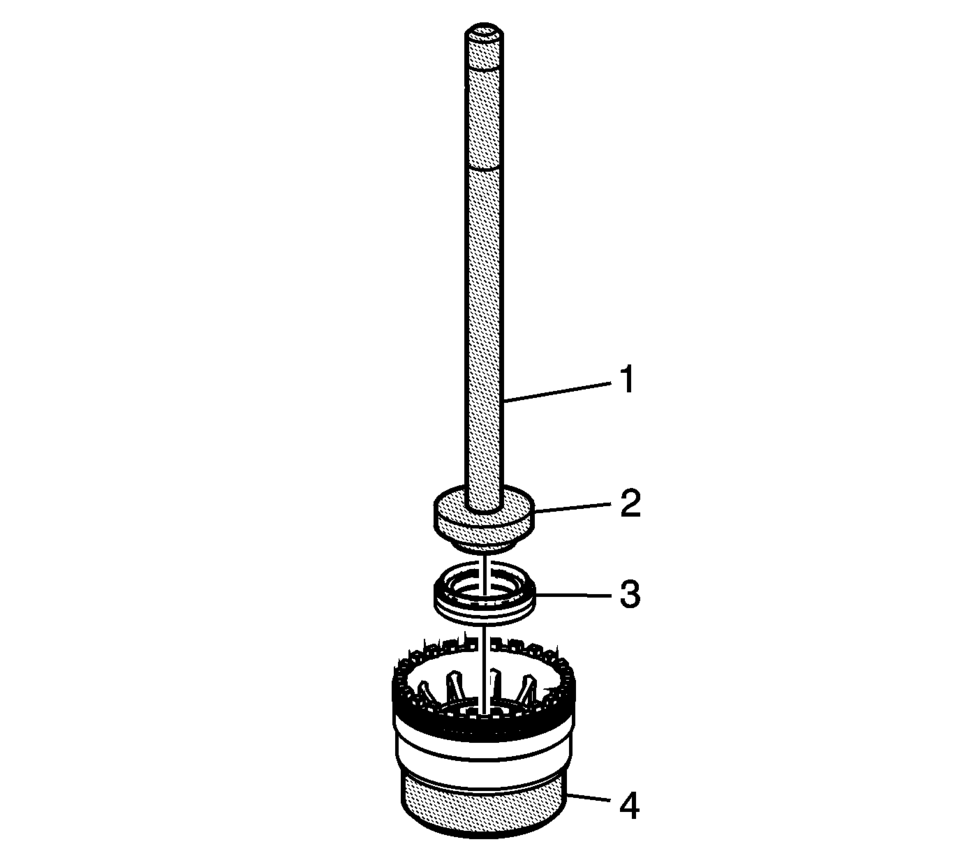
- Install the front wheel drive shaft oil seal (3) using the R-0007761 handle (1), S-9707500 seal installer (2), and the J-810721 support base (4).
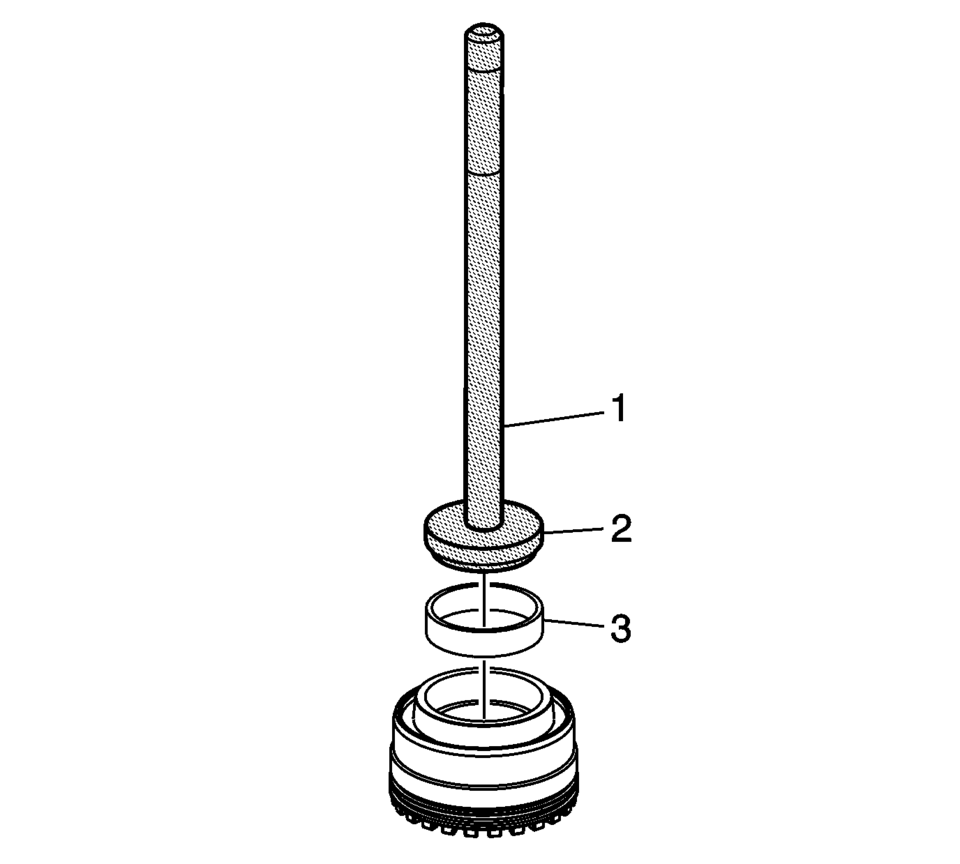
- Install the front differential bearing race (3) using the R-0007761 handle (1) and the R-0407012 driver (2).
Note:
Lubricate rotating parts on their bearing, running, seating, and pressure surfaces using transmission fluid.
Warning:
Refer to Safety Glasses Warning.
 Clutch and Differential Housing Disassemble
Special Tools
M-680770 Universal Sliding Mallet
R-0007758 Holding Fixture
R-0407008 Counter Shaft Bearing Remover
R-0407010 Input Shaft Needle Bearing Puller and Driver
R-0407013 Gearshi ...
 Differential Case Disassemble
Special Tools
6-9607346 Sensor Ring Gear Puller
J-810704 Steering Column Center Bar Puller
J-810721 Axle Shaft Seal Remover Support Base
R-0006749 Support Base
R-0407011 Bearing Race Rem ...
Other materials:
Uniform Tire Quality Grading
Quality grades can be found where applicable on the tire sidewall between tread
shoulder and maximum section width. For example:
Treadwear 200 Traction AA Temperature A
The following information relates to the system developed by the United States
National Highway Traffic Safety Administration ...
Steering Angle Sensor Centering
The steering angle sensor does not require centering often. Centering of the
steering angle sensor might be required after certain service procedures are performed.
Some of these procedures are as follows:
Wheel alignment
Steering gear replacement
Steering column replacement
Collision ...
Drive belts
Water pump
Alternator
Drive belt automatic tensioner
Crankshaft pulley
Air conditioning compressor
WARNING
Always ensure the ignition switch is OFF before inspecting or servicing the
drive belts on your Nissan Armada. Unexpected engine rotation can cause serious
injury.
1. Ca ...

0.0078